- 大家好,我是同学小张,日常分享AI知识和实战案例
- 欢迎 点赞 + 关注 👏,持续学习,持续干货输出。
- +v: jasper_8017 一起交流💬,一起进步💪。
- 微信公众号也可搜【同学小张】 🙏
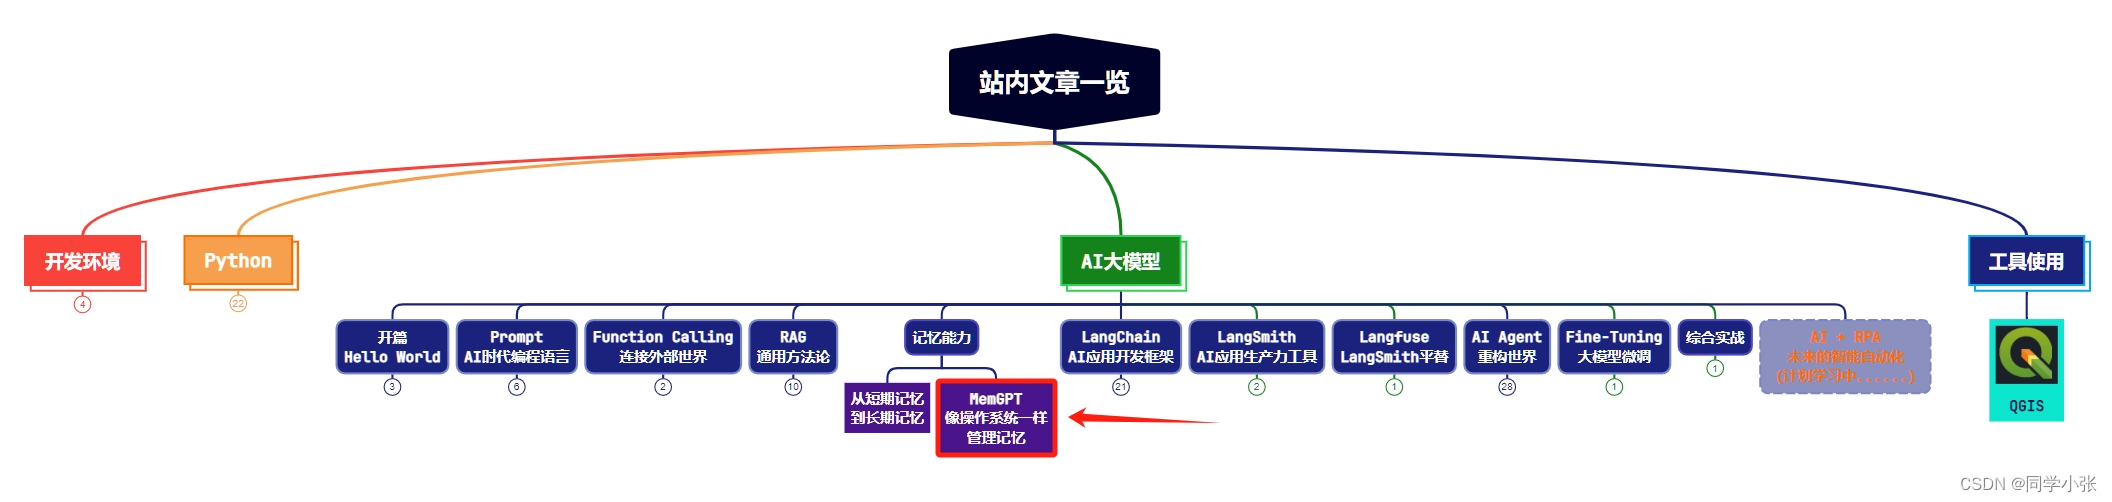
本站文章一览:

这两天在看大模型长时记忆的一些实现方法,然后看到了这样一个开源项目:MemGPT,又称 Memory GPT,专门用来管理大模型的记忆。这可能是目前管理大模型记忆的最专业的框架和思路了。
GitHub:https://github.com/cpacker/MemGPT
- Building persistent LLM agents with long-term memory
今天我们来看下 MemGPT 背后的实现原理,看看大佬是怎么实现大模型记忆管理和长时记忆的。并上手体验一下。
文章目录
- 0. 实现原理
- 0.1 记忆分层
- 0.2 数据移动
- 1. 快速上手
- 1.1 普通玩法
- 1.1.1 环境安装
- 1.2 进阶玩法
- 1.2.1 源码安装
- 1.2.2 上手代码
- 1.2.3 运行效果
0. 实现原理
论文原文:MemGPT: Towards LLMs as Operating Systems
从论文的题目:MemGPT: Towards LLMs as Operating Systems,就可以看出大体的实现思路,它借鉴传统操作系统虚拟内存管理的方式,通过对记忆分层,智能管理不同存储层,在LLM的有限上下文窗口内提供扩展的上下文。在文档分析和多会话聊天两个领域中,MemGPT克服了现代LLM的上下文窗口限制,提高了性能。
0.1 记忆分层
MemGPT受操作系统启发,实现了一个多级存储架构。在这个架构中,有两种主要的内存类型:主上下文(类似于主内存/物理内存/RAM)和外部上下文(类似于磁盘内存/磁盘存储)。
- 主上下文 (Main Context): 就是大模型中固定的上下文窗口,这部分包含LLM的提示词。是大模型接收到的内容。
- 外部上下文 (External Context): 这是指保存在LLM的固定上下文窗口之外的任何信息。这部分信息如果需要在推理过程中被LLM使用,就必须显式地移动到主上下文中。大模型无法直接用,要想用,必须通过查找等将必要信息移动到主上下文中。
0.2 数据移动
MemGPT 通过 LLM 的 Function Calling 能力来协调主上下文和外部上下文之间的数据移动。Memory的编辑和检索完全是自主的:MemGPT 根据当前上下文自主更新和搜索自己的 Memory。例如,当上下文变得特别长时,会自动将多余的上下文经过整理后保存进持久化地址中。
下面代码是超过限制Token时的判断,返回active_memory_warning,外部根据此标志可以进行相应处理:
# Check the memory pressure and potentially issue a memory pressure warning current_total_tokens = response.usage.total_tokens active_memory_warning = False # We can't do summarize logic properly if context_window is undefined if self.agent_state.llm_config.context_window is None: # Fallback if for some reason context_window is missing, just set to the default print(f"{CLI_WARNING_PREFIX}could not find context_window in config, setting to default {LLM_MAX_TOKENS['DEFAULT']}") print(f"{self.agent_state}") self.agent_state.llm_config.context_window = ( LLM_MAX_TOKENS[self.model] if (self.model is not None and self.model in LLM_MAX_TOKENS) else LLM_MAX_TOKENS["DEFAULT"] ) if current_total_tokens > MESSAGE_SUMMARY_WARNING_FRAC * int(self.agent_state.llm_config.context_window): printd( f"{CLI_WARNING_PREFIX}last response total_tokens ({current_total_tokens}) > {MESSAGE_SUMMARY_WARNING_FRAC * int(self.agent_state.llm_config.context_window)}" ) # Only deliver the alert if we haven't already (this period) if not self.agent_alerted_about_memory_pressure: active_memory_warning = True self.agent_alerted_about_memory_pressure = True # it's up to the outer loop to handle this else: printd( f"last response total_tokens ({current_total_tokens})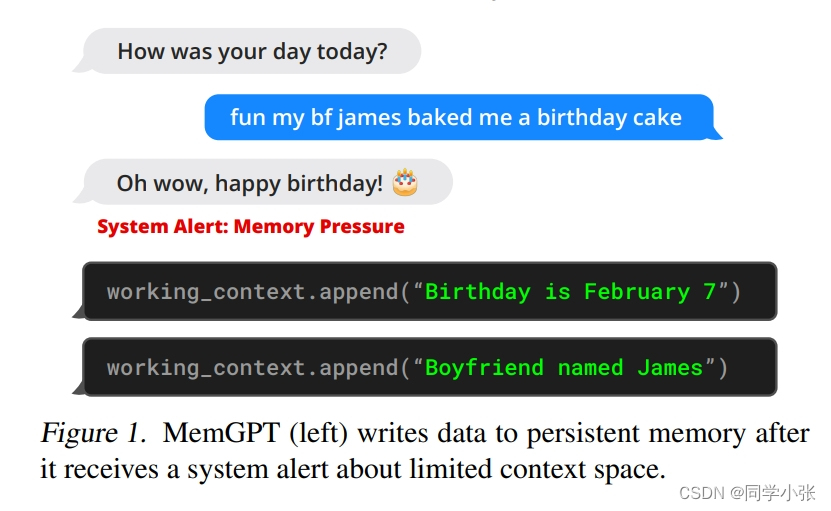
下图是从Memory处理和移动到组装成完整的Prompt的过程描述,重点看一下:

MemGPT 将 主上下文 分为三个连续部分:系统指令、工作上下文和FIFO队列。
- 系统指令是只读(静态)的,包含有关MemGPT控制流、不同内存级别的预期用途以及如何使用MemGPT功能的指令(例如,如何检索上下文外数据)的信息。这指导MemGPT实现自主编辑和检索。
看它源码中的这部分Prompt,太复杂了… (如果每次都需要将这个Prompt告诉大模型,让其生成相应的Function Calling,那这成本是不是有点高了?)

-
工作上下文是一个固定大小的非结构化文本读/写块,只能通过MemGPT函数调用进行写入。在会话设置中,工作上下文用于存储关于用户和Agent的对话信息。
-
FIFO队列存储消息的滚动历史。FIFO队列中的第一个索引存储系统消息,该消息包含已从队列中删除的消息的递归摘要。
图中有个箭头最多的,Function Executor,用来读写各种外部Memory,也就是实现Memory的增删改查,例如将外部上下文转移到主上下文中使用。
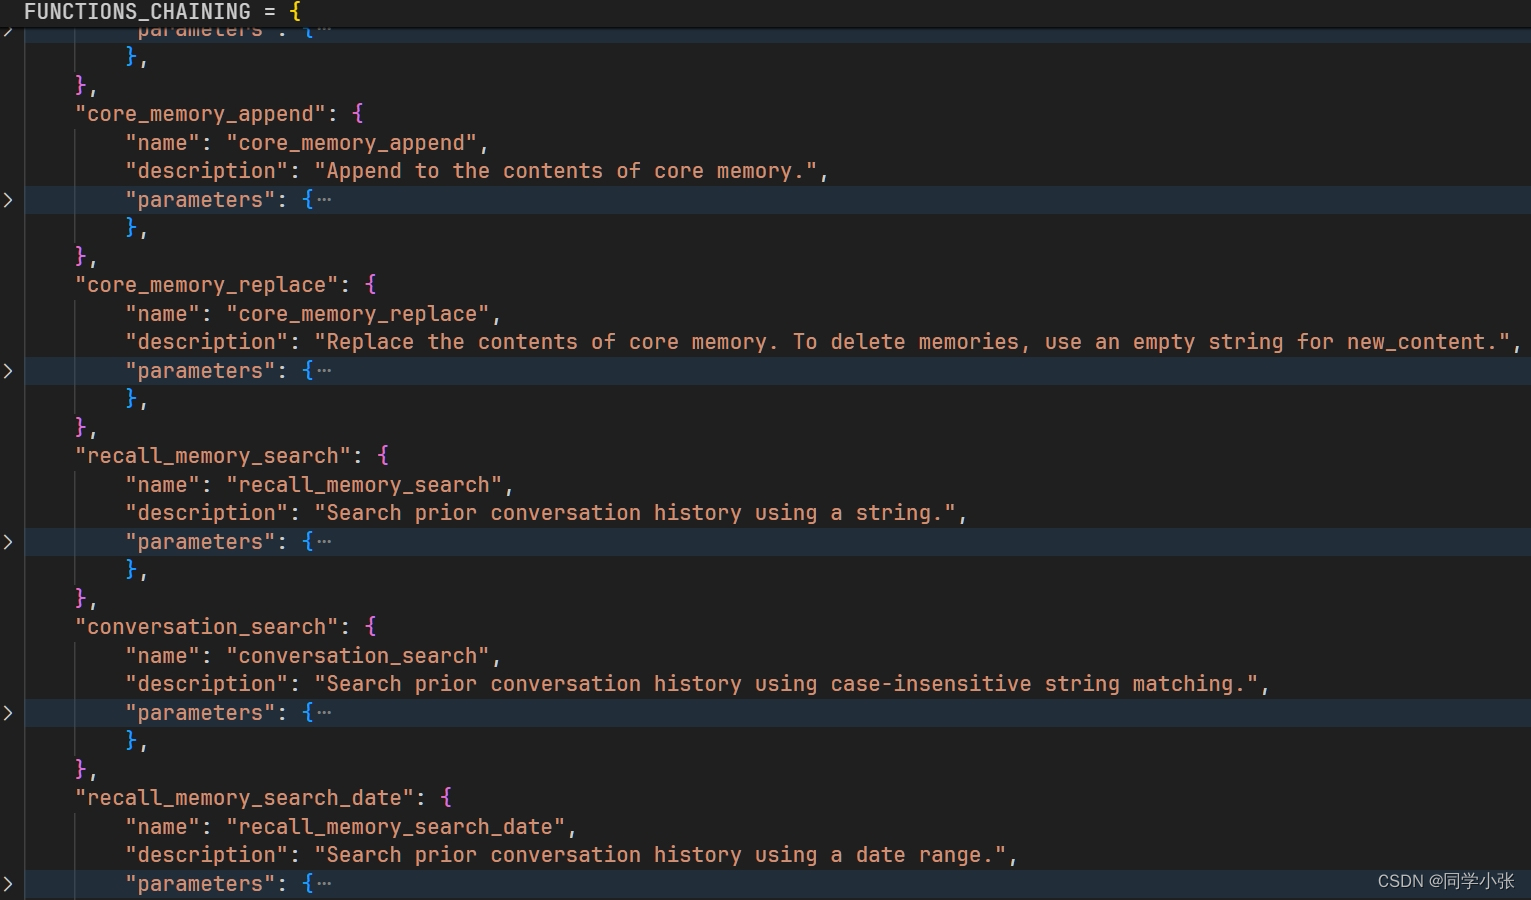
部分Function定义如下:包括修改主上下文,检索外部上下文等,都是通过这些Fuction来进行的。而这些Function的调用,是注册到LLM里面,由LLM根据上下文生成的Function Calling调用。
论文先看到这里,里面实现的细节非常多且复杂,需要花时间详细并且反复读才行。
用我自己的话和理解总结一下整体的实现思路:
将上下文分为主上下文和外部上下文,外部上下文存储在磁盘或向量数据库中,需要时进行检索,然后填充到主上下文中去使用。至于什么时候应该用外部上下文,什么时候应该修改主上下文,这由LLM根据当时的主上下文生成Function Calling,通过Function来去调用相应的函数实现上下文的变换。这样,外部上下文都是分散的,检索出来的也都是与当前主上下文相关的,所以就解决了长上下文时比较旧的内容丢失的问题。
1. 快速上手
1.1 普通玩法
1.1.1 环境安装
pip install -U pymemgpt
然后
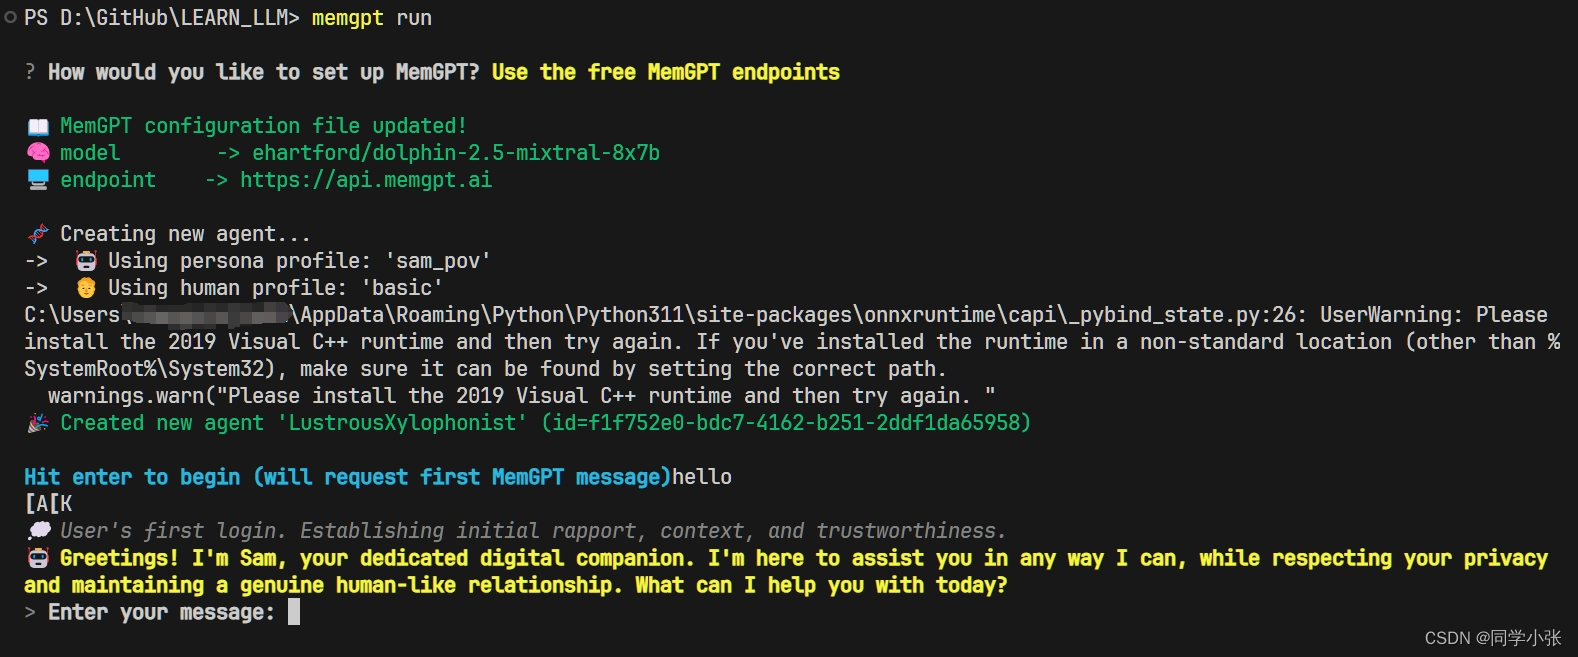
memgpt run
运行界面如下:
当然你可以输入一些命令来使用高级一点的玩法:
/exit: Exit the CLI
/attach: Attach a loaded data source to the agent
/save: Save a checkpoint of the current agent/conversation state
/dump: View the current message log (see the contents of main context)
/dump : View the last messages (all if is omitted)
/memory: Print the current contents of agent memory
/pop: Undo the last message in the conversation
/pop : Undo the last messages in the conversation. It defaults to 3, which usually is one turn around in the conversation
/retry: Pops the last answer and tries to get another one
/rethink : Will replace the inner dialog of the last assistant message with the  to help shaping the conversation
/rewrite: Will replace the last assistant answer with the given text to correct or force the answer
/heartbeat: Send a heartbeat system message to the agent
/memorywarning: Send a memory warning system message to the agent
这些命令具体怎么实现的,可以看 MemGPT\memgpt\main.py 中的源码:
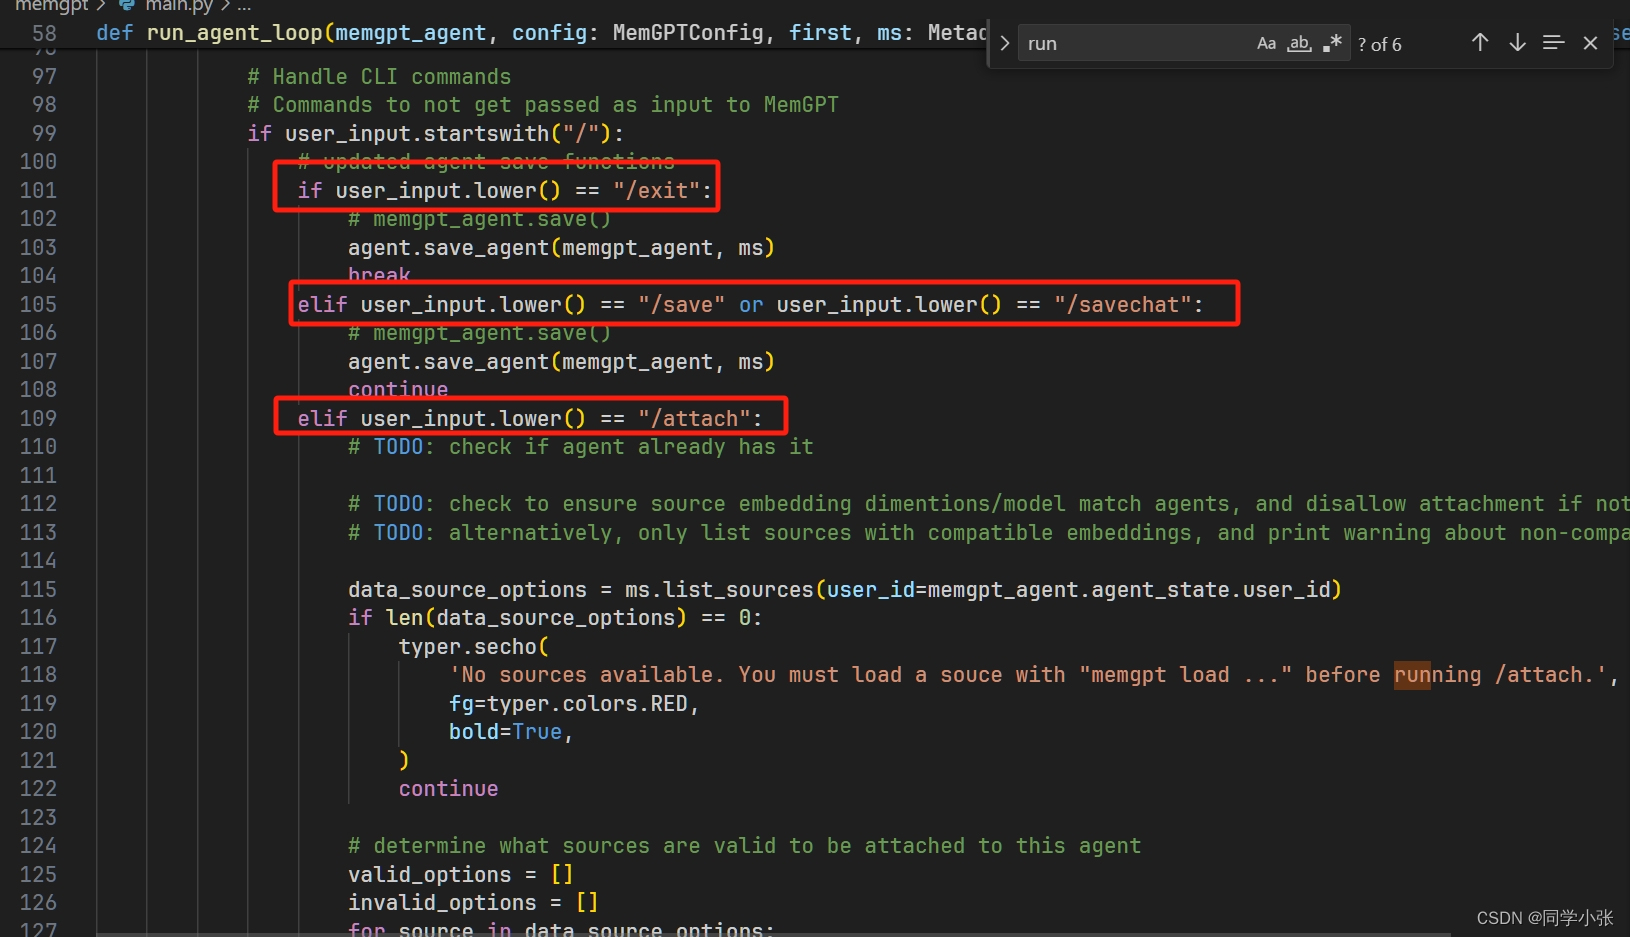
这种玩法就不过多介绍了。下面重点介绍进阶玩法,开发的方式。
1.2 进阶玩法
1.2.1 源码安装
还是老规矩,用源码安装,方便以后断点调试和学习。
git clone https://github.com/cpacker/MemGPT.git
cd MemGPT
pip install -e .
1.2.2 上手代码
在运行前,一定记得将OpenAI的Key和代理设置到环境变量中,例如下面的 load_dotenv
# 加载 .env 到环境变量
from dotenv import load_dotenv, find_dotenv
_ = load_dotenv(find_dotenv())
from memgpt import create_client
# Connect to the server as a user
client = create_client()
# Create an agent
agent_info = client.create_agent(
  name="my_agent",
  persona="You are a friendly agent.",
  human="Bob is a friendly human."
)
# Send a message to the agent
messages = client.user_message(agent_id=agent_info.id, message="Hello, agent!")
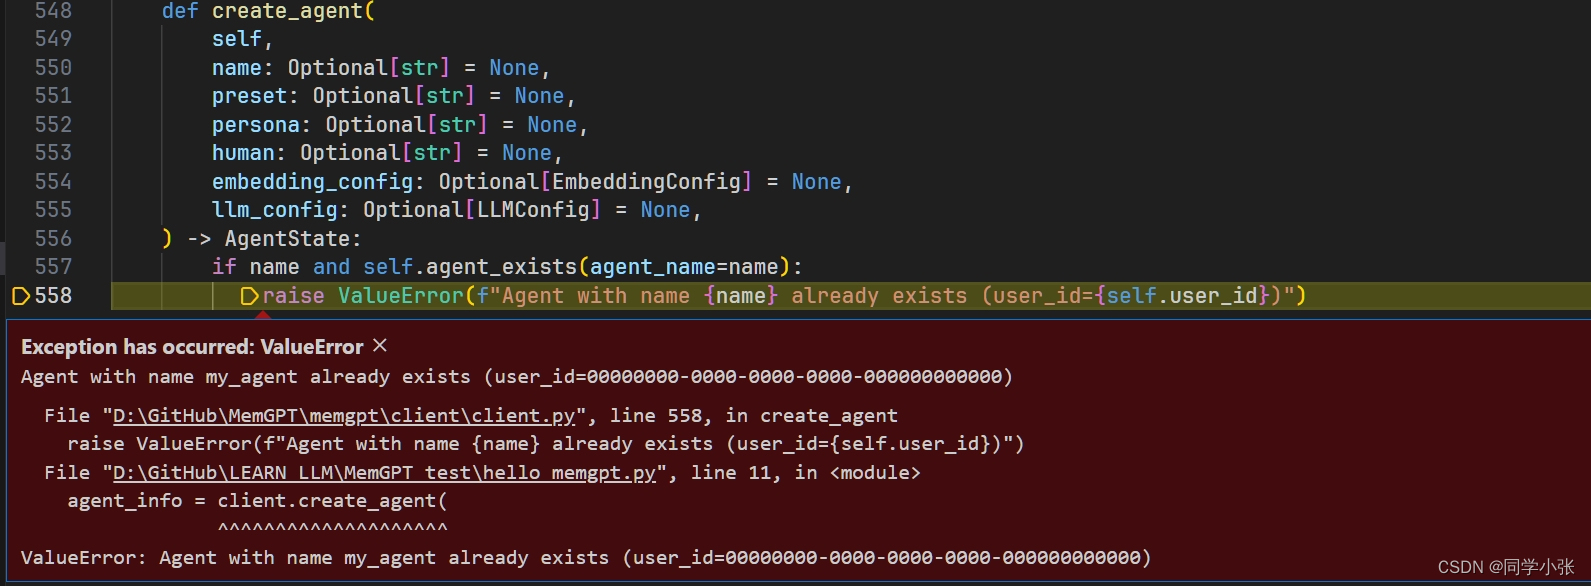
1.2.3 运行效果

无法重复创建相同名字的Agent,可能是一个名字一个存储地址?这样实现的Agent整体的持久化存储?
如果觉得本文对你有帮助,麻烦点个赞和关注呗 ~~~
- 大家好,我是 同学小张,日常分享AI知识和实战案例
- 欢迎 点赞 + 关注 👏,持续学习,持续干货输出。
- +v: jasper_8017 一起交流💬,一起进步💪。
- 微信公众号也可搜【同学小张】 🙏
本站文章一览:
-
- 系统指令是只读(静态)的,包含有关MemGPT控制流、不同内存级别的预期用途以及如何使用MemGPT功能的指令(例如,如何检索上下文外数据)的信息。这指导MemGPT实现自主编辑和检索。
- Building persistent LLM agents with long-term memory