uniAPP开发小程序使用MQTT通讯EMQX Cloud
首先感谢大佬参考案例
下载并安装工具
1.Hbuilderx 2. nodejs 3.MQTTX
链接放这,自己下载安装
MQTT服务器:EMQX
第一步:测试MQTTX通讯
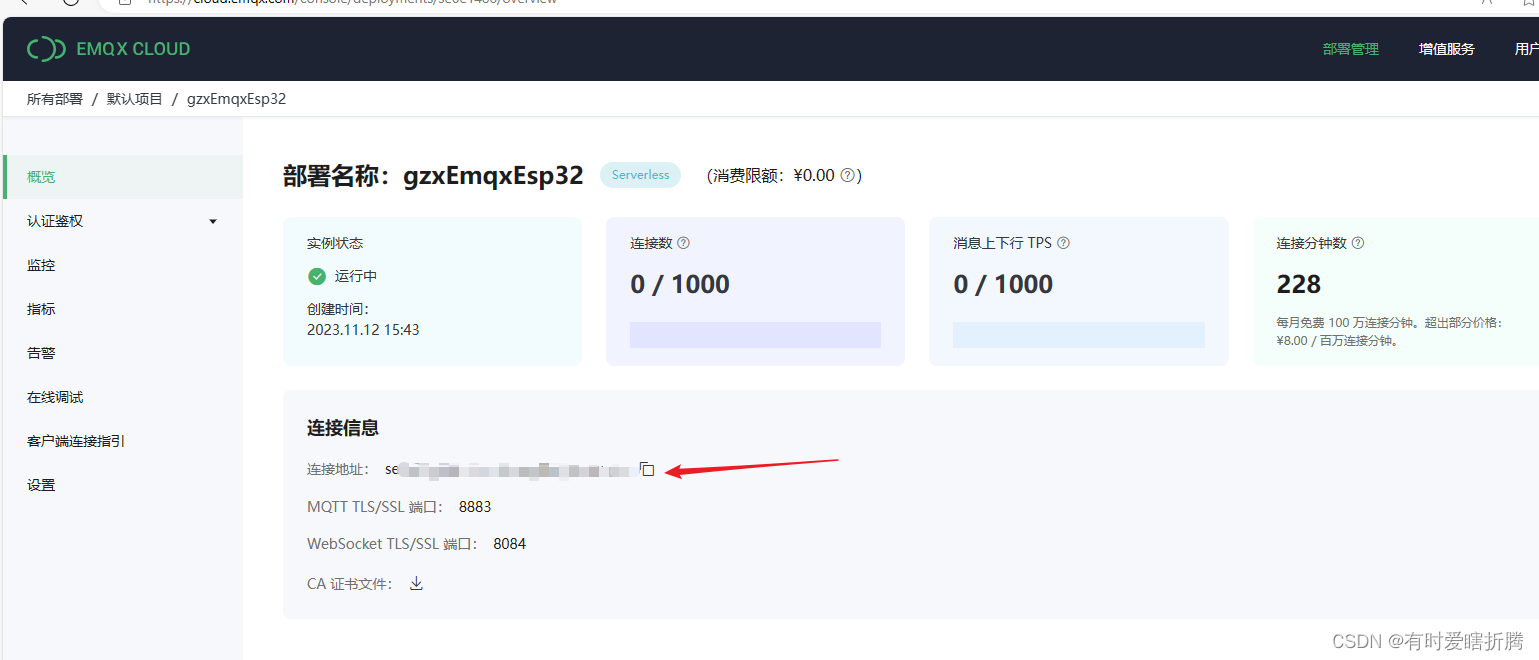
1.记住这地址,你的服务器地址
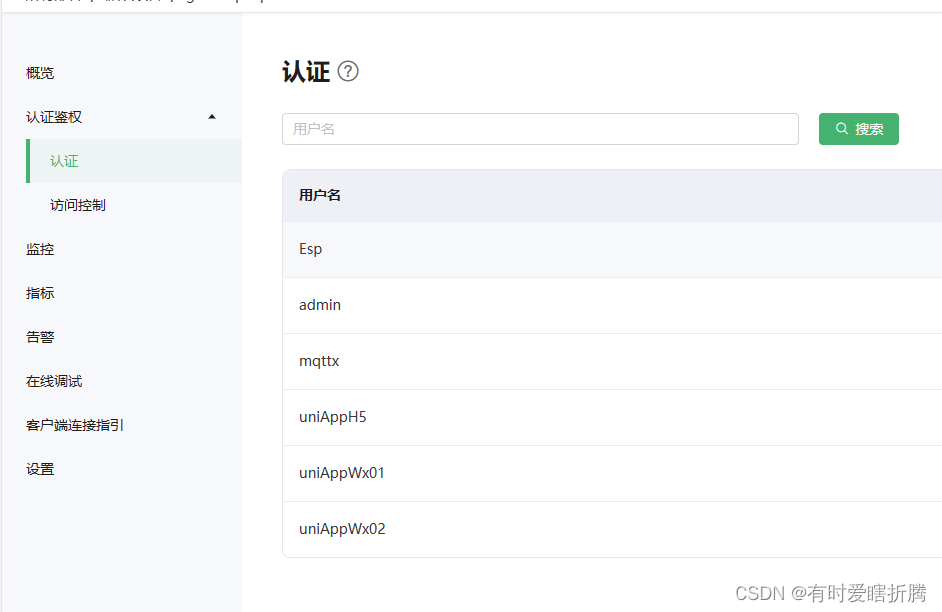
2.随便创建几个用户
3.打开MQTTX
填入刚刚的服务器地址
注意我选的参数
用户就是上图的用户和密码
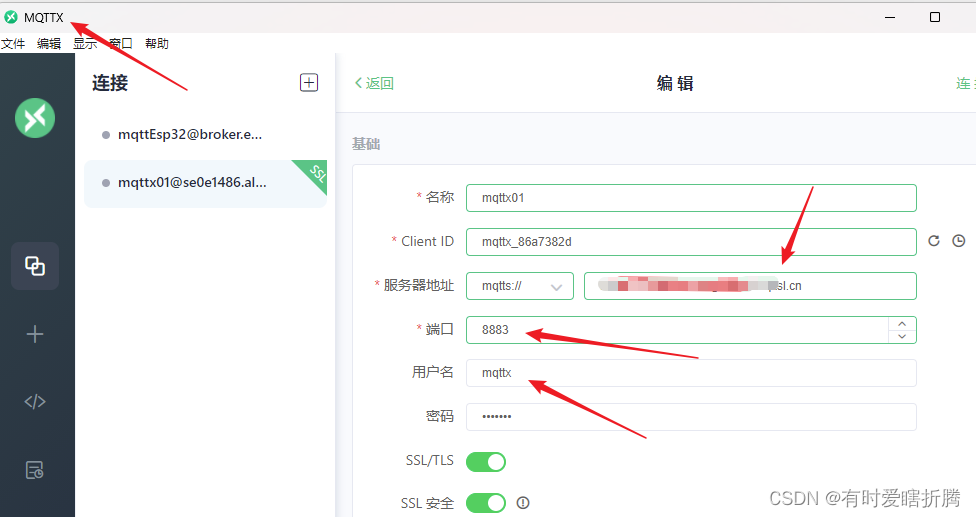
点击连接,成功
失败的,自己再重复下上面看看哪里错了
第二步:源码测试
混个积分,谢谢,,,,源码
1.打开源码
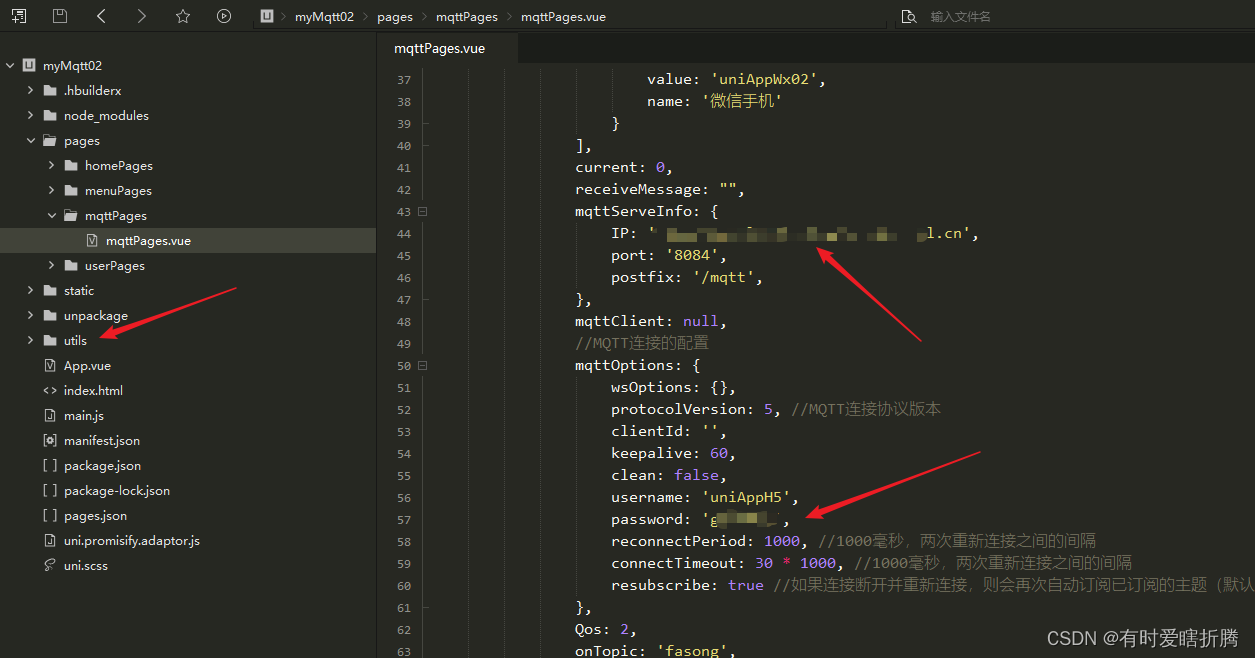
IP就是刚刚你服务器的地址,
密码就是服务器里面创建的用户的密码
还有那个文件,我也没深究,所以还是要感谢大佬参考案例
2.不要源码
必须先安装Nodejs
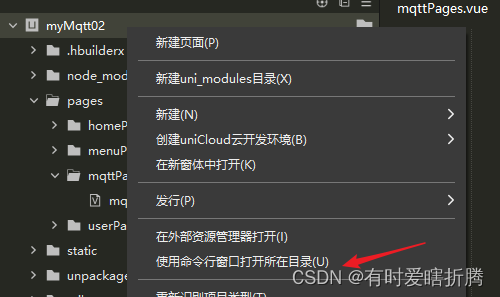
选择目录,右键,用命令行窗口打开
分两次输入
npm install mqtt@3.0.0

npm install uuid
主要源码
					{{item.name}}


			mqtt 连接
			mqtt 订阅
			mqtt 发布
			取消订阅
			断开连接
			message:{{ receiveMessage.toString() }}


	import mqtt from '@/utils/mqtt4.1.0.js';
	export default {
		data() {
			return {
				radDataArr: [{
						value: 'uniAppH5',
						name: '网页',
						checked: 'true'
					},
					{
						value: 'uniAppWx01',
						name: '微信仿真'
					},
					{
						value: 'uniAppWx02',
						name: '微信手机'
					}
				],
				current: 0,
				receiveMessage: "",
				mqttServeInfo: {
					IP: '*******.cn',
					port: '8084',
					postfix: '/mqtt',
				},
				mqttClient: null,
				//MQTT连接的配置
				mqttOptions: {
					wsOptions: {},
					protocolVersion: 5, //MQTT连接协议版本
					clientId: '',
					keepalive: 60,
					clean: false,
					username: 'uniAppH5',
					password: '****',
					reconnectPeriod: 1000, //1000毫秒,两次重新连接之间的间隔
					connectTimeout: 30 * 1000, //1000毫秒,两次重新连接之间的间隔
					resubscribe: true //如果连接断开并重新连接,则会再次自动订阅已订阅的主题(默认true)
				},
				Qos: 2,
				onTopic: 'fasong',
				onSub: 'jieshou',
			}
		},
		methods: {
			radioChange: function(evt) {
				for (let i = 0; i  {
							uni.hideLoading();
							this.showToast('连接成功', 1000, 'success')
							this.subscribe()
						});
						this.mqttClient.on('message', (topic, message) => {
							console.log('收到来自' + topic + '的消息' + message.toString());
							this.receiveMessage = message
						});
					}
					this.mqttClient.on('reconnect', error => {
						uni.hideLoading();
						this.showToast('正在重连···', 1000)
					});
					this.mqttClient.on('error', error => {
						uni.hideLoading();
						this.showToast('连接失败!', 1000)
					});
				} catch (e) {
					console.log("连接异常" + e);
				}
			},
			subscribe: function() {
				// 判断是否已成功连接
				if (!this.mqttClient || !this.mqttClient.connected) {
					this.showToast('客户端未连接', 1000)
					return;
				}
				this.mqttClient.subscribe(this.onTopic, {
					qos: this.Qos
				}, error => {
					if (!error) {
						this.showToast('订阅成功', 1000, 'success')
						console.log('订阅成功');
					}
				});
				/* //订阅多个主题
			this.mqttClient.subscribe(['one', 'two', 'three'], { qos: 1 }, err => {
				console.log(err || '订阅成功');
				this.show(err || '订阅成功');
			 });

				    // 订阅不同 qos 的不同主题
				    this.mqttClient.subscribe(
				        [
				            { hello: 1 },
				            { 'one/two/three': 2 },
				            { '#': 0 }
				        ],
				        (err) => {
				          this.show();console.log(err || '订阅成功')
				        },
				    )


			}); */
			},
			publish: function() {
				// 判断是否已成功连接
				if (!this.mqttClient || !this.mqttClient.connected) {
					this.showToast('客户端未连接', 1000)
					return;
				}
				if (this.sendMassage != '') {
					// var send = '{"code": 200, "msg": "发送打1111指令", "data": "2.doc"}';
					// 定义JSON对象
					const messageq = {
						code: 200,
						msg: '发送打印指令',
						data: '2.doc'
					}
					// 将JSON对象转换为JSON字符串
					const message1 = JSON.stringify(messageq)
					this.mqttClient.publish(this.onSub, message1, error => {
						console.log(error || '消息发布成功');
						this.showToast('消息发布成功', 1000, 'success')
					});
				} else {
					this.showToast('发布消息为空', 1000)
				}
			},
			unsubscribe: function() {
				this.mqttClient.unsubscribe(
					// topic, topic Array, topic Array-Onject
					// ['one', 'two', 'three'],
					this.onTopic,
					err => {
						console.log(err || '取消订阅成功');
						this.showToast('取消订阅成功', 1000, 'success')
					}
				);
			},
			unconnect: function() {
				if (!this.mqttClient || !this.mqttClient.connected) {
					this.showToast('客户端未连接', 1000)
					return;
				}
				this.mqttClient.end();
				//this.mqttClient = null
				this.showToast('成功断开连接', 1000, 'success')
				console.log('断开连接');
			},
			showToast: function(title, time, icon = 'none') {
				uni.showToast({
					title: title,
					icon: icon,
				});
				setTimeout(function() {
					uni.hideToast();
				}, time);
			},
		}
	}


	.mqttPswordtype {
		height: 100rpx;
		background: #F7F8FA;
		white-space: pre-wrap;
	}
	.mqttTest {
		button {
			margin: 20rpx 10rpx;
			height: 100rpx;
			color: #F7F8FA;
		}
	}
亲测有效
H5演示:
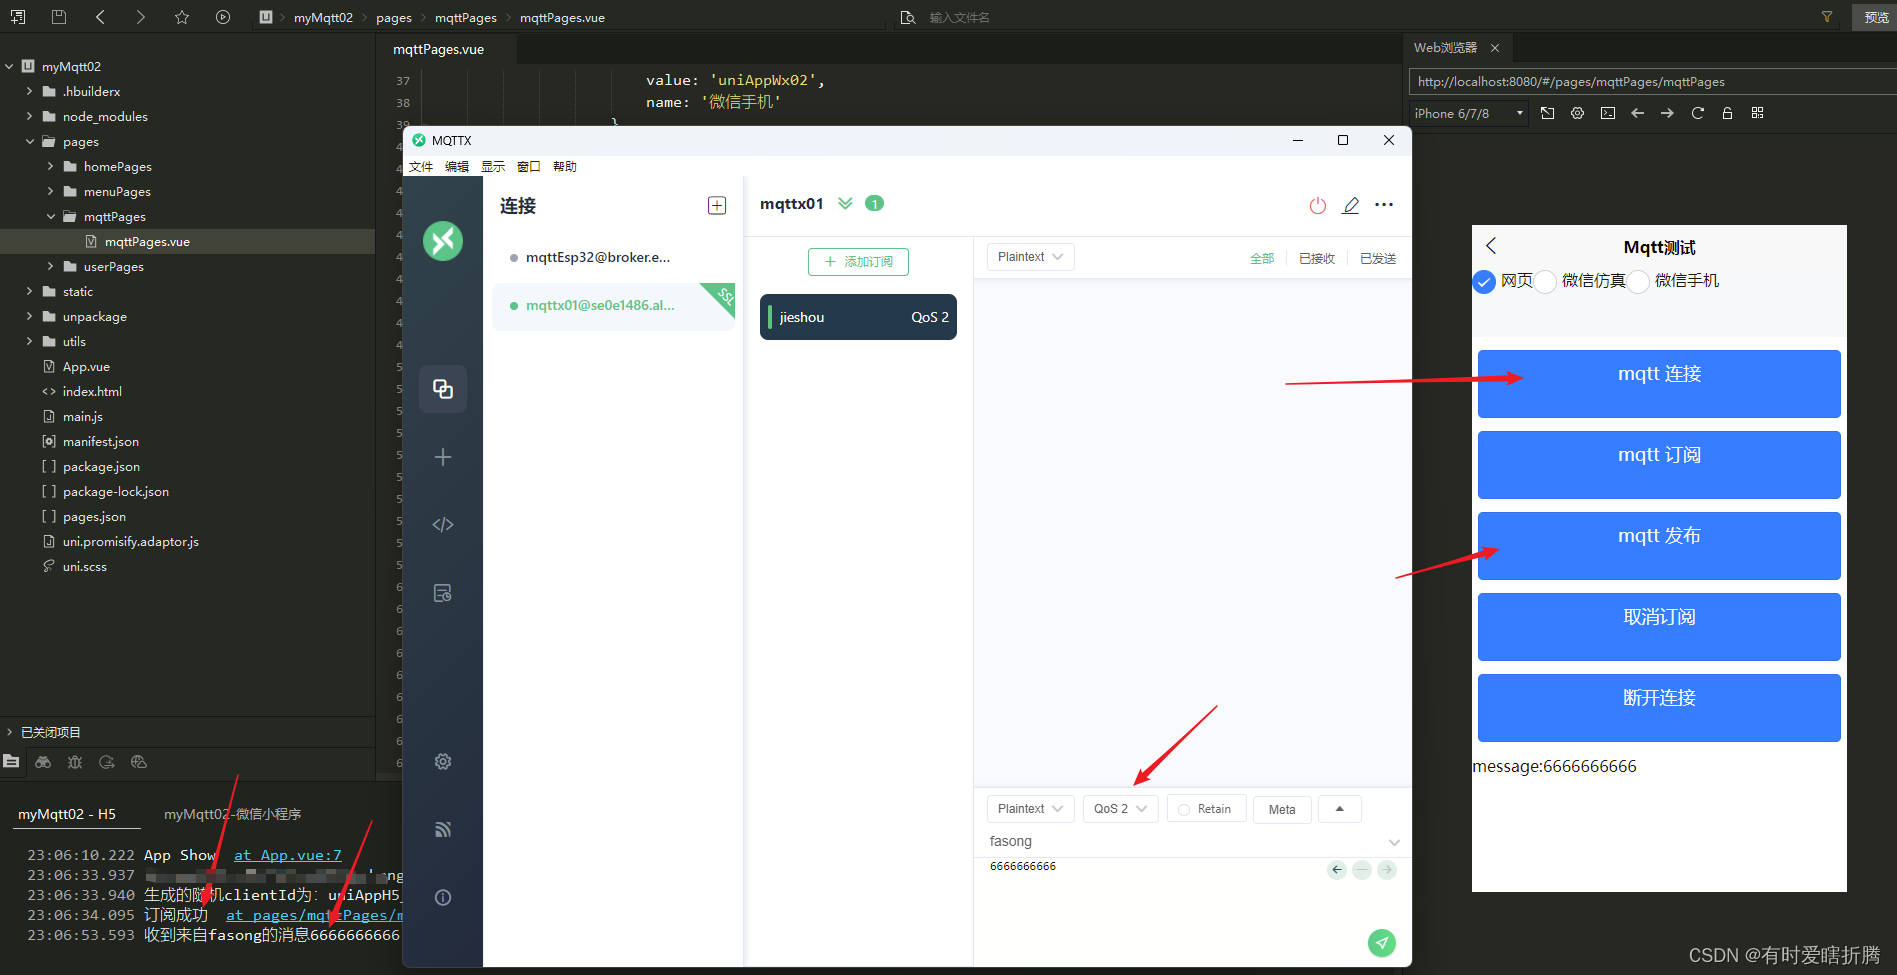
小程序演示,我这里直接用了小程序的ID,进行真机模拟

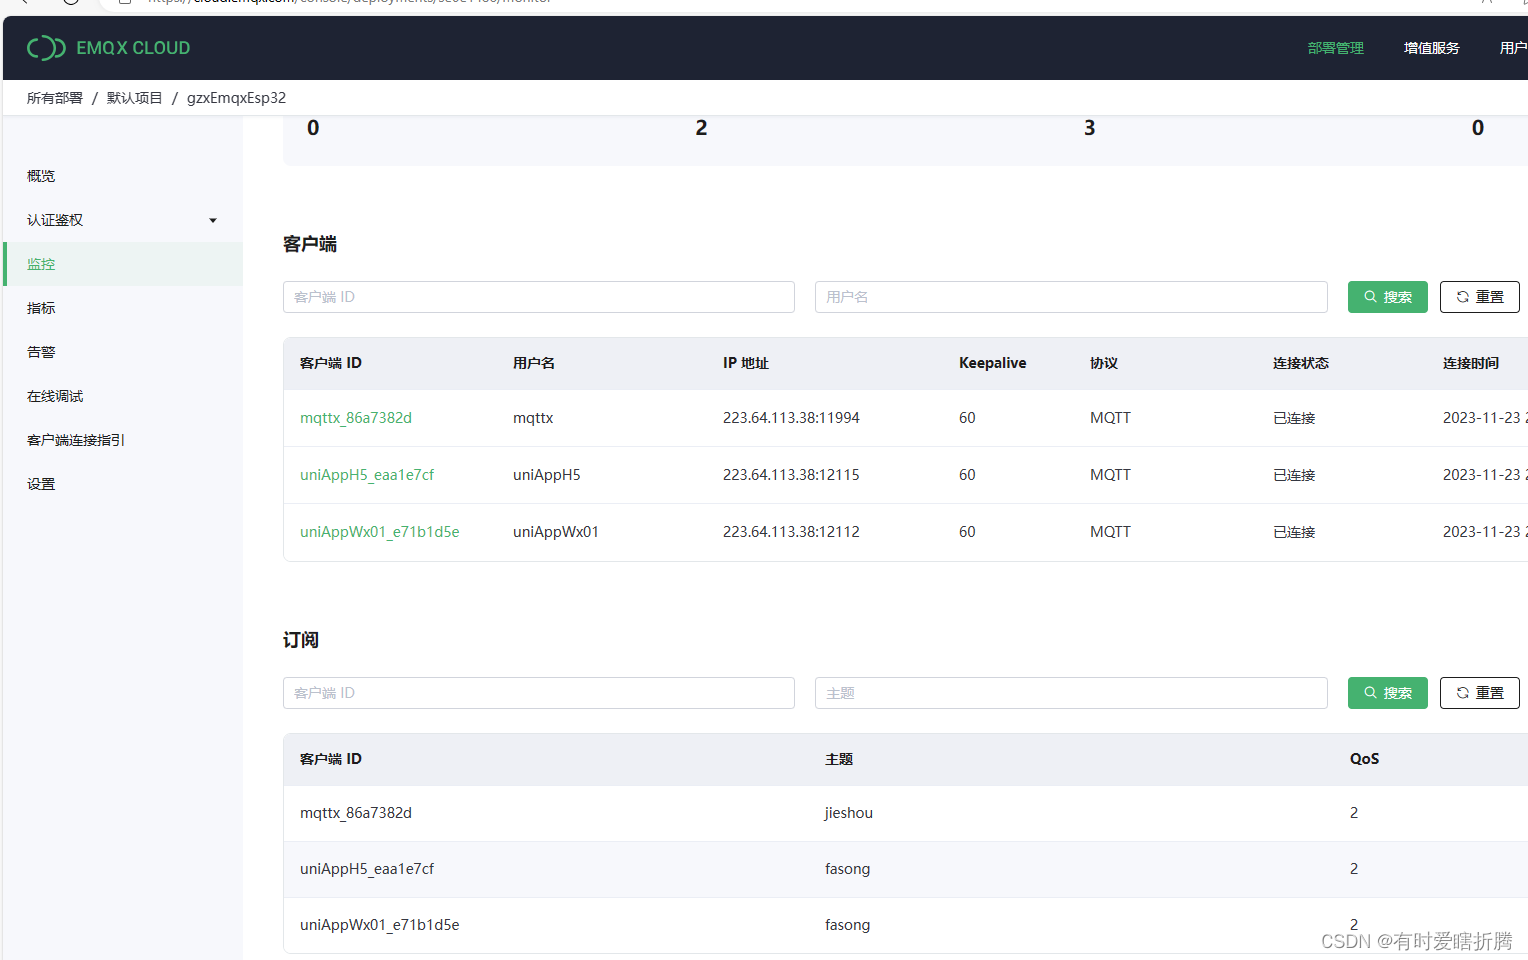
回到服务器查看,可以看到三个在连接
*注:大佬如果需要我删除,直接留言即可