文章目录
- 关于 Candle
- 结构
- 安装
- 1、With Cuda support :
- 2、Without Cuda support :
- 3、With mkl support
- 二、基本使用 Hello World!
- 1、处理 MNIST 数据集
- 2、使用一个 `Linear` 层
- 3、使用 `candle_nn`
- 三、Pytorch cheatsheet
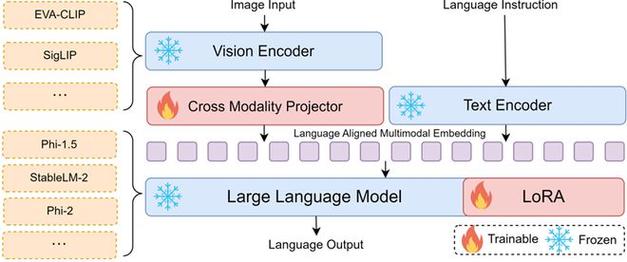
关于 Candle
Candle is a minimalist ML framework for Rust with a focus on performance (including GPU support) and ease of use.
 (图片来源网络,侵删)
你可以尝试在线 demos: whisper,LLaMA2, T5, yolo, Segment Anything.
- github : https://github.com/huggingface/candle
- 官方文档:https://huggingface.github.io/candle/
相关文章、教程
 (图片来源网络,侵删)
- Python 失宠!Hugging Face 用 Rust 新写了一个 ML 框架,现已低调开源
https://www.infoq.cn/news/fMBmytGX8aFOKzrN3pea
结构
Candle 结构包括:
- Candle-core:核心操作、设备和 Tensor 结构定义。
- Candle-nn:构建真实模型的工具。
- Candle-examples:在实际设置中使用库的示例。
- Candle-kernels:CUDA 自定义内核;
- Candle-datasets:数据集和数据加载器。
- Candle-Transformers:与 Transformers 相关的实用程序。
- Candle-flash-attn:Flash attention v2 层。
- candle-onnx: ONNX 模型评估。
安装
https://huggingface.github.io/candle/guide/installation.html
安装 Rust: https://blog.csdn.net/lovechris00/article/details/124808034
1、With Cuda support :
1.1 首先,确保 Cuda 被正确安装了
- nvcc --version 应该打印有关Cuda编译器驱动程序的信息。
- nvidia-smi --query-gpu=compute_cap --format=csv 应该打印您的GPU计算能力,例如:
compute_cap
8.9
您还可以使用 CUDA_COMPUTE_CAP= 环境变量为特定的计算编译 Cuda内核。
如果以上任何命令出错,请确保更新您的Cuda版本。
1.2 创建一个新的app,添加 candle-core 来增加 Cuda 支持。
从创建一个新的 cargo 开始 :
cargo new myapp
cd myapp
Make sure to add the candle-core crate with the cuda feature:
确保添加具有cuda功能的 candle-core 被创建:
cargo add --git https://github.com/huggingface/candle.git candle-core --features "cuda"
运行 cargo build 来保证所有被正确编译
cargo build
2、Without Cuda support :
创建一个新的 app,并添加 candle-core 如下:
cargo new myapp
cd myapp
cargo add --git https://github.com/huggingface/candle.git candle-core
最后,运行 cargo build 来保证所有被正确编译
cargo build
3、With mkl support
You can also see the mkl feature which could be interesting to get faster inference on CPU. Using mkl
二、基本使用 Hello world!
转载自:Hello world!
1、处理 MNIST 数据集
We will now create the hello world of the ML world, building a model capable of solving MNIST dataset.
Open src/main.rs and fill in this content:
use candle_core::{Device, Result, Tensor};
struct Model {
    first: Tensor,
    second: Tensor,
}
impl Model {
    fn forward(&self, image: &Tensor) -> Result {
        let x = image.matmul(&self.first)?;
        let x = x.relu()?;
        x.matmul(&self.second)
    }
}
fn main() -> Result {
    // Use Device::new_cuda(0)?; to use the GPU.
    let device = Device::Cpu;
    let first = Tensor::randn(0f32, 1.0, (784, 100), &device)?;
    let second = Tensor::randn(0f32, 1.0, (100, 10), &device)?;
    let model = Model { first, second };
    let dummy_image = Tensor::randn(0f32, 1.0, (1, 784), &device)?;
    let digit = model.forward(&dummy_image)?;
    println!("Digit {digit:?} digit");
    Ok(())
}
Everything should now run with:
cargo run --release
2、使用一个 Linear 层
Now that we have this, we might want to complexify things a bit, for instance by adding bias and creating the classical Linear layer. We can do as such
struct Linear{
    weight: Tensor,
    bias: Tensor,
}
impl Linear{
    fn forward(&self, x: &Tensor) -> Result {
        let x = x.matmul(&self.weight)?;
        x.broadcast_add(&self.bias)
    }
}
struct Model {
    first: Linear,
    second: Linear,
}
impl Model {
    fn forward(&self, image: &Tensor) -> Result {
        let x = self.first.forward(image)?;
        let x = x.relu()?;
        self.second.forward(&x)
    }
}
This will change the model running code into a new function
fn main() -> Result {
    // Use Device::new_cuda(0)?; to use the GPU.
    // Use Device::Cpu; to use the CPU.
    let device = Device::cuda_if_available(0)?;
    // Creating a dummy model
    let weight = Tensor::randn(0f32, 1.0, (784, 100), &device)?;
    let bias = Tensor::randn(0f32, 1.0, (100, ), &device)?;
    let first = Linear{weight, bias};
    let weight = Tensor::randn(0f32, 1.0, (100, 10), &device)?;
    let bias = Tensor::randn(0f32, 1.0, (10, ), &device)?;
    let second = Linear{weight, bias};
    let model = Model { first, second };
    let dummy_image = Tensor::randn(0f32, 1.0, (1, 784), &device)?;
    // Inference on the model
    let digit = model.forward(&dummy_image)?;
    println!("Digit {digit:?} digit");
    Ok(())
}
Now it works, it is a great way to create your own layers. But most of the classical layers are already implemented in candle-nn.
3、使用 candle_nn
For instance Linear is already there. This Linear is coded with PyTorch layout in mind, to reuse better existing models out there, so it uses the transpose of the weights and not the weights directly.
So instead we can simplify our example:
cargo add --git https://github.com/huggingface/candle.git candle-nn
And rewrite our examples using it
use candle_core::{Device, Result, Tensor};
use candle_nn::{Linear, Module};
struct Model {
    first: Linear,
    second: Linear,
}
impl Model {
    fn forward(&self, image: &Tensor) -> Result {
        let x = self.first.forward(image)?;
        let x = x.relu()?;
        self.second.forward(&x)
    }
}
fn main() -> Result {
    // Use Device::new_cuda(0)?; to use the GPU.
    let device = Device::Cpu;
    // This has changed (784, 100) -> (100, 784) !
    let weight = Tensor::randn(0f32, 1.0, (100, 784), &device)?;
    let bias = Tensor::randn(0f32, 1.0, (100, ), &device)?;
    let first = Linear::new(weight, Some(bias));
    let weight = Tensor::randn(0f32, 1.0, (10, 100), &device)?;
    let bias = Tensor::randn(0f32, 1.0, (10, ), &device)?;
    let second = Linear::new(weight, Some(bias));
    let model = Model { first, second };
    let dummy_image = Tensor::randn(0f32, 1.0, (1, 784), &device)?;
    let digit = model.forward(&dummy_image)?;
    println!("Digit {digit:?} digit");
    Ok(())
}
Feel free to modify this example to use Conv2d to create a classical convnet instead.
Now that we have the running dummy code we can get to more advanced topics:
- For PyTorch users
- Running existing models
- Training models
三、Pytorch cheatsheet
https://huggingface.github.io/candle/guide/cheatsheet.html#pytorch-cheatsheet
Using PyTorch Using Candle Creation torch.Tensor([[1, 2], [3, 4]]) Tensor::new(&[[1f32, 2.], [3., 4.]], &Device::Cpu)? Creation torch.zeros((2, 2)) Tensor::zeros((2, 2), DType::F32, &Device::Cpu)? Indexing tensor[:, :4] tensor.i((.., ..4))? Operations tensor.view((2, 2)) tensor.reshape((2, 2))? Operations a.matmul(b) a.matmul(&b)? Arithmetic a + b &a + &b Device tensor.to(device="cuda") tensor.to_device(&Device::new_cuda(0)?)? Dtype tensor.to(dtype=torch.float16) tensor.to_dtype(&DType::F16)? Saving torch.save({"A": A}, "model.bin") candle::safetensors::save(&HashMap::from([("A", A)]), "model.safetensors")? Loading weights = torch.load("model.bin") candle::safetensors::load("model.safetensors", &device) 伊织 2024-03-23
- Python 失宠!Hugging Face 用 Rust 新写了一个 ML 框架,现已低调开源