Shopify开发入门-前端保姆级教程🚀🚀🚀
本文旨在介绍Shopify开发入门、环境、配置等,帮助开发者配置环境、了解各个开发模式的区别及用途;已有Shopify开发经验者可退出,以免浪费你的宝贵时间。本文5k字+,图片、链接、代码块较多,请耐心阅读~
前言
最近在调研Shopify开发,对其也有了一定的认识、了解;即将这些整理沉淀下来,希望能帮助到他人。
介绍
Shopify 是由 Tobi Lütke 创办的加拿大软件开发商。
Shopify 是一站式SaaS模式的电商服务平台,为电商卖家提供搭建网店的技术和模版,管理全渠道的营销、售卖、物流等服务。降低小型商户在网店经营上的技术门槛,是 Shopify 最基础的业务。
商户注册账户,选择网站模版,上传商品并添加描述,设置价格和物流选项,添加收款方式,短时间内就能生成一个美观且可靠的独立站。
已有超过一百万家企业使用Shopify平台创建了在线店铺。
相关地址
Shopify官网(https://www.shopify.com/)
Shopify开发文档(https://shopify.dev/)
Shopify合作伙伴(https://www.shopify.com/partners)
Shopify合作伙伴博客(https://www.shopify.com/partners/blog)
Ruby官网(https://www.ruby-lang.org/zh_cn/)
内网穿透-ngrok官网(https://ngrok.com/)
liquid模板语言(https://shopify.dev/api/liquid)
本文Demo地址(github)
起步
若想要开发Shopify主题、应用、自定义店铺,都应该满足以下基本要求。
本地开发环境
- 安装 Node.js 14.170+
- 安装Node.js包管理器 npm、Yarn 或 pnpm
- 安装 Ruby 3.0+
- 安装 Git 2.28+
创建Shopify开发者账号(合作伙伴)
注册Shopify ID(已有账号的话会自动跳过此步骤)
进入Shopify开发官网,点击右上角 Login in。如下图,点击添加账号。
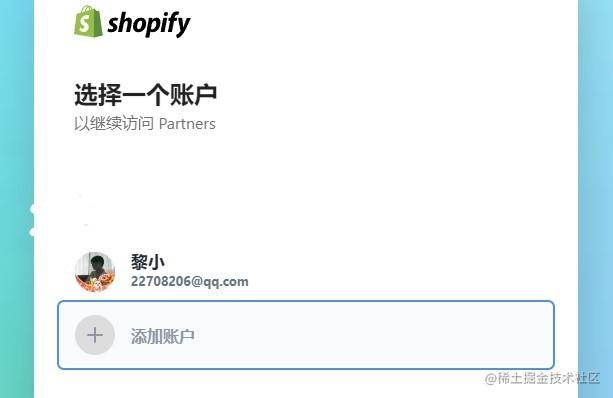
没注册过Shopify的话会提示创建Shopify ID,一步步创建就可以了。
创建合作伙伴账户
已有Shopify账号可用邮箱直接登录,点击新建合作伙伴账户
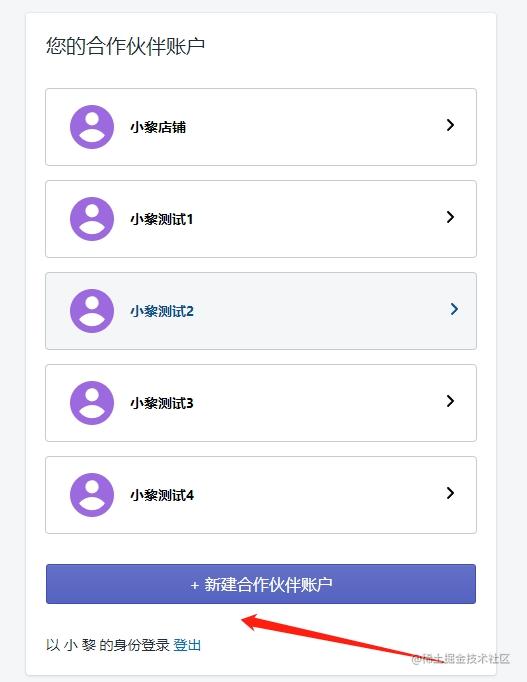
进入到表单填写页,填写完成点击查看控制面板即可。
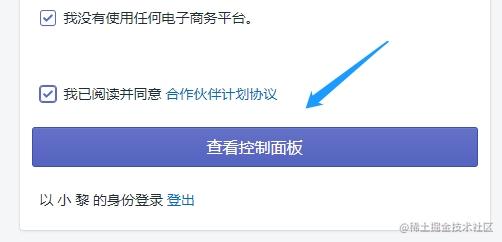
创建过程会久一些,请勿重复创建。若提示504,进入Shopify开发官网,重新登陆。如下图,小黎开发账户已创建成功。
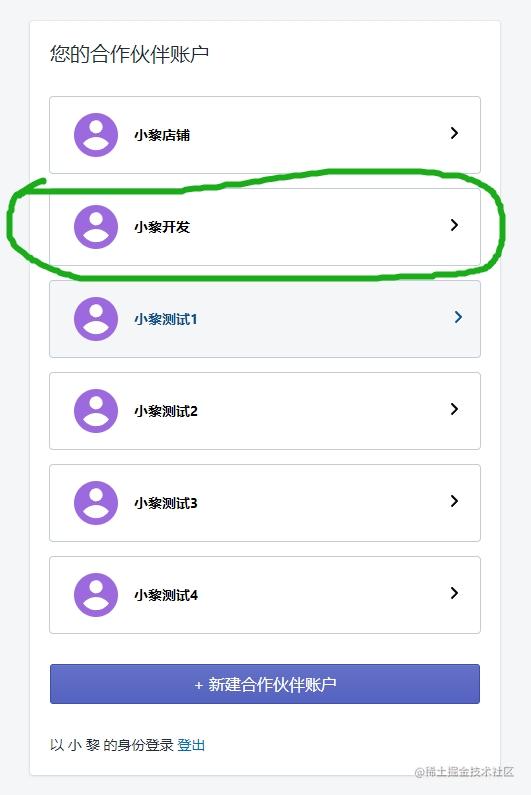
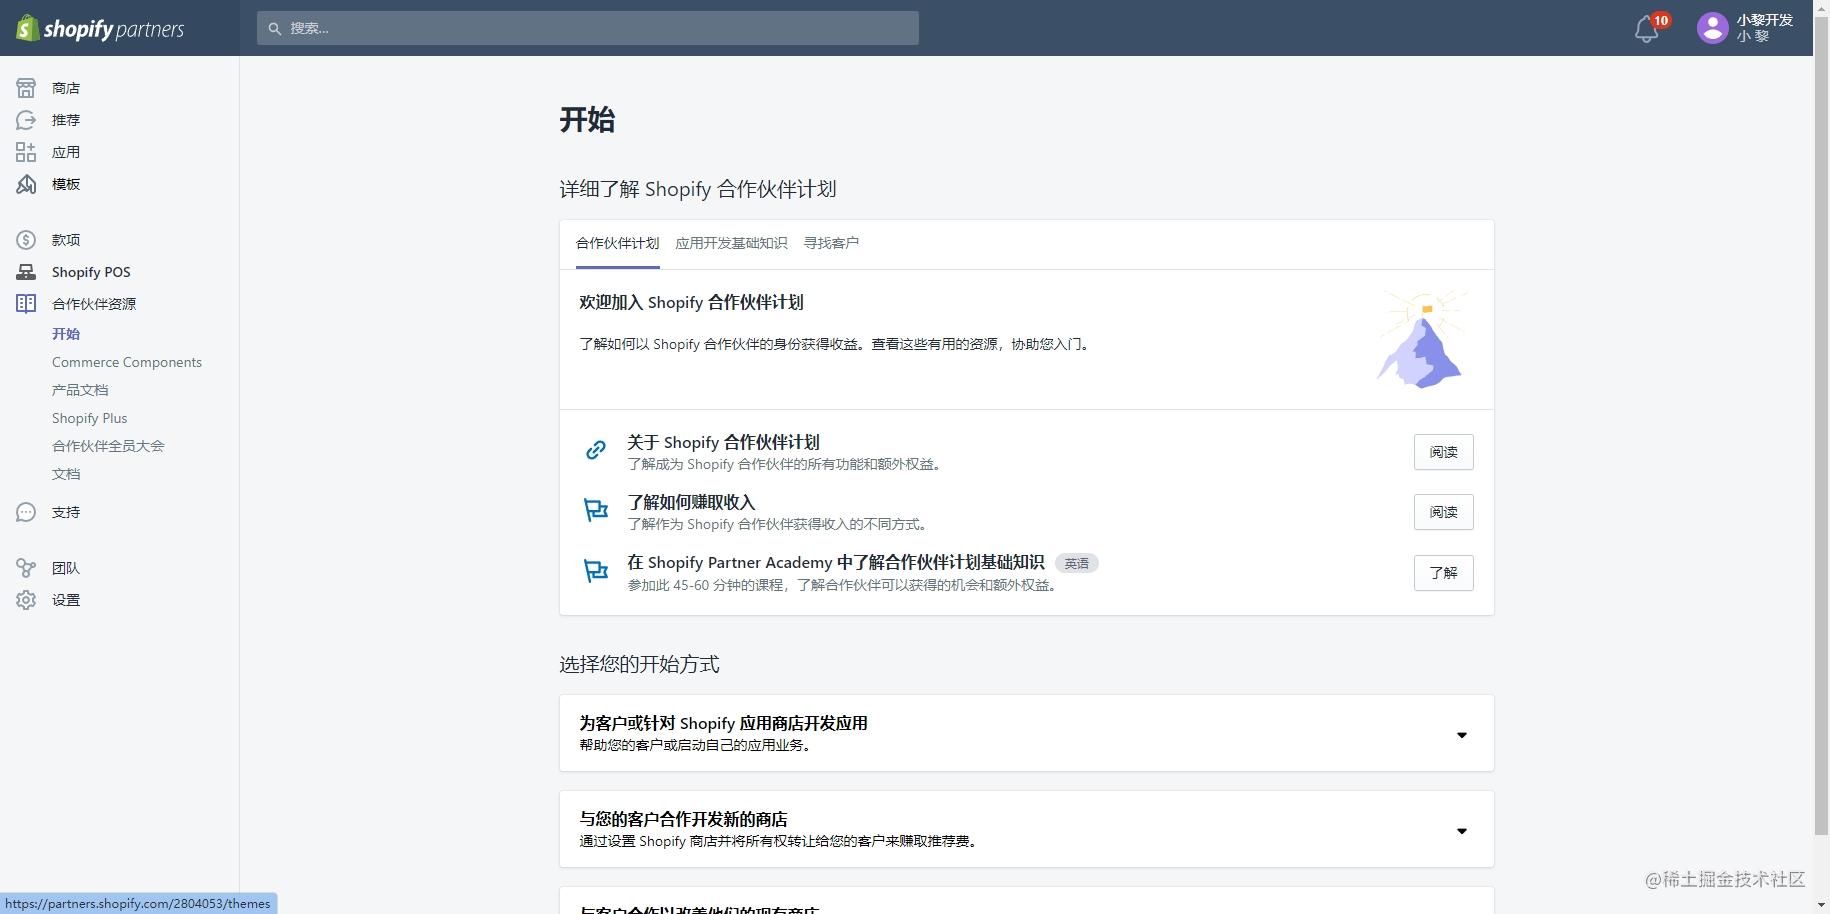
点击小黎开发进入合作伙伴控制后台。
关于语言(英语好的小伙伴可以忽略)
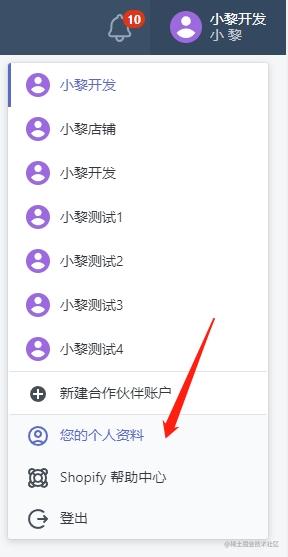
这时候有小伙伴会好奇了,为什么我的页面都是中文呢。这里我已经设置过了语言,基本Shopify的后台都是中文了。点击右上角头像,点击个人资料,下滑找到首选语言设置。

创建开发商店
点击左侧商店,点击创建开发商店;
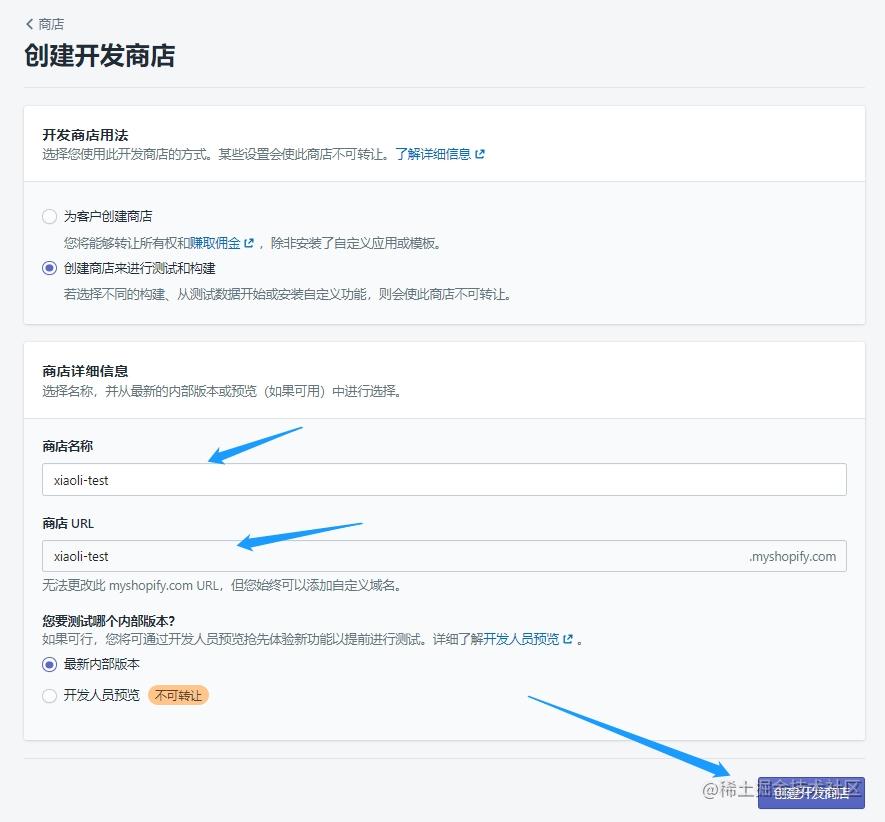
填入商店名称,尽量简短好记。点击右下角创建开发商店。创建完成后会跳转到商店(新创建的商店)后台。
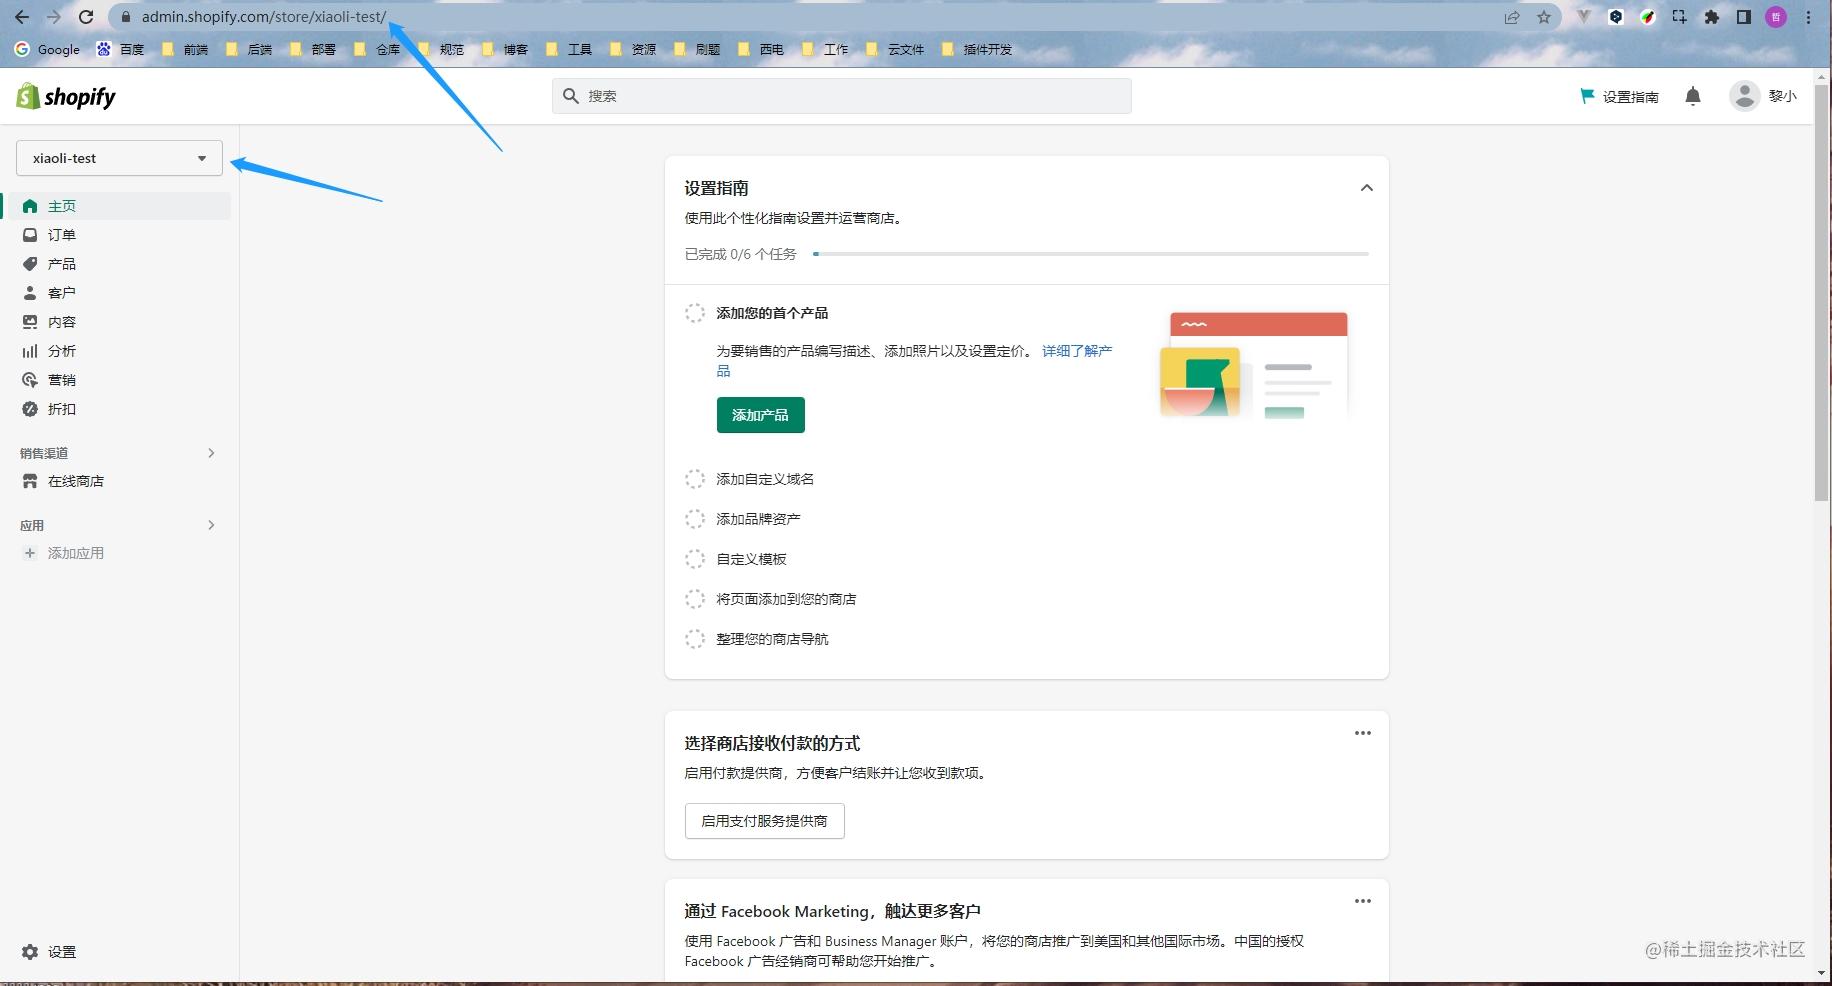
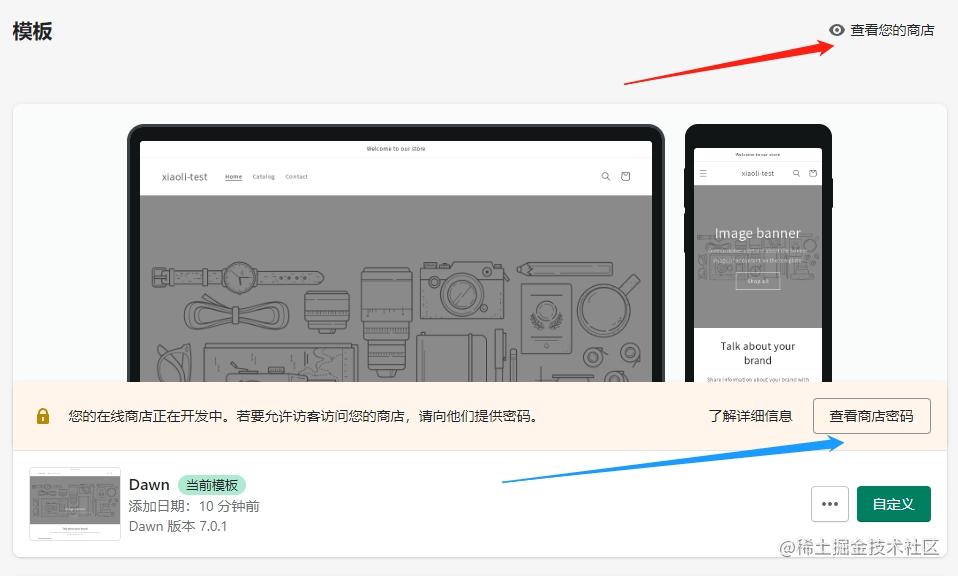
点击左侧导航在线商店,点击右上角查看你的商店。在线商店链接为https://[商店名].myshopify.com/, 目前商店仅供开发使用。可在右下角查看并更改商店密码。
完成起步的所有步骤后,我们便成功了第一步;接下来看相关的开发。
开发
再回到Shopify开发官网,我们可以看到官方的简介 Build anything. Reimagine commerce.(建立任何东西。重新想象商业。),再往下看 Start building
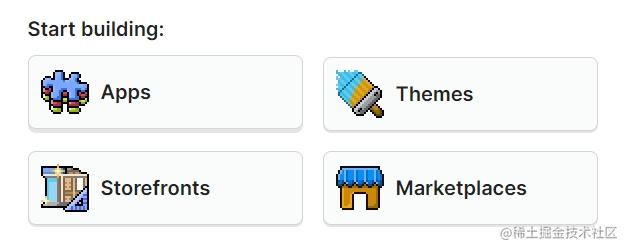
分别为应用、主题、定制商店、市场等。
应用
商店后台应用
您可以构建一个应用程序来为 Shopify 商店添加功能并扩展商家体验,或者为客户创造独特的购买体验。您还可以将 Shopify 商店数据提取到您的应用程序、平台或集成中。
为了根据他们的特定需求定制体验,商家使用 Shopify 应用来帮助建立他们的业务,与外部服务集成,并向他们的 Shopify 后台添加功能。
官方文档
1. 创建新应用
在控制台运行命令 npm init @shopify/app@latest ,根据提示输入应用名、模板,我这里选的是node。
PS D:\Demos\Shopify-test> npm init @shopify/app@latest
Welcome. Let’s get started by naming your app. You can change it later.
?  Your app's name?
✔  xiaoli-app
?  Which template would you like to use?

>  (1) node
   (2) php
   (3) ruby

   Press ↑↓ arrows to select, enter to confirm
会下载代码及依赖,时间会久一些,请耐心等待。
2. 启动服务
cd xiaoli-app
npm run dev
运行命令后控制台提示
To run this command, log in to Shopify Partners.
👉 Press any key to open the login page on your browser
按下回车后网页会提示登录合作伙伴账户,选择合作伙伴账户后。会提示登录成功,然后选择你的开发店铺,这里我选择我刚创建的小黎开发
✔ Logged in.
Looks like this is the first time you're running dev for this project.
Configure your preferences by answering a few questions.
?  Which Partners organization is this work for?
   小黎店铺
   小黎测试3
   小黎测试1
   小黎测试2
   小黎测试4
>  小黎开发
   小黎开发测试
   Press ↑↓ arrows to select, enter to confirm
设置app name
?  Which Partners organization is this work for?
✔  小黎开发
?  App Name:
✔  xiaoli-app
✔ Using your default dev store (xiaoli-test) to preview your project.
✅ Success! Converted xiaoli-test.myshopify.com to a Test store.
然后会生成一个链接和一些预览地址
╭─ info ────────────────────────────────────────────────────────────────────────────────────────────────────────────────────────────────────────────────────────────────────────╮
│                                  │
│  For your convenience, we've given your app a default URL: https://c88b-219-144-202-78.jp.ngrok.io.                            │
│                                  │
│  You can update your app's URL anytime in the Partners Dashboard ( https://partners.shopify.com/2804053/apps/27426717697/edit ). But once your app is live, updating its URL  │
│   will disrupt merchant access.  │
│                                  │
╰───────────────────────────────────────────────────────────────────────────────────────────────────────────────────────────────────────────────────────────────────────────────╯
Shareable app URL
  https://c88b-219-144-202-78.jp.ngrok.io?shop=xiaoli-test.myshopify.com&host=eGlhb2xpLXRlc3QubXlzaG9waWZ5LmNvbS9hZG1pbg
2023-02-03 08:54:38 | frontend |   > Network:  http://192.168.110.85:62591/
2023-02-03 08:54:38 | frontend |   > Network:  http://192.168.12.1:62591/
2023-02-03 08:54:38 | frontend |   > Network:  http://192.168.136.1:62591/
2023-02-03 08:54:38 | frontend |   > Local:    http://localhost:62591/
3. 安装应用
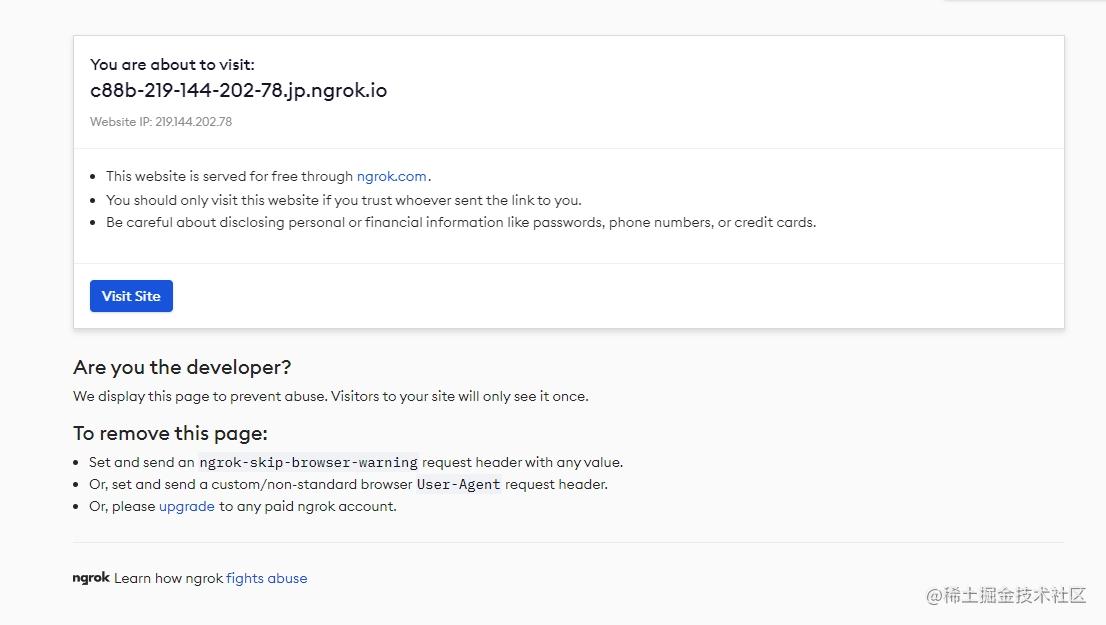
首次访问需要设置内网穿透,我之前已经设置了,所以可以直接进入
我们点击 Shareable app URL 后面的这个链接会在网页开一个新页,点击 Visit Site,然后安装该应用。
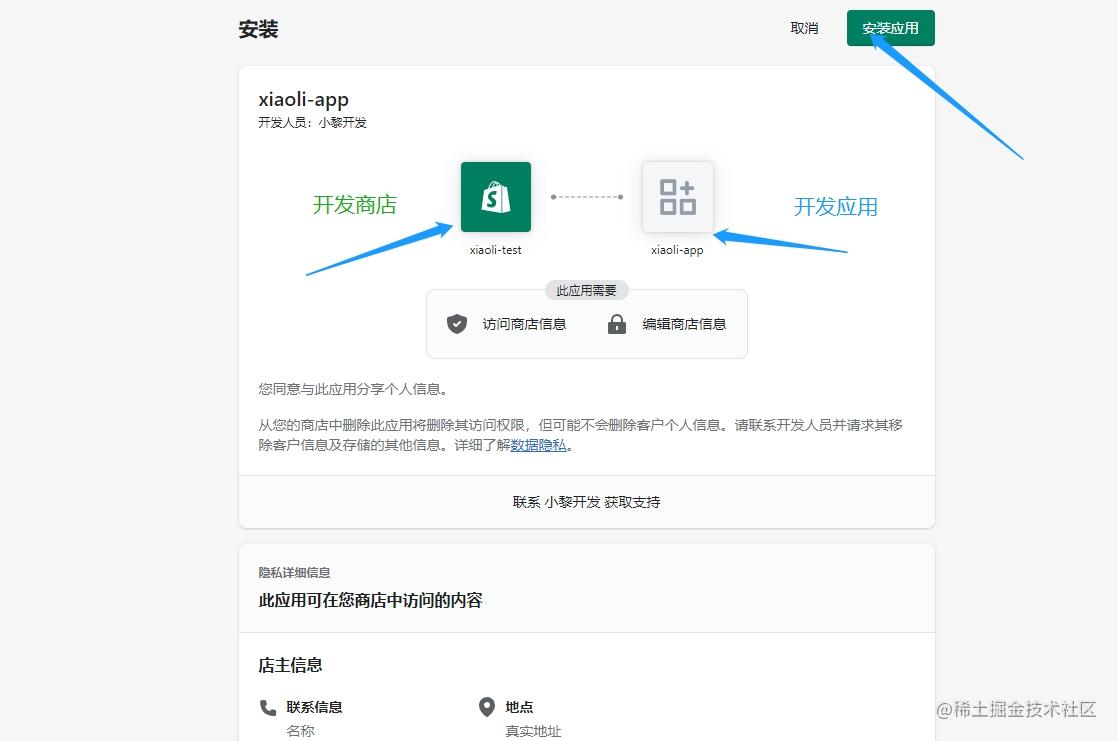
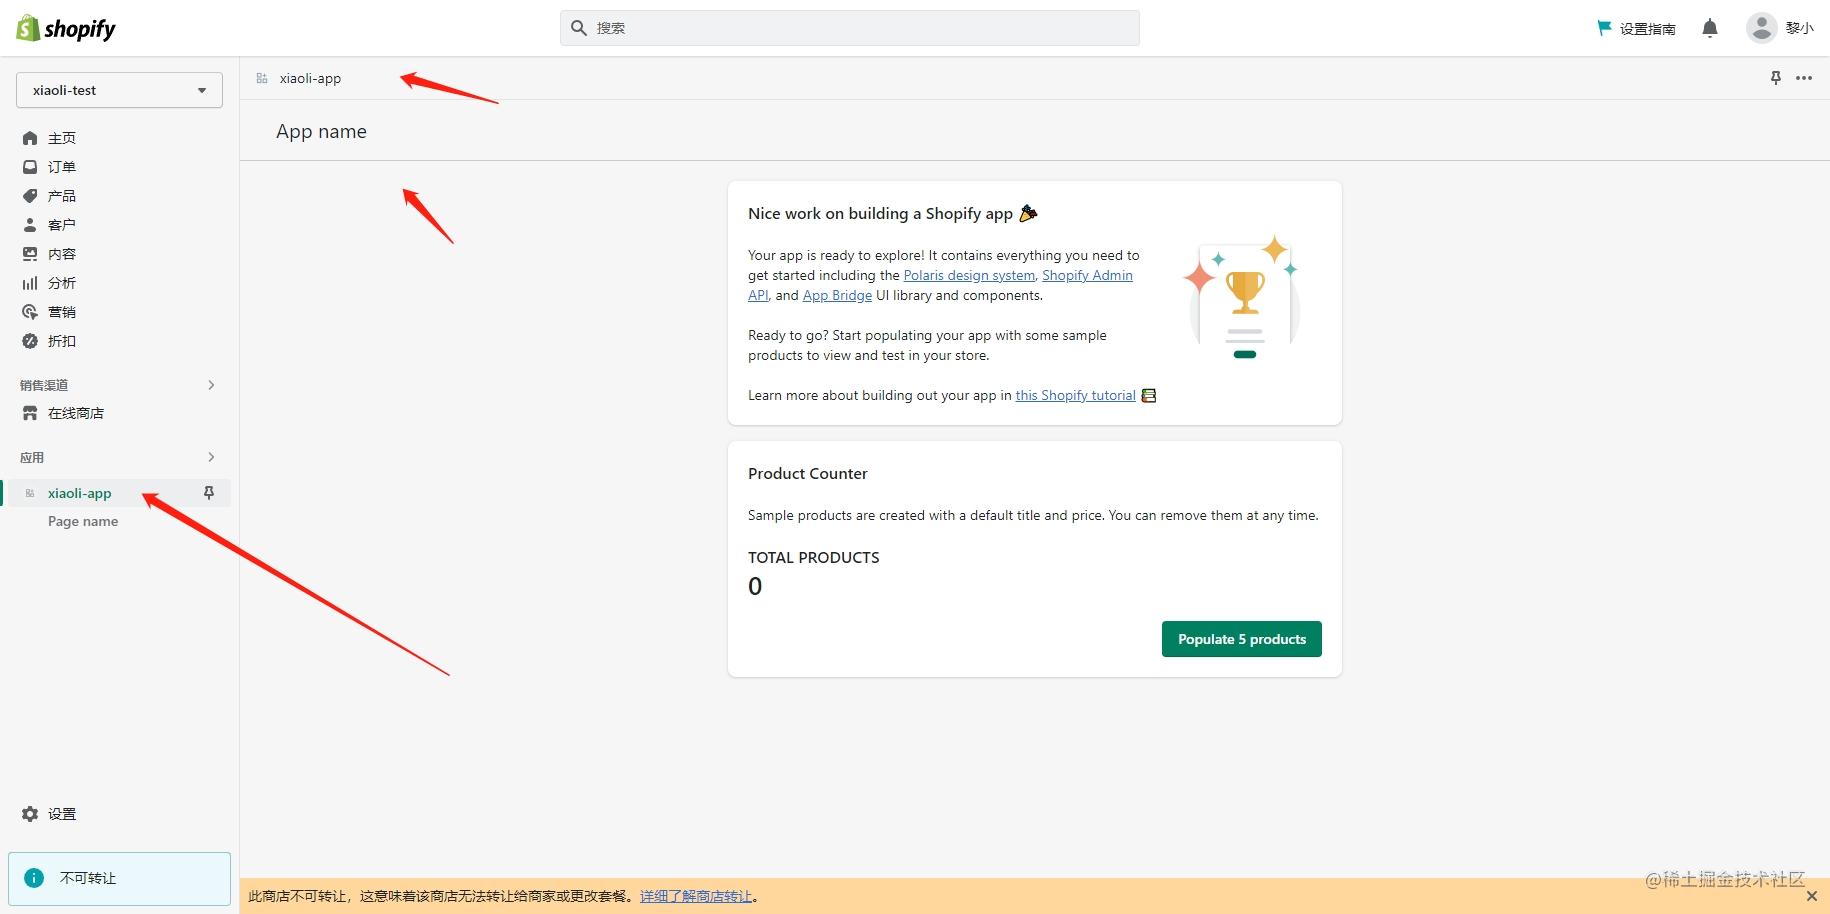
安装成功后,我们会看到左侧应用栏那里有我们的应用xiaoli-app
3-1. 设置内网穿透
未设置时网页会提示我们设置ngrok, ngrok官网,使用邮箱注册登录后来到控制台;

下载解压后运行该程序,复制命令并运行。
ngrok is a command line application, try typing 'ngrok.exe http 80'
at this terminal prompt to expose port 80.
C:\Users\Administrator\Desktop>ngrok config add-authtoken 2KzcraSazcmMYNC4BjTw7SAD7XK_5e7Zv5JRe2u62hsEa4QCA
Authtoken saved to configuration file: C:\Users\Administrator\AppData\Local/ngrok/ngrok.yml
C:\Users\Administrator\Desktop>
4. 本地开发应用
我们先来看一下文件目录结构
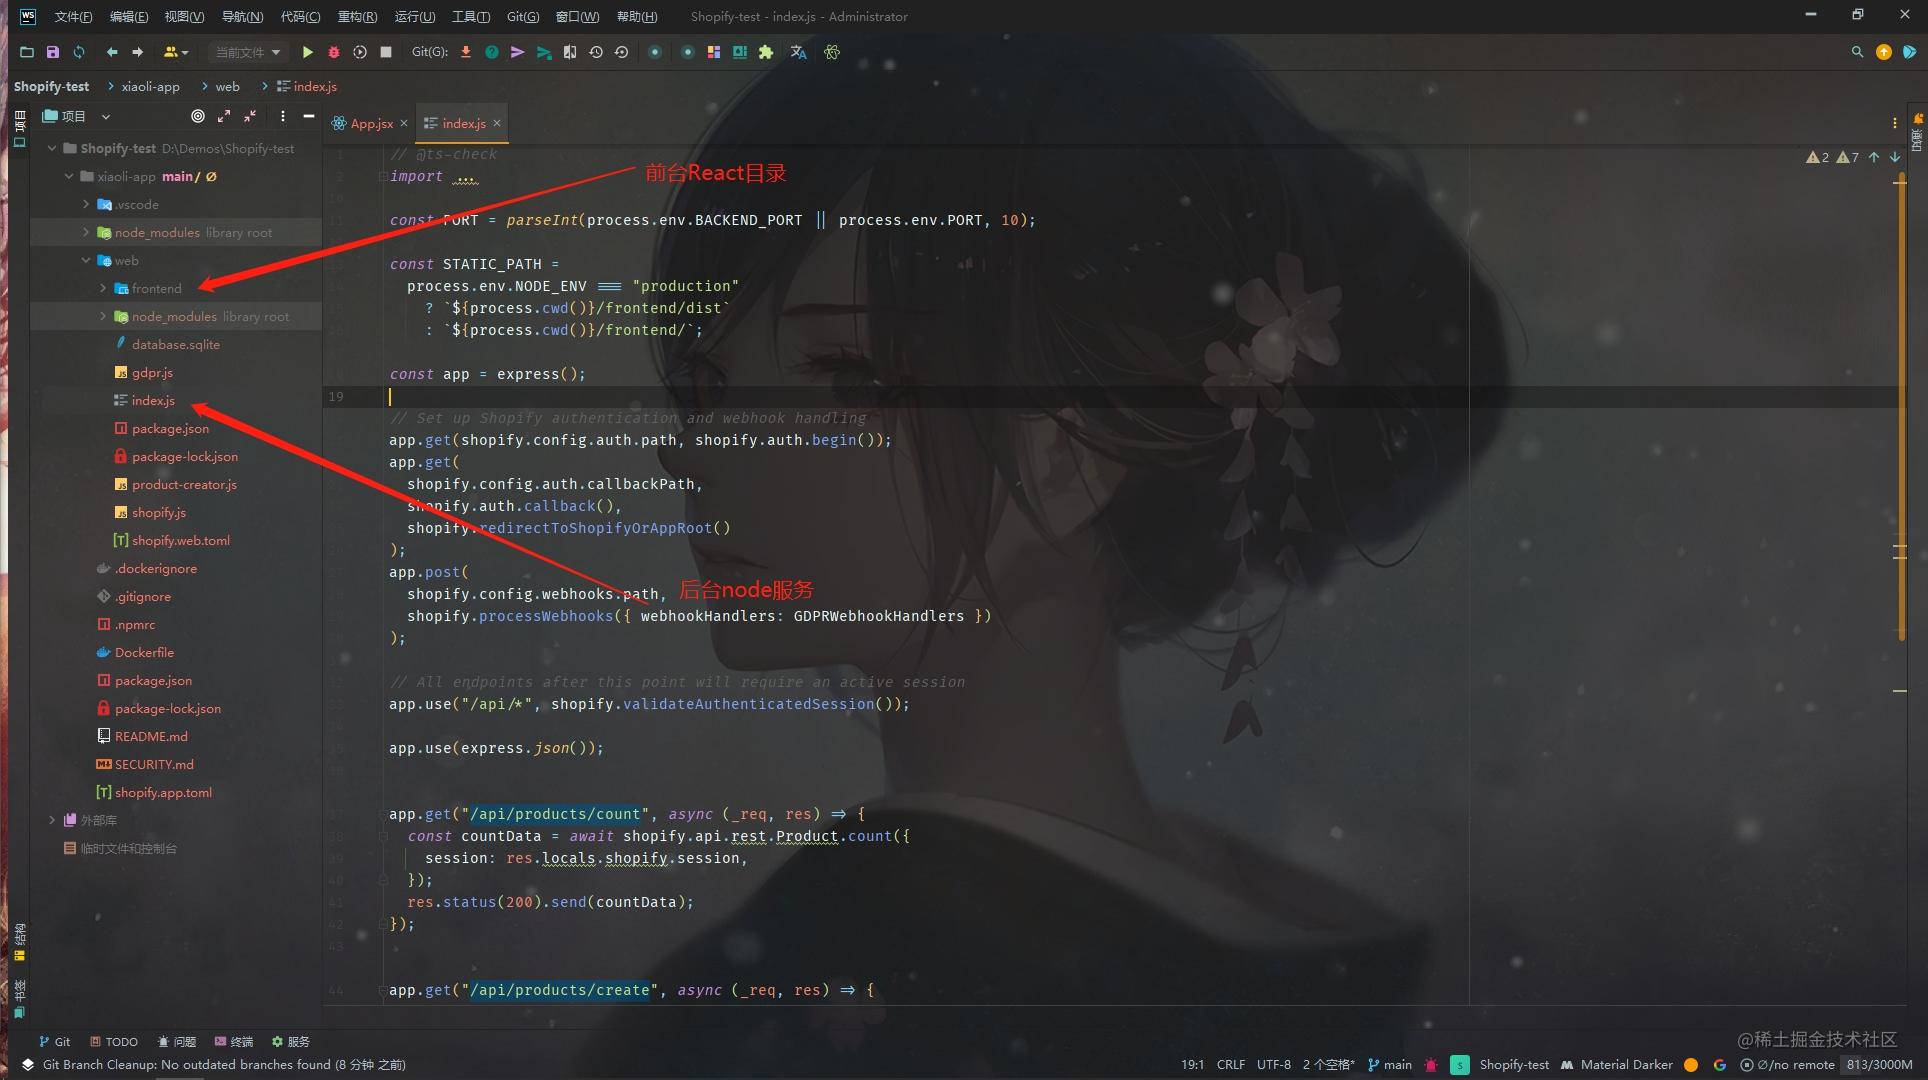
然后打开React入口文件 xiaoli-app\web\frontend\App.jsx,如下部分代码,这部分代码对应了后台左侧的导航栏
navigationLinks={[
  {
    label: "Page name",
    destination: "/pagename",
  }
]}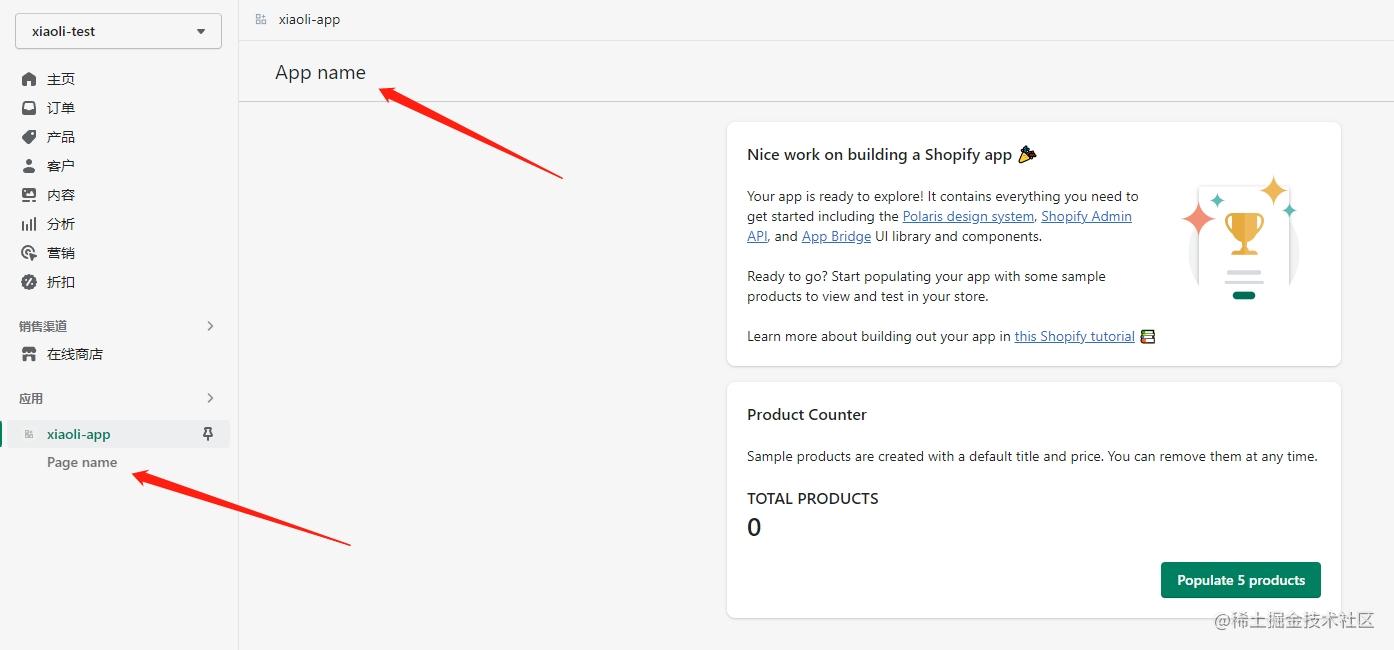
我们分别在xiaoli-app\web\frontend\App.jsx 更改导航
navigationLinks={[
  {
    label: "小黎介绍页",
    destination: "/pagename",
  }
]}
在xiaoli-app\web\frontend\pages\index.jsx 更改标题
然后刷新下后台,现在导航和标题已经改变了
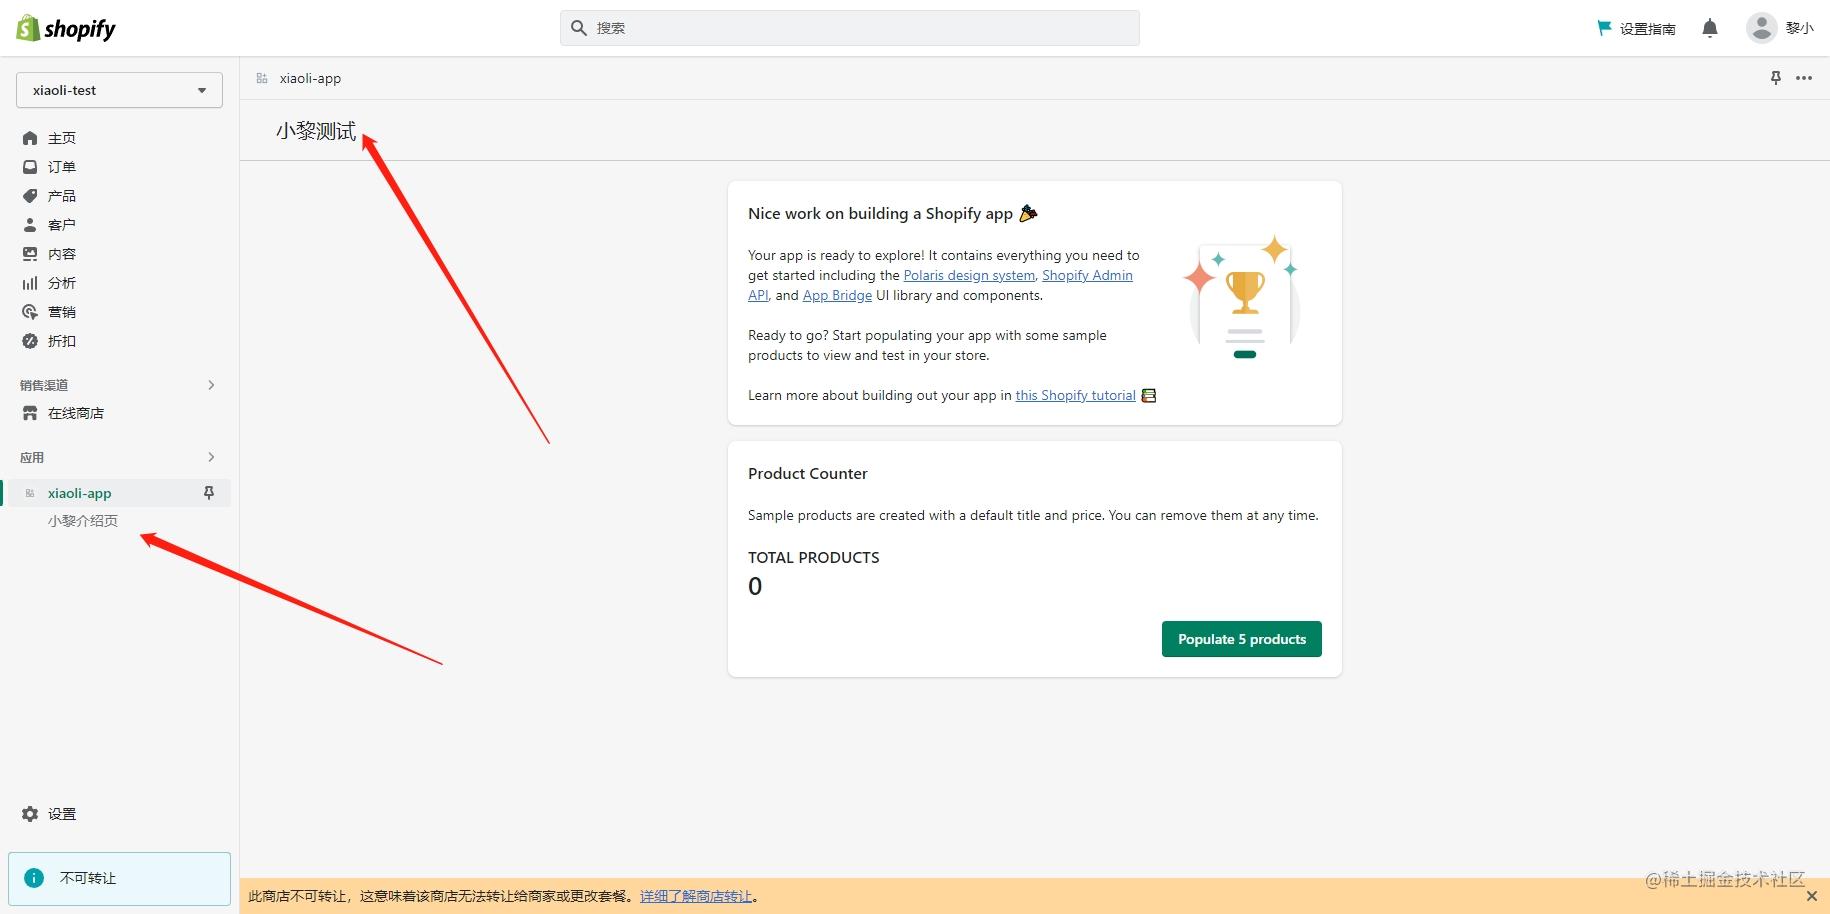
剩下功能各位大佬们开发去吧。
商店前台应用-主题应用扩展(应用程序块、应用程序嵌入块)
主题应用程序扩展为您的应用程序提供了两种扩展在线商店主题的集成类型:应用程序块和应用程序嵌入块。您提交到 Shopify 应用商店的每个新应用都需要使用主题应用扩展来与在线商店主题集成。
主题应用程序扩展允许商家轻松地将动态元素添加到他们的主题中,而无需与 Liquid 模板或代码进行交互。例如,动态元素可以包括产品评论、价格、评级或产品的交互式 3D 模型。
优点
- 主题应用程序扩展会自动在主题编辑器中公开您的应用程序。您可以利用编辑器的可视化编辑功能,而无需在您的应用程序中复制它们。
- 您可以同时将您的应用程序部署到使用它的所有在线商店。您还可以访问Shopify CDN 上的应用程序版本控制和资产托管的生命周期管理。
- 一组集成逻辑和指令适用于所有主题。
- 商家不需要手动编辑他们的主题代码。
官方文档
1. 创建应用扩展
在之前创建的xiaoli-app文件内,运行命令 npm run shopify app generate extension,我们选择 (9)Theme App Extension,然后输入扩展名称。
PS D:\Demos\Shopify-test\xiaoli-app> npm run shopify app generate extension
?  Type of extension?
   Discounts and checkout
   (1) Checkout UI
   (5) Function - Product discount
   (6) Function - Shipping discount
   (7) Post-purchase UI
   Merchant admin
   (8) Subscription UI
   Online store
>  (9) Theme App Extension
   Analytics
   (10) Web Pixel
   Press ↑↓ arrows to select, enter to confirm
?  Type of extension?
✔  Theme App Extension
?  Your extension's working name?
✔  xiaoli-extension
╭─ success ─────────────────────────────────────────────────────────────────────────────────────────────────────────────────────────────────────────────────────────────────────╮
│                                  │
│  Theme App Extension extension was added to your project!                       │
│                                  │
│  Next steps                      │
│    • To find your extension, remember to `cd extensions/xiaoli-extension`       │
│    • To preview your project, run `npm run dev`                                 │
│                                  │
╰───────────────────────────────────────────────────────────────────────────────────────────────────────────────────────────────────────────────────────────────────────────────╯
   ╭───────────────────────────────────────────────────────────────╮
   │                │
   │     New major version of npm available! 6.14.13 -> 9.4.1      │
   │   Changelog: https://github.com/npm/cli/releases/tag/v9.4.1   │
   │               Run npm install -g npm to update!               │
   │                │
   ╰───────────────────────────────────────────────────────────────╯
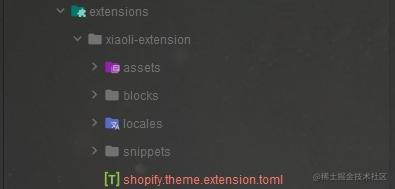
创建成功后,文件中多了一个extensions文件
2. 主题扩展介绍
我们先来看一下文件目录
└── extensions
  └── xiaoli-extension
      ├── assets
      ├── blocks
      ├── snippets
      ├── locales
      └── shopify.theme.extension.toml
主题扩展文件目录详解(官网)
- assets 注入到主题CSS、JavaScript 和其他静态应用内容
- blocks 应用程序块和应用程序嵌入块 Liquid 文件。
- snippets Liquid 代码段文件,这些文件是您可以在其他应用程序块和应用程序嵌入块中引用的代码位。
- locales JSON 语言环境文件以托管面向商家和面向客户的翻译。
- shopify.theme.extension.toml 基本应用配置设置的配置文件,包括扩展名称和类型
3. 编写应用插件
官方给了一个简单的应用程序块供我们测试预览(效果不够明显)
App blocks let you build powerful integrations with online store themes.
{% render "app_snippet" %}
{% schema %}
  {
    "name": "Hello World",
    "target": "section",
    "stylesheet": "app.css",
    "javascript": "app.js",
    "settings": [
        { "label": "Color", "id": "color", "type": "color", "default": "#000000" }
    ]
  }
{% endschema %}
官方还有一个主题库theme-extension-getting-started, 我们将这个库下载到本地,替换assets、blocks、snippets这几个文件,完成后目录文件如下
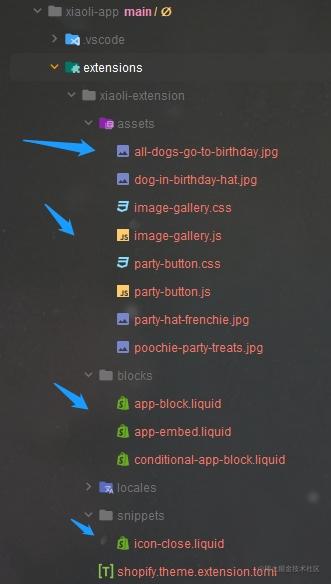
删掉每个文件内的.gitkeep文件(不删的话预览会报错)
4. 部署应用扩展创建草稿版本
创建扩展后,您可以将扩展代码部署到 Shopify。该deploy命令将应用程序更新推送到开发商店中的草稿版本。在发布到在线商店之前,您可以在沙盒环境中测试您的主题应用程序扩展。
- 运行npm run deploy
- 选择发布到小黎开发合作伙伴账户
- 提示创建或选择一个应用(连接我们之前创建的应用xiaoli-app)
- 选择 Yes, deploy to push changes发布
PS D:\Demos\Shopify-test\xiaoli-app> npm run deploy
> xiaoli-app@1.0.0 deploy D:\Demos\Shopify-test\xiaoli-app
> shopify app deploy
?  Which Partners organization is this work for?
✔  小黎开发
Before you preview your work, it needs to be associated with an app.

?  Create this project as a new app on Shopify? // connection reference
✔  Yes, create it as a new app // 这里应连接当前的应用,不需要创建一个新的
?  App Name:
✔  xiaoli-app // 连接的应用为 xiaoli-app
?  Make the following changes to your extensions in Shopify Partners?
✔  Yes, deploy to push changes
✔ Created extension xiaoli-extension.
Deploying your work to Shopify Partners. It will be part of xiaoli-extension
 theme_extensions | Running theme check on your Theme app extension...
 theme_extensions | Checking D:/Demos/Shopify-test/xiaoli-app/extensions/xiaoli-extension ...
 theme_extensions | 12 files inspected, 0 offenses detected, 0 offenses auto-correctable
╭─ success ─────────────────────────────────────────────────────────────────────────────────────────────────────────────────────────────────────────────────────────────────────╮
│                                  │
│  Deployed to Shopify!            │
│                                  │
│  Summary                         │
│    • xiaoli-extension is deployed to Shopify but not yet live                   │
│                                  │
│  Next steps                      │
│    • Publish xiaoli-extension ( https://partners.shopify.com/2804053/apps/27757379585/extensions/theme_app_extension/20693712897 )                                            │
│                                  │
╰───────────────────────────────────────────────────────────────────────────────────────────────────────────────────────────────────────────────────────────────────────────────╯
PS D:\Demos\Shopify-test\xiaoli-app>
完成上述步骤后,我们的应用扩展便部署到了线上。可以看到控制台Next steps,点击链接进入合作伙伴管理后台。
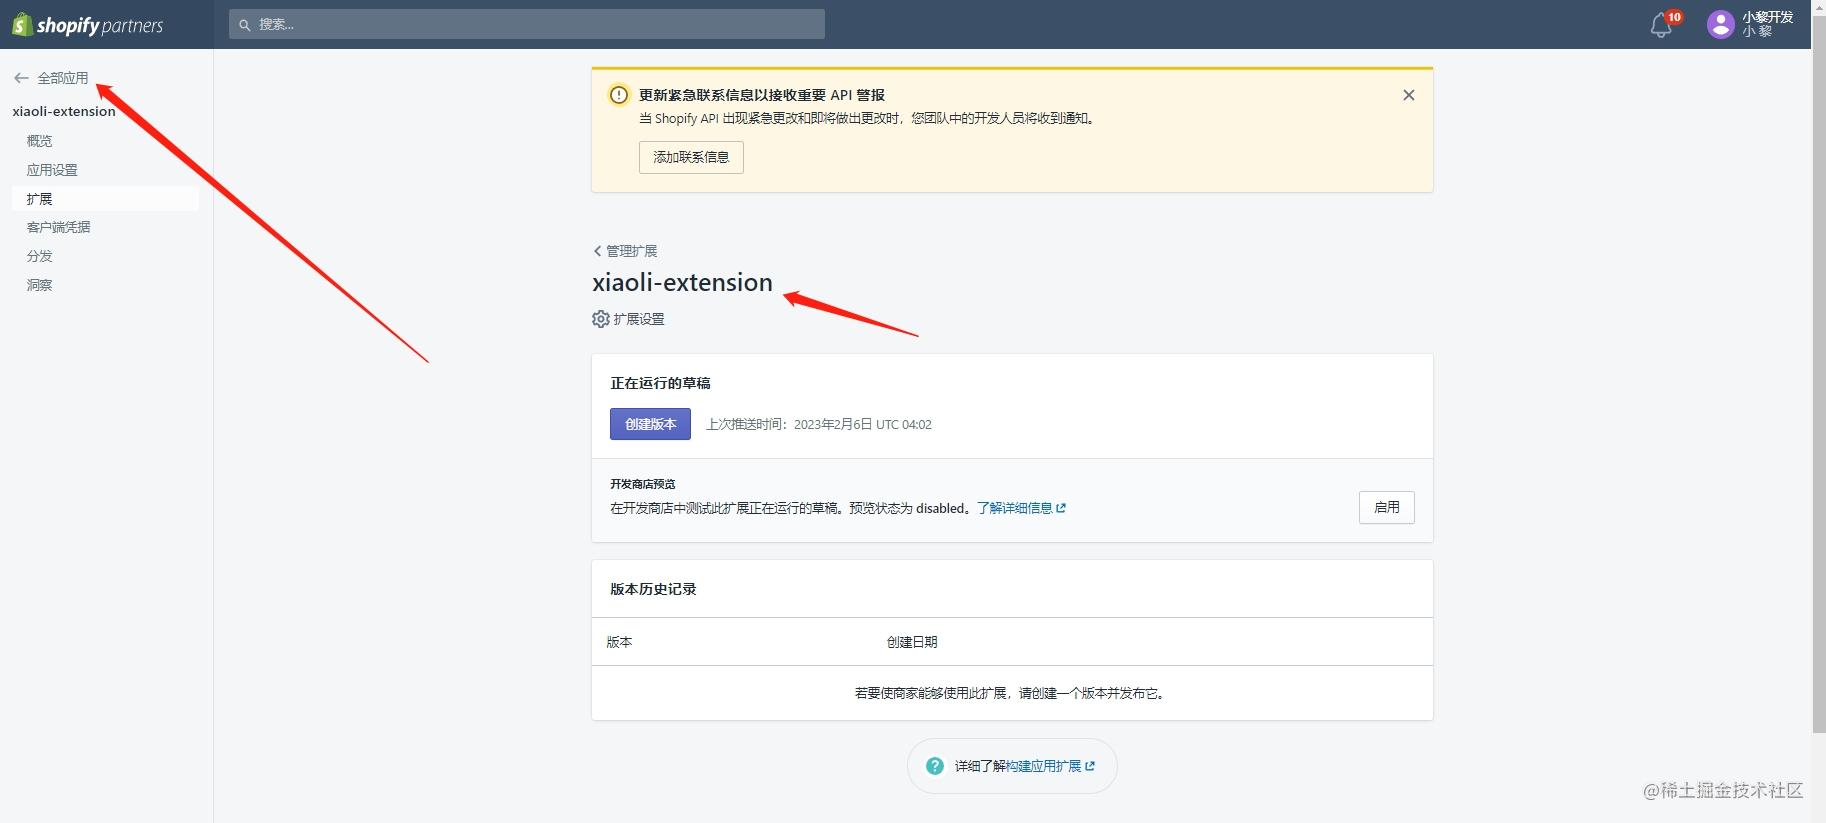
- 在开发商店预览区域点击启用
- 创建版本v0.1.0,点击发布该版本
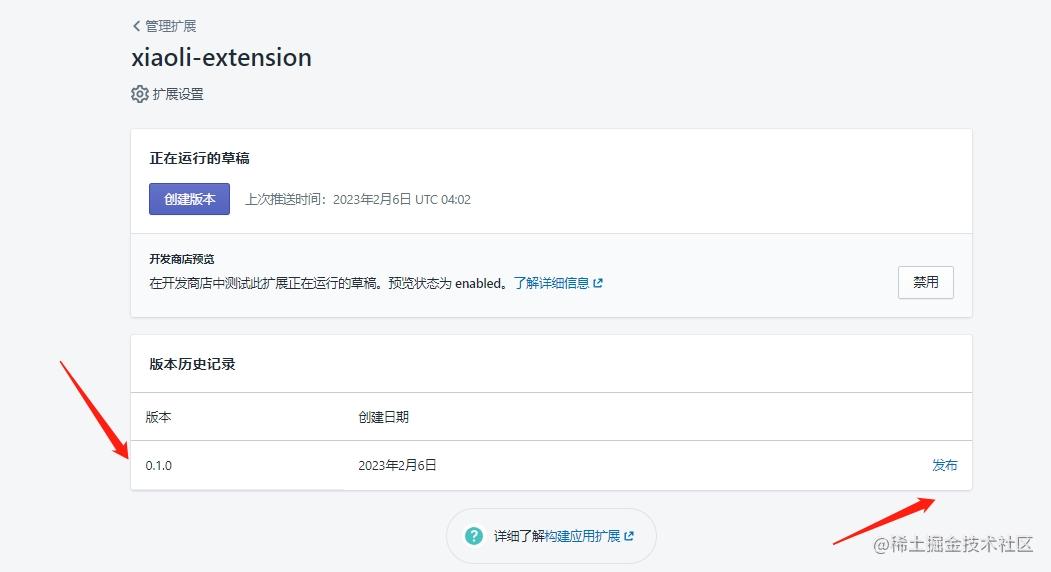
发布完成后需要等待5分钟…
4. 使用并预览应用扩展
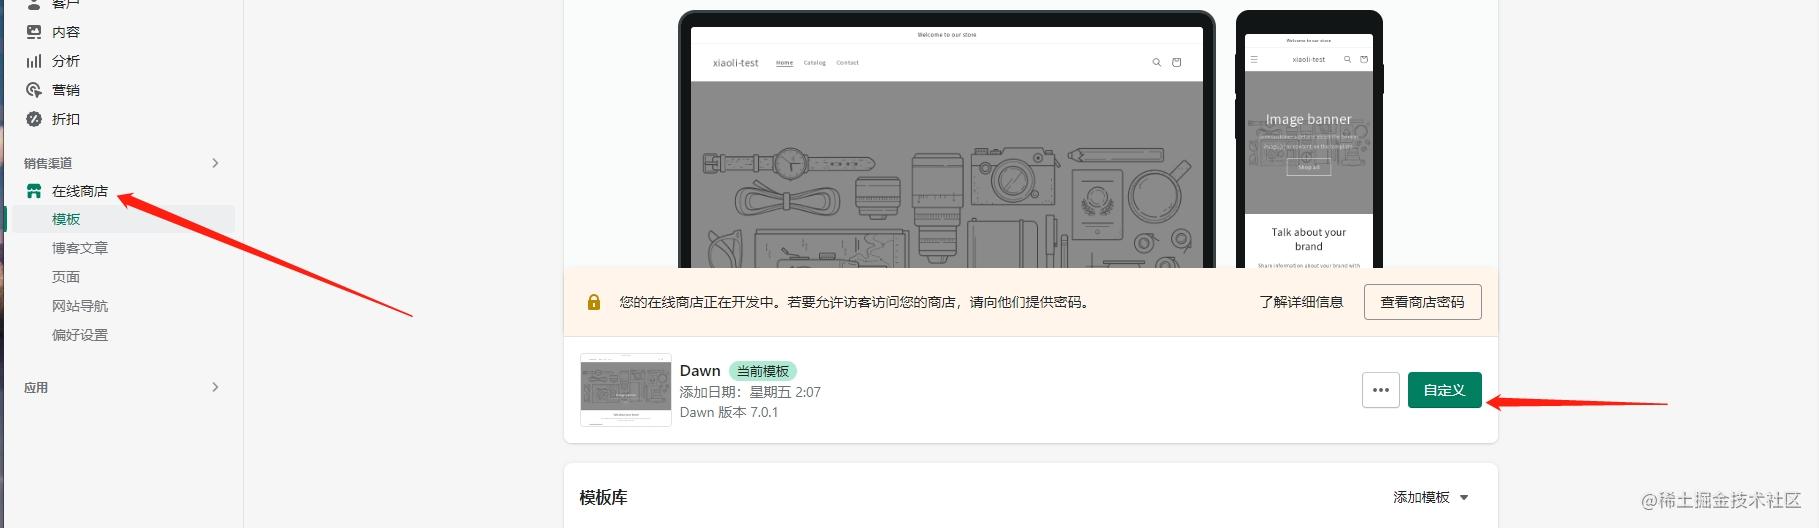
完成部署及发布后,便可以使用代码块、应用嵌入。在商城后台点击在线商店,然后点击自定义按钮进入。
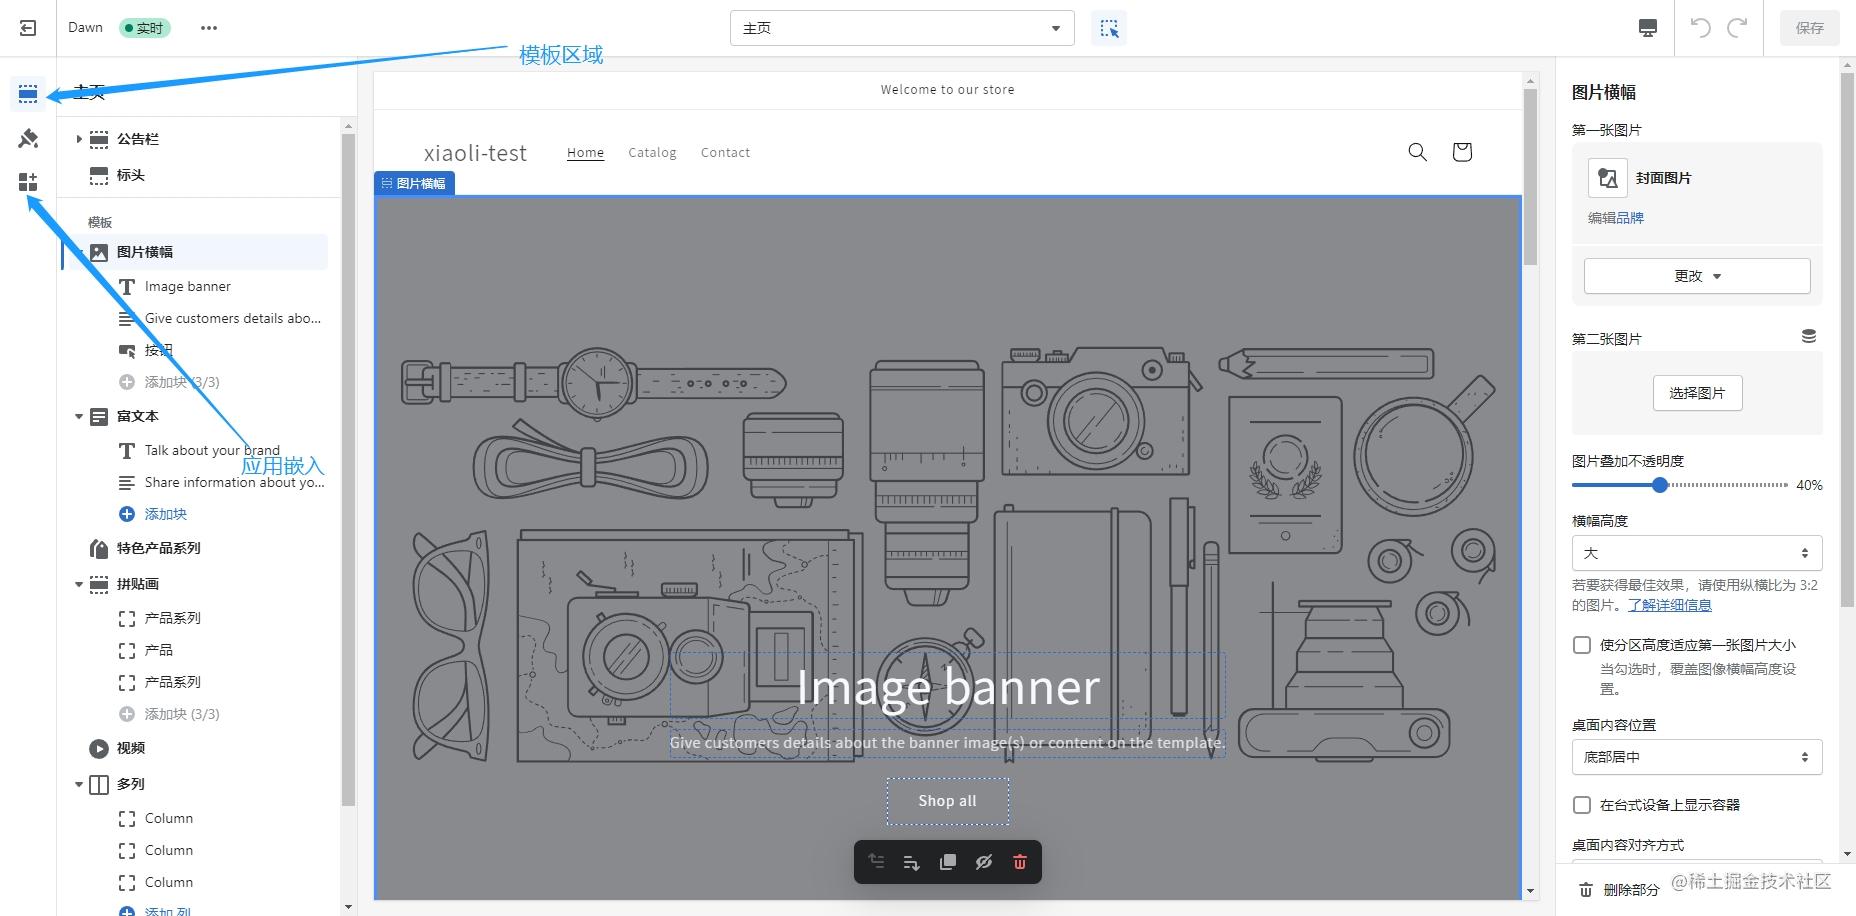
此时我们进入到了在线商店编辑页,左侧导航分别为模板区域、模板设置、应用嵌入等。
应用块
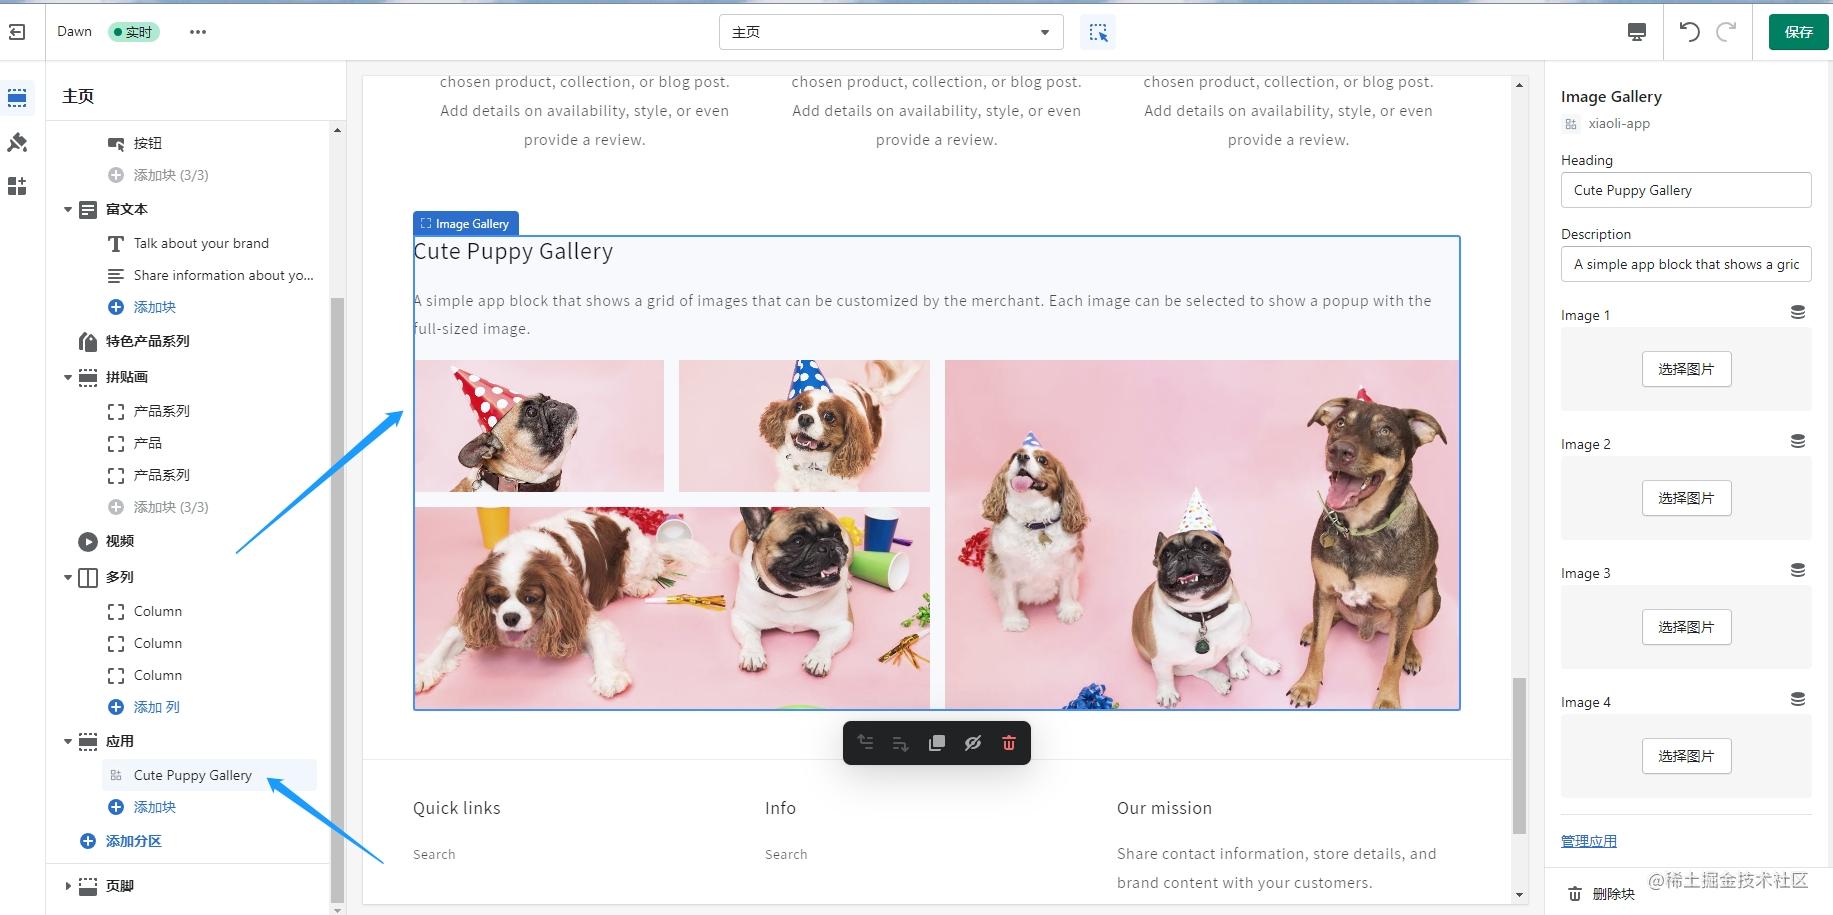
在模板区域,点击添加分区,选择我们的应用块。

现在我们看到页面新加入了一个图片区域,这就是我们应用块。
点击右上角保存按钮,即可在线上商城预览。
此代码块对应文件地址为 xiaoli-extension/blocks/app-block.liquid
应用嵌入
在应用嵌入区域,可以看到我们开发的Party嵌入应用,点击开关并保存。
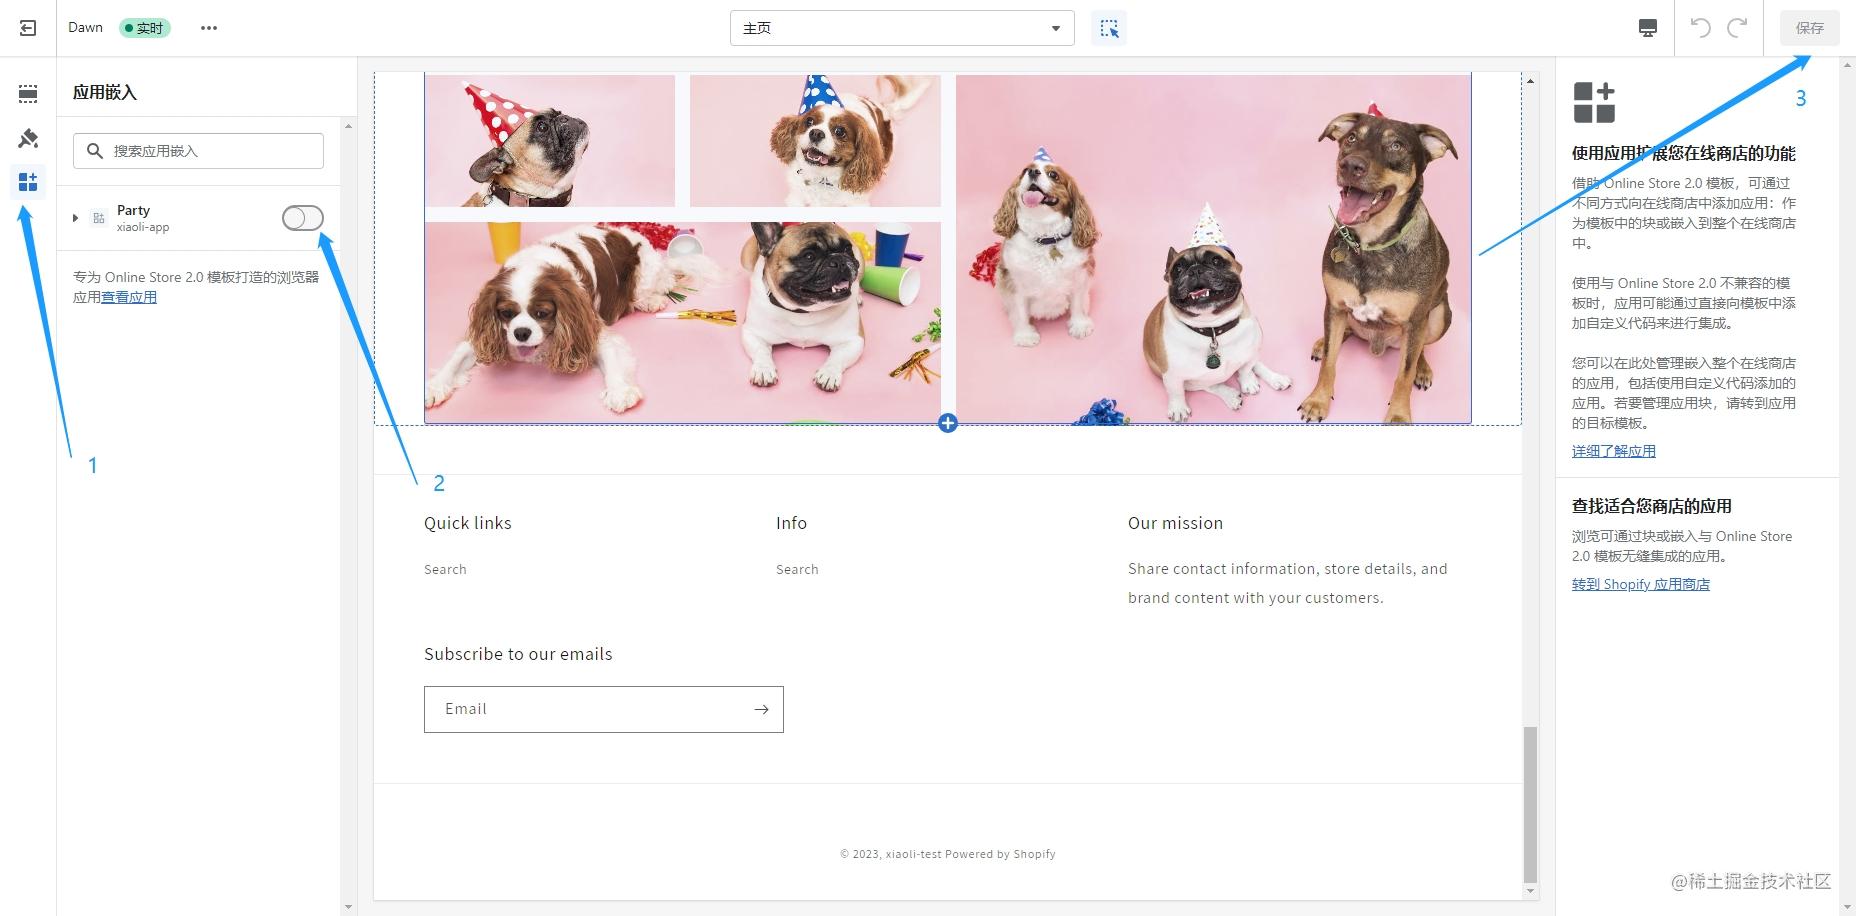
此时右下角出现了一个悬浮的圆形按钮(狗头像),这里是一个动画效果。
5. 主题应用扩展结构
在blocks目录下找到
app-block.liquid(应用块)
{% schema %}
  {
    "name": "Image Gallery",
    "target": "section",
    "stylesheet": "image-gallery.css",
    "javascript": "image-gallery.js",
    "templates": ["product", "index"],
    "settings": [
      {
        "type": "text",
        "id": "heading",
        "label": "Heading",
        "default": "Cute Puppy Gallery"
      },
      {
        "type": "text",
        "id": "description",
        "label": "Description",
        "default": "A simple app block that shows a grid of images that can be customized by the merchant. Each image can be selected to show a popup with the full-sized image."
      },
      {
        "type": "image_picker",
        "id": "image_1",
        "label": "Image 1"
      },
      {
        "type": "image_picker",
        "id": "image_2",
        "label": "Image 2"
      },
      {
        "type": "image_picker",
        "id": "image_3",
        "label": "Image 3"
      },
      {
        "type": "image_picker",
        "id": "image_4",
        "label": "Image 4"
      }
    ]
  }
{% endschema %}
app-embed.liquid(嵌入应用)
{% schema %} { "name": "Party", "target": "body", "stylesheet": "image-gallery.css", "javascript": "party-button.js", "settings": [] } {% endschema %}- name 应用程序块或应用程序嵌入块的主题编辑器中的标题。
- target 应用程序块的值为section. 应用程序嵌入块的值为head和body。
- javascript 从assets子目录加载的 JavaScript 文件,仅当页面上存在该块时才会加载这些资产。无论块在页面上出现多少次,它也只会加载一次。
- stylesheet 从assets子目录加载的 Css 文件,只引入一次。
- templates 可以在其中呈现块的模板,默认为所有页面。
- settings 向商家提供的用于自定义应用程序块或应用程序嵌入块的设置;选择块时,这些设置会出现在主题编辑器(右侧)中。可以使用设置Liquid 对象访问设置值。
官网地址
主题
主题决定了 Shopify在线商店的外观、感觉和功能对于商家及其客户的方式。
Shopify 主题是使用 Shopify 的主题模板语言Liquid以及 HTML、CSS、JavaScript 和 JSON 构建的。
官方文档
1. 设置开发环境
macOS (Homebrew)
brew tap shopify/shopify
brew install shopify-cli
Windows 和 Linux (npm)
npm install -g @shopify/cli @shopify/theme
2. 初始化主题
运行shopify theme init命令后,提示我们输入主题的名称,这里我输入xiaoli-theme;首次预览时需要登录,
PS D:\Demos\Shopify-test> shopify theme init
?  Name of the new theme:
✔  xiaoli-theme
3. 启动本地开发服务器预览主题
进入xiaoli-theme目录,运行shopify theme dev --store {store}(store为开发商店的名称);首次预览时需要登录,控制台提示Press any key to open the login page on your browser 时按下center打开新网页,选择账号登录。
PS D:\Demos\Shopify-test> cd xiaoli-theme
PS D:\Demos\Shopify-test\xiaoli-theme> shopify theme dev --store xiaoli-test
To run this command, log in to Shopify Partners.
👉 Press any key to open the login page on your browser
✔ Logged in.
┏━━ Viewing theme… ━━━━━━━━━━━━━━━━━━━━━━━━━━━━━━━━━━━━━━━━━━━━━━━━━━━━━━━━━━━━━
┃ * Syncing theme #143515222338 on xiaoli-test.myshopify.com
┃                            100%
┃
┃ Serving .
┃
┃ Please open this URL in your browser:
┃ http://127.0.0.1:9292
┃
┃ Customize this theme in the Theme Editor, and use 'theme pull' to get the changes:
┃ https://xiaoli-test.myshopify.com/admin/themes/143515222338/editor
┃
┃ Share this theme preview:
┃ https://xiaoli-test.myshopify.com/?preview_theme_id=143515222338
┃
┃ (Use Ctrl-C to stop)
┗━━━━━━━━━━━━━━━━━━━━━━━━━━━━━━━━━━━━━━━━━━━━━━━━━━━━━━━━━━━━━━━━━━ (11.03s)
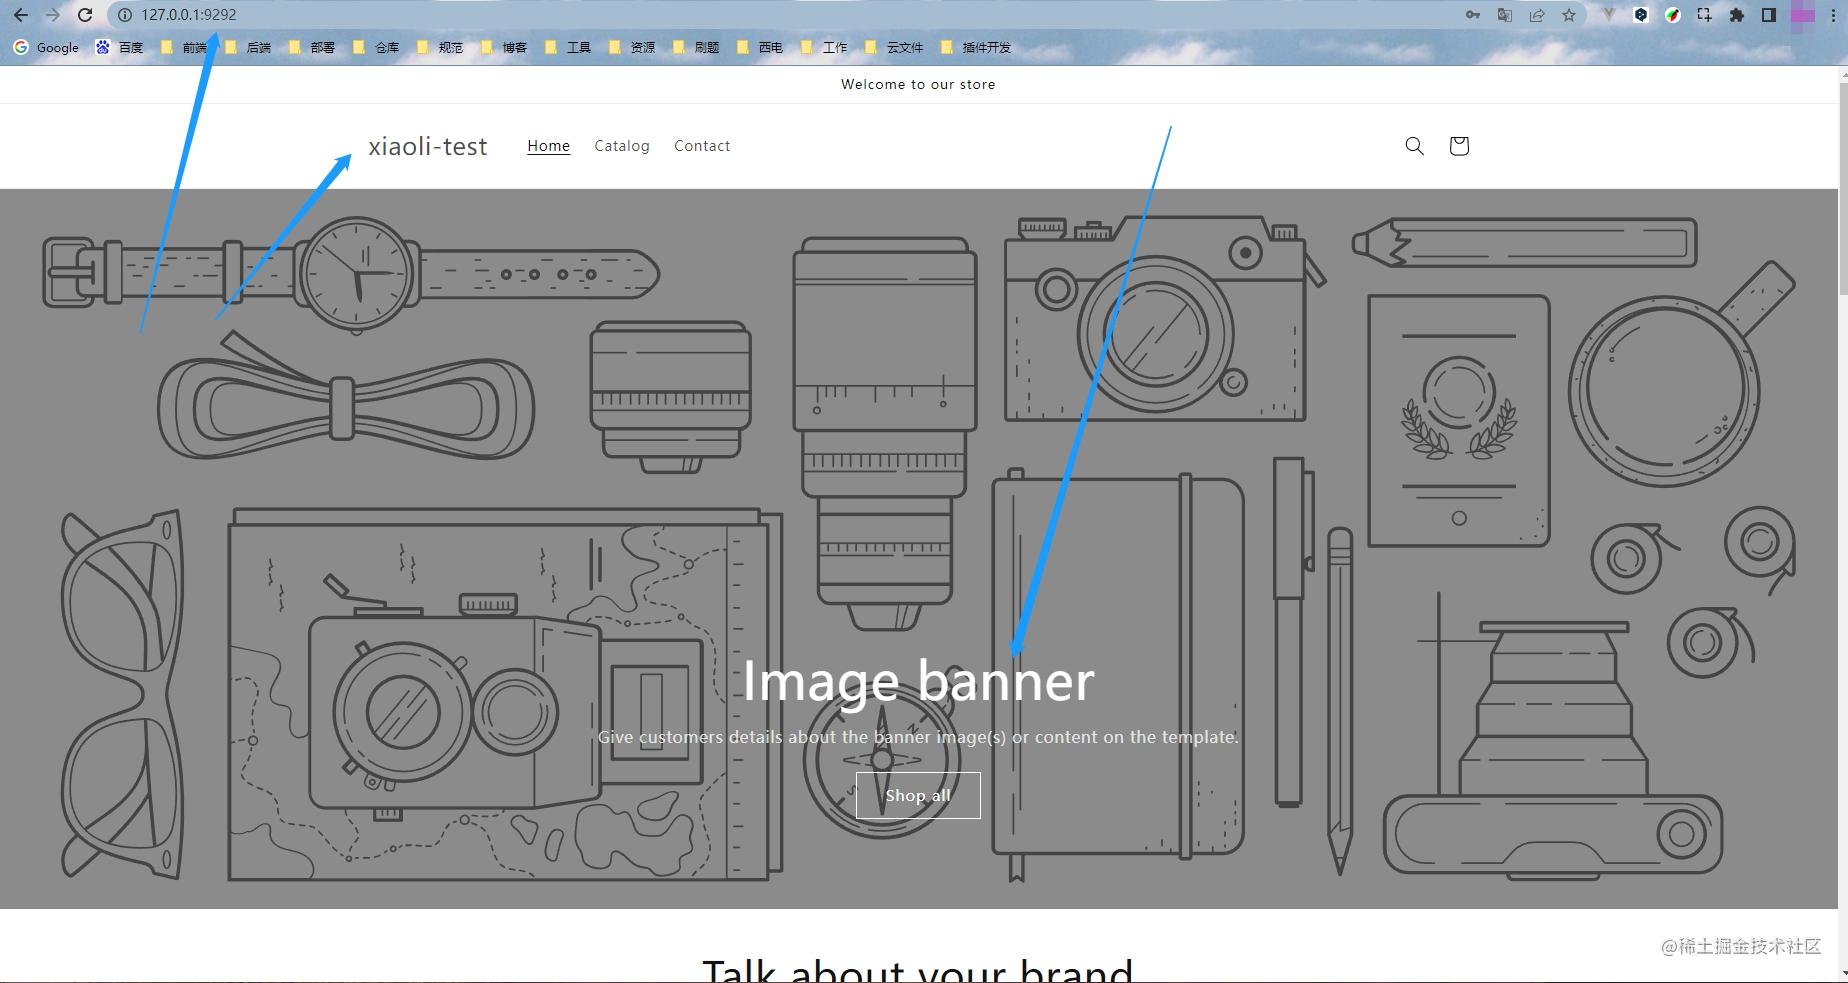
打开 http://127.0.0.1:9292 ,输入商城密码,预览主题。
4. 测试更改主题
更改templates/index.json文件的image_banner
"image_banner": {
  "blocks": {
    "heading": {
      "type": "heading",
      "settings": {
        "heading": "小黎宣传图banner",
        "heading_size": "h0"
      }
    }
  }
}
保存后预览
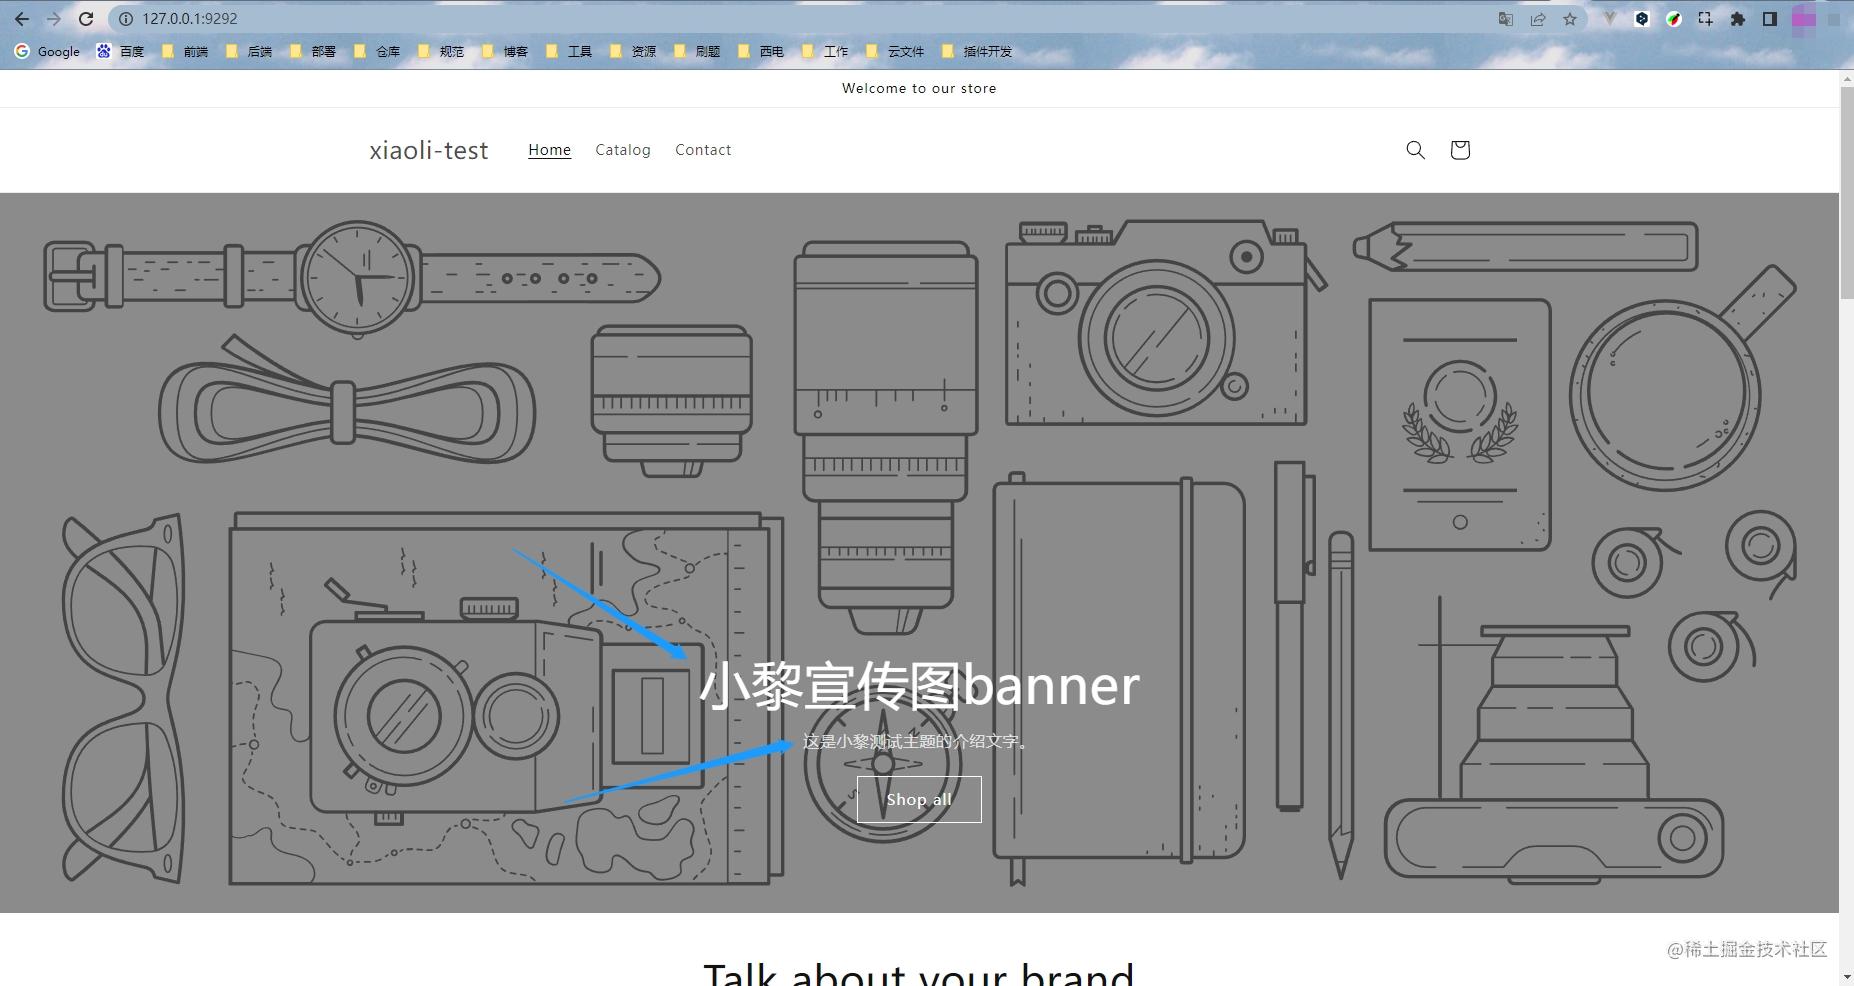
image_banner 区域的文字已经改变。
5. 上传主题到商店
运行shopify theme push --unpublished命令,输入主题名称xiaoli-theme。
PS D:\Demos\Shopify-test\xiaoli-theme> shopify theme push --unpublished
? Theme name
> xiaoli-theme
┏━━ Pushing theme files to xiaoli-theme (#143516729666) on xiaoli-test.myshopify.com
┃                            100%
┗━━━━━━━━━━━━━━━━━━━━━━━━━━━━━━━━━━━━━━━━━━━━━━━━━━━━━━━━━━━━━━━━━━ (69.02s) ━━━
√ Your theme was pushed successfully
  View your theme:
  https://xiaoli-test.myshopify.com/?preview_theme_id=143516729666
  Customize this theme in the Theme Editor:
  https://xiaoli-test.myshopify.com/admin/themes/143516729666/editor
上传完成后,打开开发商店后台,点击在线商店,我们可以看到刚上传的xiaoli-theme主题。
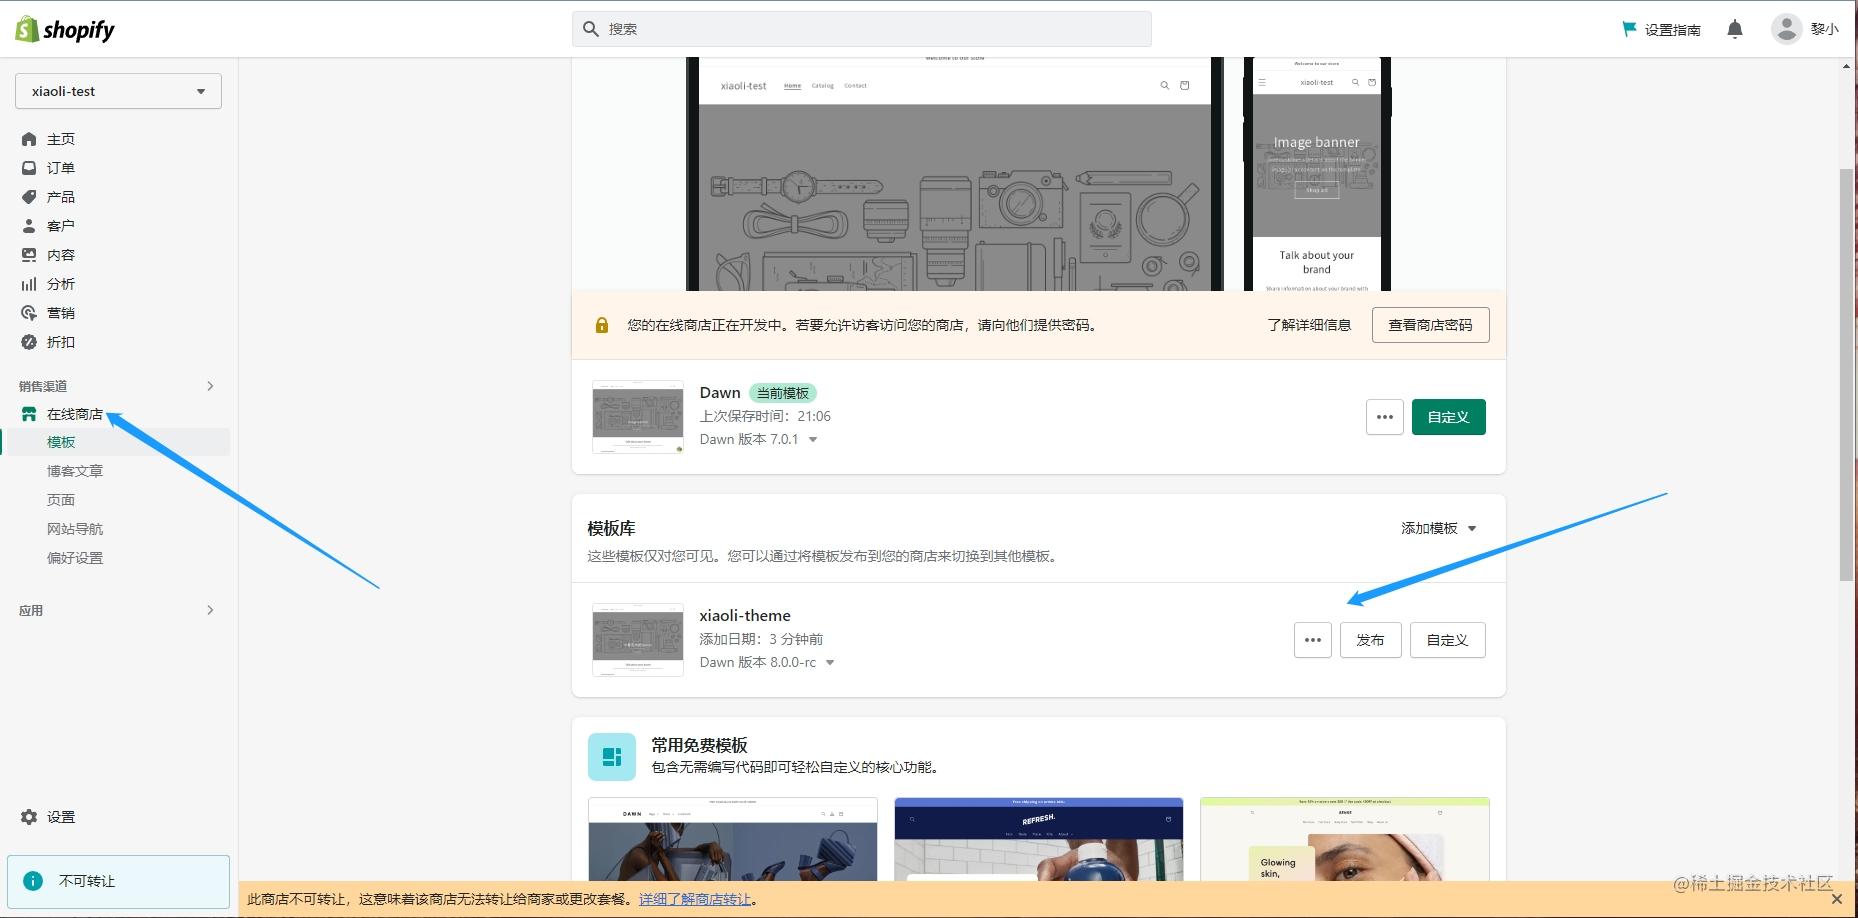
6. 发布主题
若主题已开发完成,可在商店后台模板库区域点击发布或运行命令shopify theme publish
7. 使用vue开发主题
Vue+Tailwind Css 主题开发环境-github地址
文档地址
定制商店
自定义店面是构建无头商务的模型,其中店面的前端和后端相互独立。您构建前端。商家在其定制店面体验背后使用 Shopify 的商务引擎。
优点
- 灵活性:Storefront API 与设备和平台无关。您可以使用任何编程语言构建自定义店面,这使您的工作流程更加灵活。
- 定制:您可以构建一个随着商家业务的增长和调整而变化的解决方案。随着客户趋势和交互的变化,商务解决方案可以快速适应客户获取方面的长期市场变化。
- 集成:带来您自己的工具、技术堆栈和经验,并将您的自定义后端与 Shopify 商务数据集成。
Hydrogen
Hydrogen 是用于构建Shopify 自定义店面的前端 Web 开发框架。它包括您入门所需的结构、组件和工具,因此您可以花时间设计和设计功能,使您的品牌独一无二。
在线预览项目地址
1. 创建 Hydrogen 应用
运行命令npm init @shopify/hydrogen,选择模板、语言,输入名称。
Windows PowerShell
版权所有 (C) Microsoft Corporation。保留所有权利。
PS D:\Demos\Shopify-test> npm init @shopify/hydrogen
?  Choose a template :
>  Demo Store
   Hello World
✔  Demo Store
?  Choose a language :
   JavaScript
>  TypeScript
✔  TypeScript
?  Name your new Hydrogen storefront:
✔  xiaoli-custom
✨ xiaoli-hydrogen is ready to build!
🚀 Run npm run dev to start your local development server and start building.
📚 Docs: Quick start guide ( https://shopify.dev/custom-storefronts/hydrogen )
👋 Note: your project will display inventory from the Hydrogen Demo Store. To connect this project to your Shopify store’s inventory instead, update xiaoli-hydrogen/hydrogen.config.js with your store ID and Storefront API key.
PS D:\Demos\Shopify-test>
2. 运行
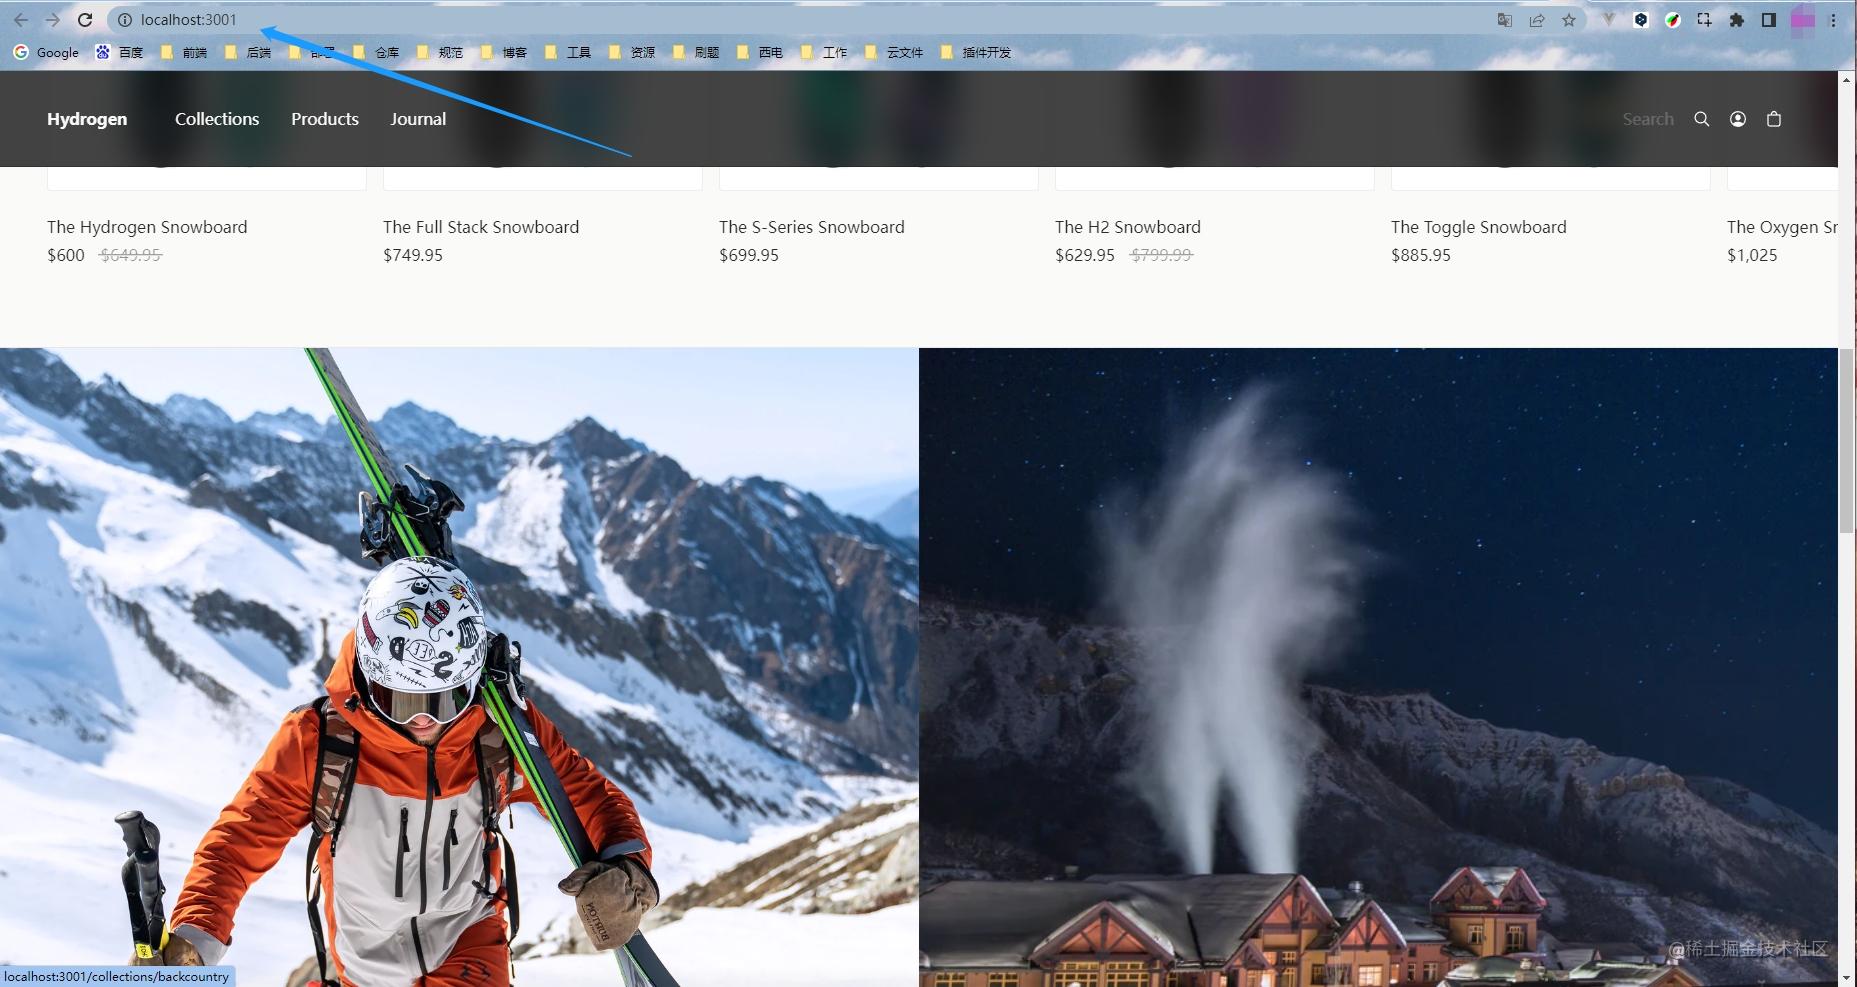
更新hydrogen.config.js 文件内的store ID 、Storefront API key(只预览可忽略)。
运行npm run dev,访问 http://localhost:3000 查看商城。
若报错
SyntaxError: Unexpected token '??=
请检查 Node.js版本16.14.0+
3. 目录结构
官方地址
└── src
    ├── assets
    │   ├── favicon.svg   // Hydrogen favicon
    ├── components // Objects that contain business logic for commerce concepts
    │   └── account // Components that render account information
    |   │   └── AccountActivateForm.client.tsx
    |   │   └── AccountAddressBook.client.tsx
    |   │   └── AccountAddressEdit.client.tsx
    |   │   └── ...
    │   └── cards // Components that render card elements
    |   │   └── ArticleCard.tsx
    |   │   └── CollectionCard.server.tsx
    |   │   └── OrderCard.client.tsx
    |   │   └── ...
    │   └── cart // Components that render cart elements
    |   │   └── CartDetails.client.tsx
    |   │   └── CartEmpty.client.tsx
    |   │   └── CartLineItem.client.tsx
    |   │   └── ...
    │   └── elements // Components that provide small chunks of reusable content
    |   │   └── Button.tsx
    |   │   └── Grid.tsx
    |   │   └── Heading.tsx
    |   │   └── ...
    │   └── global // Components that render global elements on a page
    |   │   └── CartDrawer.client.tsx
    |   │   └── Drawer.client.tsx
    |   │   └── Footer.client.tsx
    |   │   └── ...
    │   └── product // Components that render product information
    |   │   └── ProductDetail.client.tsx
    |   │   └── ProductForm.client.tsx
    |   │   └── ProductGallery.client.tsx
    |   │   └── ...
    │   └── search // Components that provide search functionality
    |   │   └── NoResultRecommendations.server.tsx
    |   │   └── SearchPage.server.tsx
    |   │   └── ...
    │   └── sections // Components that provide specific pieces of content on a page
    |   │   └── FeaturedCollections.tsx
    |   │   └── Hero.tsx
    |   │   └── ProductSwimlane.server.tsx
    |   │   └── ...
    │   └── CountrySelector.client.tsx // A client component that selects the appropriate country to display for products on a website
    │   └── CustomFont.client.tsx // Custom fonts for your Hydrogen storefront
    │   └── HeaderFallback.tsx // A fallback for the Header component
    │   └── index.server.ts
    │   └── index.ts
    ├── lib // Libraries and utilities
    |   │   └── const.ts
    |   │   └── fragments.ts
    |   │   └── index.ts
    |   │   └── ...
    ├── routes // Navigational areas within the Demo Store
    |   │   └── account
    |   │   └── api
    |   │   └── collections
    |   │   └── ...
    ├── styles // Styling in the Demo Store
    |   │   └── index.css
    |   │   └── custom-font.css
    ├── App.server.tsx // Your app's top-level React component
市场
待定…
余音
今年首篇文给了Shopify,本文篇幅较长,难免会有疏漏、错误的地方;发现有误处,请及时指正,小黎会第一时间更正🙏。欢迎大家一键三连~