不知道大家有没有像我这样的困惑,就是加了注意力机制到自己网络里面之后,算法性能提升不大,不知道自己添加的注意力有没有关注自己所希望关注的地方,于是就想验证自己的注意力是否有用,然后又不知道怎么验证它。
反正我被这个问题困惑了好久,经过几天CSDN的“拾荒“”,我总算了解了如何将注意力热力图添加到自己的网络中,现在我将以一个通用的例子举例,然后再将其应用到我自己的网络中:
1.首先我们需要构建一个极简的网络:
from PIL import Image
import torchvision
import cv2
import numpy as np
from collections import OrderedDict
import torch
import torch.nn as nn
class MDNet(nn.Module):
    def __init__(self, model_path=None, K=1):
        super(MDNet, self).__init__()
        self.avgpool=nn.AdaptiveAvgPool2d(1)
        self.layers=nn.Sequential(OrderedDict([
                ('conv1', nn.Sequential(nn.Conv2d(3, 96, kernel_size=7, stride=2),
                                        nn.ReLU(inplace=True),
                                        nn.LocalResponseNorm(2),
                                        nn.MaxPool2d(kernel_size=3, stride=2))),
                ('conv2', nn.Sequential(nn.Conv2d(96, 256, kernel_size=5, stride=2),
                            nn.ReLU(inplace=True),
                            nn.LocalResponseNorm(2),
                            nn.MaxPool2d(kernel_size=3, stride=2))),
                ('features', nn.Sequential(nn.Conv2d(3, 512, kernel_size=3, stride=1),
                                  nn.ReLU(inplace=True))),
                ('fc4', nn.Sequential(nn.Linear(500, 512),
                                  nn.ReLU(inplace=True))),
                ('fc5', nn.Sequential(nn.Dropout(0.5),
                                  nn.Linear(500, 512),
                                  nn.ReLU(inplace=True)))
        ]))
    def forward(self, x):
        avg_result = self.avgpool(x)
        output = self.layers(x)
        return output
if __name__ == '__main__':
    net = MDNet()
其次将该模型保存下来,即在代码中添加:
def save_model(model):
    torch.save(obj=model, f='B.pth')
具体代码如下:
from PIL import Image
import torchvision
import cv2
import numpy as np
from collections import OrderedDict
import torch
import torch.nn as nn
class MDNet(nn.Module):
    def __init__(self, model_path=None, K=1):
        super(MDNet, self).__init__()
        self.avgpool=nn.AdaptiveAvgPool2d(1)
        self.layers=nn.Sequential(OrderedDict([
                ('conv1', nn.Sequential(nn.Conv2d(3, 96, kernel_size=7, stride=2),
                                        nn.ReLU(inplace=True),
                                        nn.LocalResponseNorm(2),
                                        nn.MaxPool2d(kernel_size=3, stride=2))),
                ('conv2', nn.Sequential(nn.Conv2d(96, 256, kernel_size=5, stride=2),
                            nn.ReLU(inplace=True),
                            nn.LocalResponseNorm(2),
                            nn.MaxPool2d(kernel_size=3, stride=2))),
                ('features', nn.Sequential(nn.Conv2d(3, 512, kernel_size=3, stride=1),
                                  nn.ReLU(inplace=True))),
                ('fc4', nn.Sequential(nn.Linear(500, 512),
                                  nn.ReLU(inplace=True))),
                ('fc5', nn.Sequential(nn.Dropout(0.5),
                                  nn.Linear(500, 512),
                                  nn.ReLU(inplace=True)))
        ]))
    def forward(self, x):
        avg_result = self.avgpool(x)
        output = self.layers(x)
        return output
def save_model(model):
    torch.save(obj=model, f='B.pth')
if __name__ == '__main__':
    net = MDNet()
    save_model(net)
    # model = torch.load(f="A.pth")
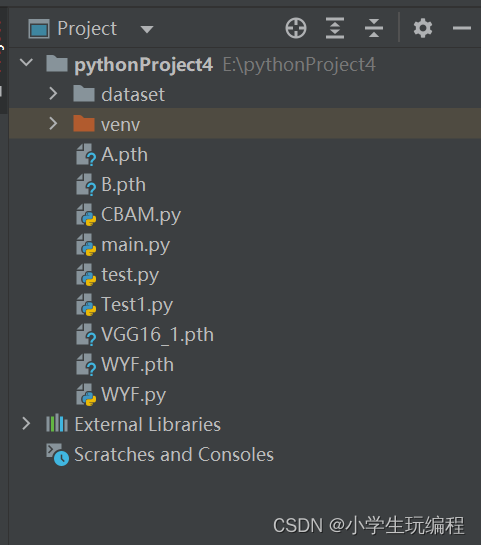
运行Python后可以看见生成了一个B.pth文件
2.使用热红外图生成图片:
#图片路径
img_path = r'C:/Users/HP/Desktop/w/1.jpg'
#给图片进行标准化操作
img = Image.open(img_path).convert('RGB')
transforms = torchvision.transforms.Compose([
    torchvision.transforms.ToTensor(),
    torchvision.transforms.Normalize([0.5, ], [0.5, ])])
data = transforms(img).unsqueeze(0)
#用于加载Pycharm中封装好的网络框架
# model = torchvision.models.vgg11_bn(pretrained=True)
#用于加载1中生成的.pth文件
model = torch.load(f="B.pth")
#打印一下刚刚生成的.pth文件看看他的网络结构
print(model)
model.eval()
#读取他fc4层图片特征
features = net.layers.Conv1(data)
features.retain_grad()
# t = model.avgpool(features)
# t = t.reshape(1, -1)
# output = model.classifier(t)[0]
# pred = torch.argmax(output).item()
# pred_class = output[pred]
#
# pred_class.backward()
grads = features.grad
features = features[0]
# avg_grads = torch.mean(grads[0], dim=(1, 2))
# avg_grads = avg_grads.expand(features.shape[1], features.shape[2], features.shape[0]).permute(2, 0, 1)
# features *= avg_grads
heatmap = features.detach().cpu().numpy()
heatmap = np.mean(heatmap, axis=0)
heatmap = np.maximum(heatmap, 0)
heatmap /= (np.max(heatmap) + 1e-8)
img = cv2.imread(img_path)
heatmap = cv2.resize(heatmap, (img.shape[1], img.shape[0]))
heatmap = np.uint8(255 * heatmap)
heatmap = cv2.applyColorMap(heatmap, cv2.COLORMAP_JET)
superimposed_img = np.uint8(heatmap * 0.5 + img * 0.5)
cv2.imshow('1', superimposed_img)
cv2.waitKey(0)
3.总代码:
from PIL import Image
import torchvision
import cv2
import numpy as np
from collections import OrderedDict
import torch
import torch.nn as nn
class MDNet(nn.Module):
    def __init__(self, model_path=None, K=1):
        super(MDNet, self).__init__()
        self.avgpool=nn.AdaptiveAvgPool2d(1)
        self.layers=nn.Sequential(OrderedDict([
                ('conv1', nn.Sequential(nn.Conv2d(3, 96, kernel_size=7, stride=2),
                                        nn.ReLU(inplace=True),
                                        nn.LocalResponseNorm(2),
                                        nn.MaxPool2d(kernel_size=3, stride=2))),
                ('conv2', nn.Sequential(nn.Conv2d(96, 256, kernel_size=5, stride=2),
                            nn.ReLU(inplace=True),
                            nn.LocalResponseNorm(2),
                            nn.MaxPool2d(kernel_size=3, stride=2))),
                ('features', nn.Sequential(nn.Conv2d(256, 512, kernel_size=3, stride=1),
                                  nn.ReLU(inplace=True))),
                # ('fc4', nn.Sequential(nn.Linear(500, 512),
                #                   nn.ReLU(inplace=True))),
                # ('fc5', nn.Sequential(nn.Dropout(0.5),
                #                   nn.Linear(500, 512),
                #                   nn.ReLU(inplace=True)))
        ]))
    def forward(self, x):
        avg_result = self.avgpool(x)
        output = self.layers(x)
        return output
def save_model(model):
    torch.save(obj=model, f='B.pth')
if __name__ == '__main__':
    # 图片路径
    img_path = r'I:/2.jpg'
    # 给图片进行标准化操作
    img = Image.open(img_path).convert('RGB')
    transforms = torchvision.transforms.Compose([
        torchvision.transforms.ToTensor(),
        torchvision.transforms.Normalize([0.5, ], [0.5, ])])
    data = transforms(img).unsqueeze(0)
    # 用于加载Pycharm中封装好的网络框架
    # model = torchvision.models.vgg11_bn(pretrained=True)
    # 用于加载1中生成的.pth文件
    model = torch.load(f="B.pth")
    # 打印一下刚刚生成的.pth文件看看他的网络结构
    print(model)
    model.eval()
    #实例化
    net = MDNet()
    save_model(net)
    features=MDNet.forward(net,data)
    # model = torch.load(f="A.pth")
    features.retain_grad()
    # t = model.avgpool(features)
    # t = t.reshape(1, -1)
    # output = model.classifier(t)[0]
    # pred = torch.argmax(output).item()
    # pred_class = output[pred]
    #
    # pred_class.backward()
    grads = features.grad
    features = features[0]
    # avg_grads = torch.mean(grads[0], dim=(1, 2))
    # avg_grads = avg_grads.expand(features.shape[1], features.shape[2], features.shape[0]).permute(2, 0, 1)
    # features *= avg_grads
    heatmap = features.detach().cpu().numpy()
    heatmap = np.mean(heatmap, axis=0)
    heatmap = np.maximum(heatmap, 0)
    heatmap /= (np.max(heatmap) + 1e-8)
    img = cv2.imread(img_path)
    heatmap = cv2.resize(heatmap, (img.shape[1], img.shape[0]))
    heatmap = np.uint8(255 * heatmap)
    heatmap = cv2.applyColorMap(heatmap, cv2.COLORMAP_JET)
    superimposed_img = np.uint8(heatmap * 0.5 + img * 0.5)
    cv2.imshow('1', superimposed_img)
    cv2.waitKey(0)
原图如下:

结果图如下:

本博客大部分都来自于其他博客,我下面给出了他们的链接,以上代码全部由我测试过了,运行一点问题都没有,我的工作就是将他们汇总,然后加入一些自己的东西,以方便自己学习和大家学习,如果觉得有帮助请给我一个一键三连,有什么问题也可以在评论区讨论。
参考博客:保存和加载自己所搭建的网络模型
现有网络模型的使用与修改的学习 及ImageNet 数据集的下载
怎样得到神经网络注意力热图?(CAM方法+pytorch代码)