目录
- 【常见名词】
- 一、LLM的低资源模型微调
- 二、向量数据库
- 1、Milvus(v2.1.4):云原生自托管向量数据库(Ubuntu下)
- 1)安装(Docker Compose方式):
- 2)管理工具(仅支持Milvus 2.0 之后的):
- 3)python操作:基于pymilvus == 2.1.3
- 2、Faiss
- 3、Pinecone:完全托管的云原生向量数据库
- 4、postgreSQL+pgvector插件
- 三、LangChain+外挂知识库
- 1、简介
- 2、安装
- 3、主要的几大模块:
- 四、AI web工具
- 1、Gradio==3.28.3
- 2、Streamlit == 1.25.0
- 五、其他
- 1、FastChat
- 2、FastAPI
【常见名词】
1、token
token是LLM中处理的最小文本单元,token的分割有多种策略:
(1)基于空格分词:即以空格为分隔,将文本分割成词组。对于英文可以使用这种方式。
(2)基于词典分词:根据预设的词典,在词典中可以匹配到的词组作为一个token;
(3)基于字节对齐分词:按照字节个数将文本分割,常见的中文模型使用2字节或3字节对;
(4)基于子词分词:将单词拆分为更小的子词组成token,例如"learning"可以拆分为[“learn”,“##ing”];
(5)BPE分词:通过统计学将高频词组 合并 为一个token。(GPT系列采用的方式:是一种基于数据压缩原理的算法,它可以根据语料库中出现频率最高的字节对(byte pair)来合并字节,从而生成新的字节。)
一、LLM的低资源模型微调
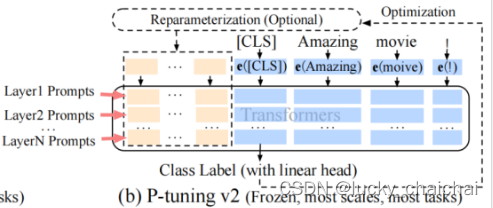
(1)p tuning v2
(2)Lora
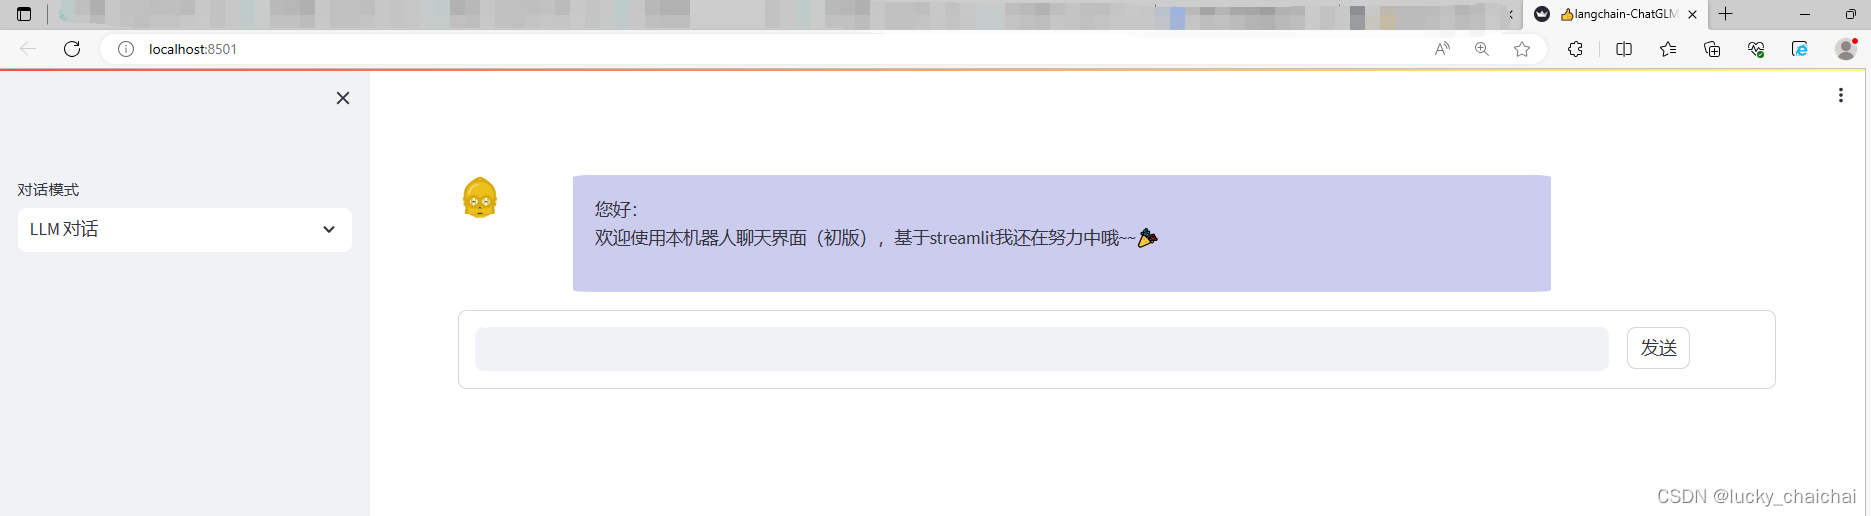
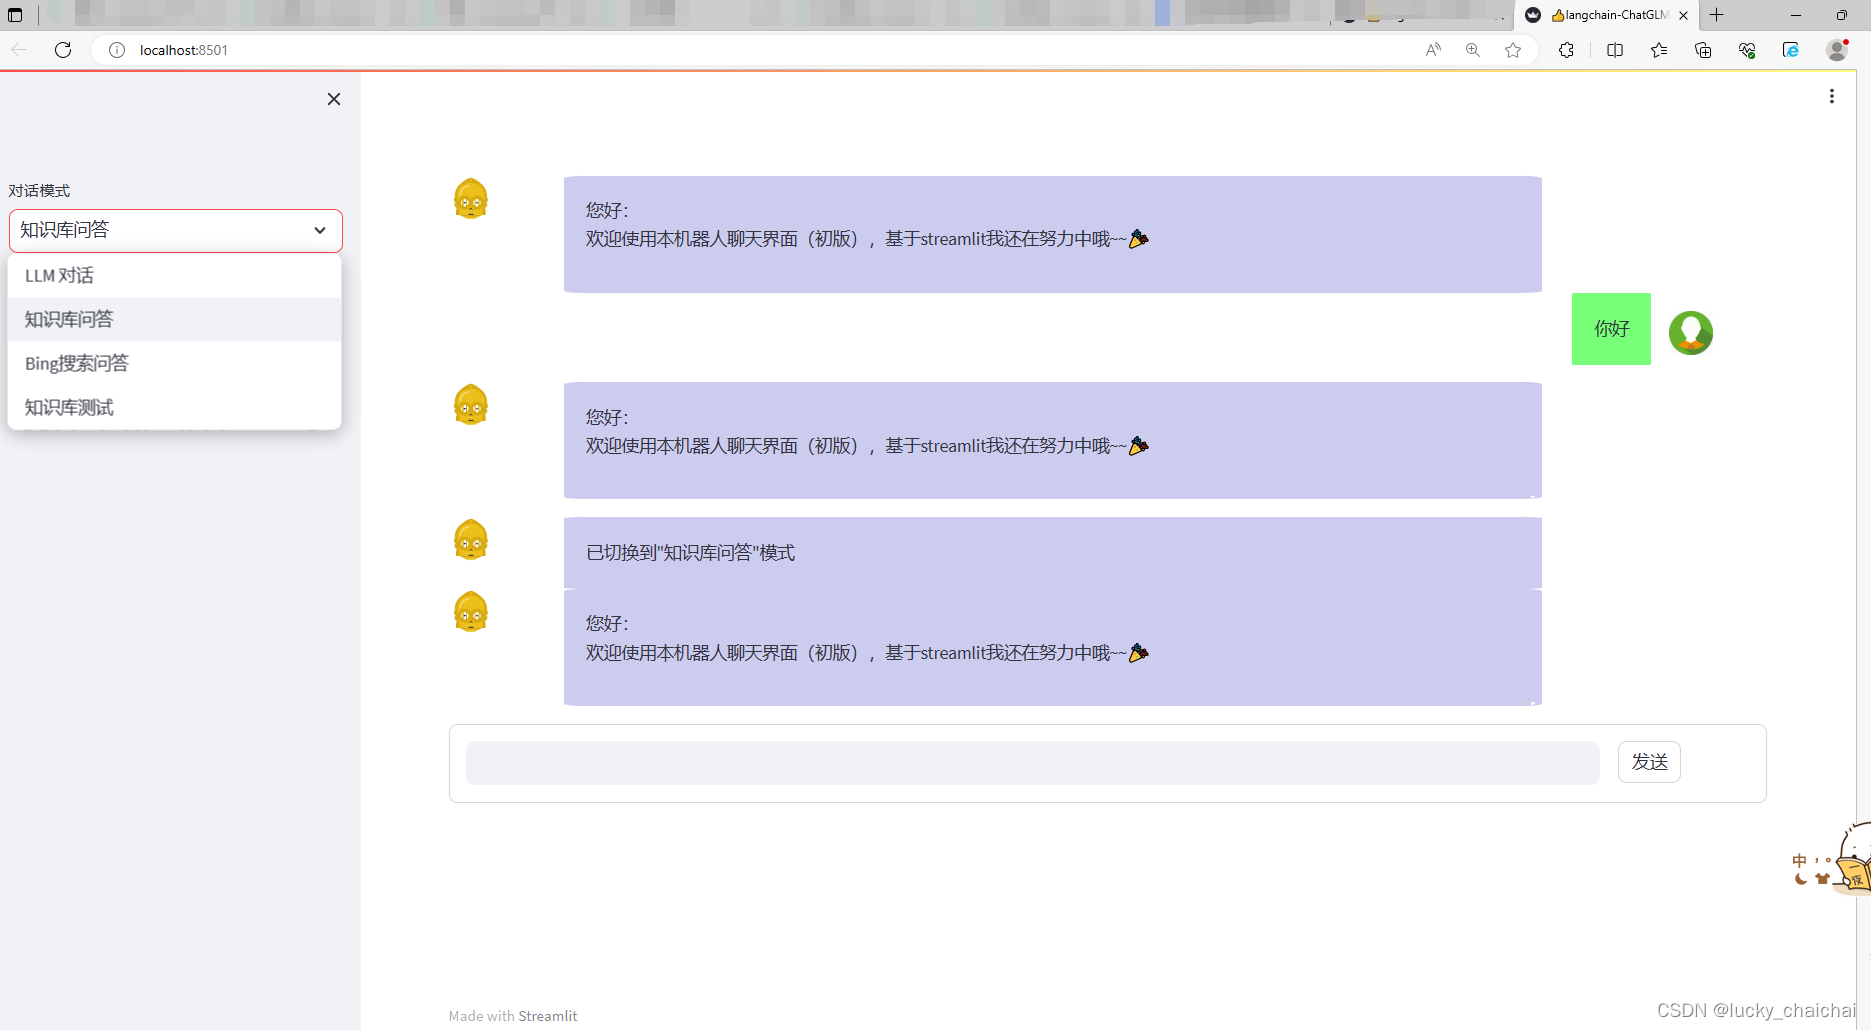
这种方法有点类似于矩阵分解,可训练层维度和预训练模型层维度一致为d,先将维度d通过全连接层降维至r,再从r通过全连接层映射回d维度,ryour machine IP}:19530 zilliz/attu:v2.1.5 'is_user': False, 'type': MsgType.TEXT, 'content': msg, 'kb': kb}) def user_say(msg): st.session_state['history'].append( {'is_user': True, 'type': MsgType.TEXT, 'content': msg}) def format_md(msg, is_user=False, bg_color='', margin='10%'): ''' 将文本消息格式化为markdown文本, 指定user 和 robot消息背景色、左右位置等 Parameters ---------- msg: 文本内容 bg_color: 指定markdown文本的背景颜色 ''' if is_user: bg_color = bg_color or ST_CONFIG.user_bg_color text = f''' {bg_color}; margin-left:{margin}; word-break:break-all; float:right; padding:2%; border-radius:2%;" {msg} ''' else: bg_color = bg_color or ST_CONFIG.robot_bg_color text = f''' {bg_color}; margin-right:{margin}; word-break:break-all; padding:2%; border-radius:2%;" {msg} ''' return text def message(msg, is_user=False, msg_type=MsgType.TEXT, icon='', bg_color='', margin='10%', kb='', ): ''' 渲染单条消息(包括双方头像、聊天文本)。目前仅支持文本 返回第2列对象 ''' # 定义界面中的列,若参数为一个整数n,则意为插入n个等尺寸列;若为列表[1, 10, 1]则意为插入3列,数值为各列之间的倍数(数值为小数,则指占界面百分比) # 该函数中,列cols[0]为robot头像,cols[2]为user头像,cols[1]为聊天消息(markdown文本) cols = st.columns([1, 10, 1]) empty = cols[1].empty() # 将第2列初始化为空 if is_user: icon = icon or ST_CONFIG.user_icon bg_color = bg_color or ST_CONFIG.user_bg_color cols[2].image(icon, width=40) # 第3列展示user头像 if msg_type == MsgType.TEXT: text = format_md(msg, is_user, bg_color, margin) empty.markdown(text, unsafe_allow_html=True) # 将第2列填充user的Markdown文本 else: raise RuntimeError('only support text message now.') else: icon = icon or ST_CONFIG.robot_icon bg_color = bg_color or ST_CONFIG.robot_bg_color cols[0].image(icon, width=40) # 第1列展示robot头像 if kb: cols[0].write(f'({kb})') # 用于向Web应用程序添加任何内容?? if msg_type == MsgType.TEXT: text = format_md(msg, is_user, bg_color, margin) empty.markdown(text, unsafe_allow_html=True) # 将第2列填充robot的Markdown文本 else: raise RuntimeError('only support text message now.') return empty def output_messages( user_bg_color='', robot_bg_color='', user_icon='', robot_icon='', ): with chat_box.container(): # 为st添加一个多元素容器(chat_box为前面定义的st的占位符) last_response = None for msg in st.session_state['history']: bg_color = user_bg_color if msg['is_user'] else robot_bg_color icon = user_icon if msg['is_user'] else robot_icon empty = message(msg['content'], is_user=msg['is_user'], icon=icon, msg_type=msg['type'], bg_color=bg_color, kb=msg.get('kb', '') ) if not msg['is_user']: last_response = empty return last_response if __name__ == "__main__": webui_title = """ 👍langchain-ChatGLM WebUI """ robot_say_ininfo = ('您好:\n\n' '欢迎使用本机器人聊天界面(初版),基于streamlit我还在努力中哦~~🎉') # 注意这个写法,只有一对引号的话第二行会为其他背景色 LLM_MODEL = 'baichuan-130b' EMBEDDING_MODEL = 'ernie-3.0-base-zh' modes = ['LLM 对话', '知识库问答', 'Bing搜索问答', '知识库测试'] st.set_page_config(webui_title, layout='wide') # webui_title是浏览器选项卡中显示的页面标题 # session_state在st rerun过程中定义、存储共享变量,可以存储任何对象;只可能在应用初始化时被整体重置。而rerun不会重置session state。 # 调用其中变量的方法:st.session_state.[变量的key] st.session_state.setdefault('history', []) # history为变量的key,[]为初始值 # 定义“等待提示”,注意每次对界面操作都会加载一次!!!? with st.spinner(f'正在加载模型({LLM_MODEL} + {EMBEDDING_MODEL}),请耐心等候...'): time.sleep(2) # 定义侧边栏 with st.sidebar: robot_say(robot_say_ininfo) def on_mode_change(): m = st.session_state.mode robot_say(f'已切换到"{m}"模式') index = 0 mode = st.selectbox('对话模式', modes, index, on_change=on_mode_change, key='mode') # on_change为复选框操作出发的变化函数 print('mode:', mode) # 打印的结果即为mode里面的值(字符串) chat_box = st.empty() # 为st应用添加一个占位符 # 创建表单容器,clear_on_submit=True表示在用户按下提交按钮后,表单内的所有小部件都将重置为其默认值 with st.form('my_form', clear_on_submit=True): cols = st.columns([8, 1]) question = cols[0].text_input( 'temp', key='input_question', label_visibility='collapsed') # 第1列为文本输入框 print('question:', question) # 打印结果即为文本框中输入的文本 def on_send(): q = st.session_state.input_question user_say(q) print("st.session_state['history']:", st.session_state['history']) last_response = output_messages() # last_response.markdown( # format_md(st.session_state['history'][-1]['content'], False), # unsafe_allow_html=True # ) submit = cols[1].form_submit_button('发送', on_click=on_send) # 第2列为按钮,on_click为点击按钮出发的操作函数 output_messages() # 不执行这个函数页面会不展示聊天历史
首次运行结果:
操作效果:
五、其他
1、FastChat
- fastchat的GitHub
- fastchat是一个基于聊天机器人方式对LLM快速训练、部署、评估的开放平台: 将LLM下载到本地后,可以通过fastchat中的 CLI 、Web 两种方式加载 / 调用 / 启动LLM,快速与LLM进行对话:
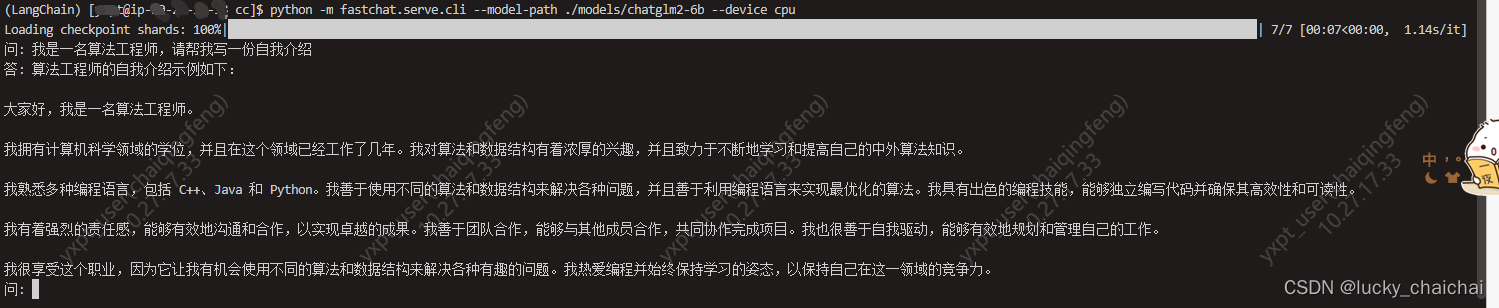
- CLI方式(命令行交互界面):
python -m fastchat.serve.cli --model-path [a LLM local folder or a Hugging Face repo name]
- -device cpu:使用CPU运行;
- -num-gpus 2:指定使用的GPU数量;
- -max-gpu-memory 8GiB:指定每个GPU使用的最大内存8G。
- Web方式(web UI交互界面):
需要三个主要组件:web servers(与用户的接口)、model workers(组织模型)、a controller(协调前两者)
(1)命令行启动:
① python -m fastchat.serve.controller
② python -m fastchat.serve.model_worker --model-path [a LLM local folder or a Hugging Face repo name]
③ python -m fastchat.serve.[gradio_web_server / openai_api_server ]
openai_api_server:启动RESTful API server,为其支持的LLM提供OpenAI-compatible APIs(即通过该命令启动后,可以使用 openai 的方式与model_worker 对应的LLM进行对话);后续也可以接入Langchain(内在逻辑??)。
- -host [ localhost ] --port [ 8000 ]:启动RESTful API server时,需要指定host、port
(2)基于fastchat模块:
from fastchat.serve.controller import Controller, app
from fastchat.serve.model_worker import (AWQConfig, GptqConfig, ModelWorker, app, worker_id)
from fastchat.serve.openai_api_server import (CORSMiddleware, app, app_settings)
CLI的结果:(81个CPU,一个问题要等2分钟差不多……)
web方式启动后,后续基于python的操作:
可以基于openai模块(如下例),也可以基于langchain中的 LLMChain 和 from langchain.chat_models import ChatOpenAI
import openai
openai.api_key = "EMPTY"
openai.api_base = "http://localhost:8000/v1"
def test_chat_completion_stream(model = "chatglm2-6b"):
	# 流式的测试,参考:https://github.com/lm-sys/FastChat/blob/main/tests/test_openai_api.py
    messages = [
    	{"role": "user",
    	 "content": "Hello! What is your name?"}
    	 ]
    res = openai.ChatCompletion.create(model=model, messages=messages, stream=True)
    for chunk in res:
        content = chunk["choices"][0]["delta"].get("content", "")
        print(content, end="", flush=True)
    print()
def text_chat_completion(model = "chatglm2-6b"):
	# create a chat completion
	completion = openai.ChatCompletion.create(
	   model=model,
	   messages=[{"role": "user", "content": "Hello! What is your name?"}]
	 )
	# print the completion
	print(completion.choices[0].message.content)
【注意】(Ubuntu)在输入问题的时候删除错别字重新输入后,回车会报错:UnicodeDecodeError: 'utf-8' codec can't decode byte 0xe3 in position 15: invalid continuation byte
1)安装
pip install fschat
2、FastAPI
- FastAPI的GitHub
- FastAPI 是一个高性能 Web 框架,用于构建 API
1)安装
pip install fastapi
pip install uvicorn
其他参考:
从LangChain+LLM的本地知识库问答到LLM与知识图谱、数据库的结合
- CLI方式(命令行交互界面):