注意:python>=3.8, pytorch>=1.7,torchvision>=0.8
Feel free to ask any question. 遇到问题欢迎评论区讨论.
官方教程:
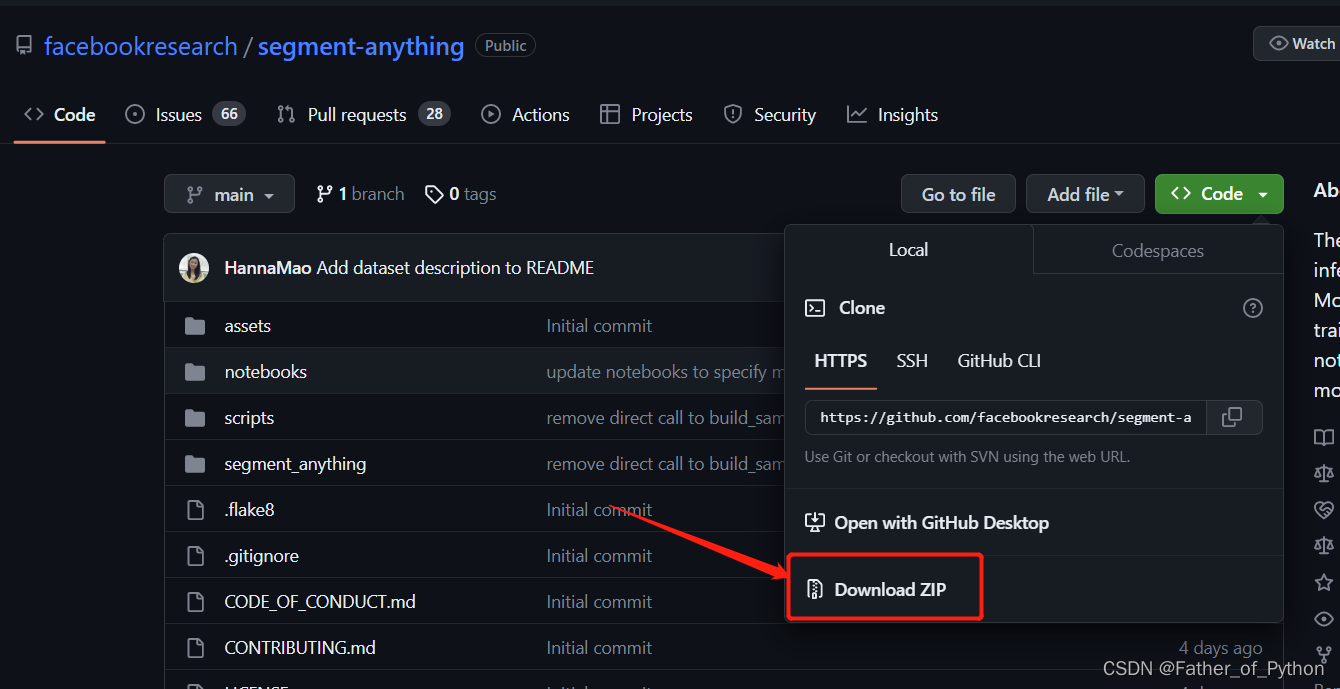
https://github.com/facebookresearch/segment-anything
1 环境配置
1.1 安装主要库:
(1)pip:
有可能出现错误,需要配置好Git。
pip install git+https://github.com/facebookresearch/segment-anything.git
(2)本地安装:
有可能出现错误,需要配置好Git。
git clone git@github.com:facebookresearch/segment-anything.git
cd segment-anything; pip install -e .
(3)手动下载+手动本地安装:
链接:https://pan.baidu.com/s/1dQ--kTTJab5eloKm6nMYrg
提取码:1234
解压后运行:
cd segment-anything-main
pip install -e .
1.2 安装依赖库:
pip install opencv-python pycocotools matplotlib onnxruntime onnx
matplotlib 3.7.1和3.7.0可能报错
如果报错:pip install matplotlib==3.6.2
1.3 下载权重文件:
下载三个权重文件中的一个,我用的第一个。
- default or vit_h: ViT-H SAM model.
- vit_l: ViT-L SAM model.
- vit_b: ViT-B SAM model.
如果下载过慢:
链接:https://pan.baidu.com/s/11wZUcjYWNL6kxOH5MFGB-g
提取码:1234
2 使用教程
2.1 根据在图片上选择的点扣出物体
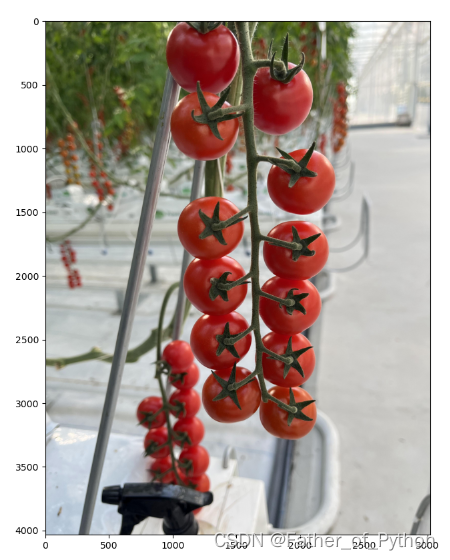
原始图像:
导入依赖库和展示相关的函数:
import cv2
import matplotlib.pyplot as plt
import numpy as np
from segment_anything import sam_model_registry, SamPredictor
def show_mask(mask, ax, random_color=False):
    if random_color:
        color = np.concatenate([np.random.random(3), np.array([0.6])], axis=0)
    else:
        color = np.array([30 / 255, 144 / 255, 255 / 255, 0.6])
    h, w = mask.shape[-2:]
    mask_image = mask.reshape(h, w, 1) * color.reshape(1, 1, -1)
    ax.imshow(mask_image)
def show_points(coords, labels, ax, marker_size=375):
    pos_points = coords[labels == 1]
    neg_points = coords[labels == 0]
    ax.scatter(pos_points[:, 0], pos_points[:, 1], color='green', marker='*', s=marker_size, edgecolor='white',
               linewidth=1.25)
    ax.scatter(neg_points[:, 0], neg_points[:, 1], color='red', marker='*', s=marker_size, edgecolor='white',
               linewidth=1.25)
确定使用的权重文件位置和是否使用cuda等:
sam_checkpoint = "F:\sam_vit_h_4b8939.pth"
device = "cuda"
model_type = "default"
模型实例化:
sam = sam_model_registry[model_type](checkpoint=sam_checkpoint)
sam.to(device=device)
predictor = SamPredictor(sam)
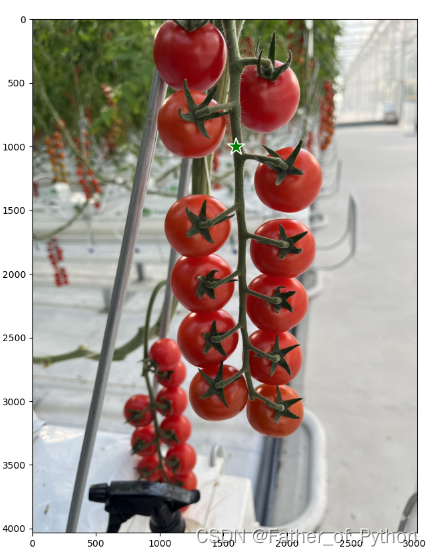
读取图像并选择抠图点:
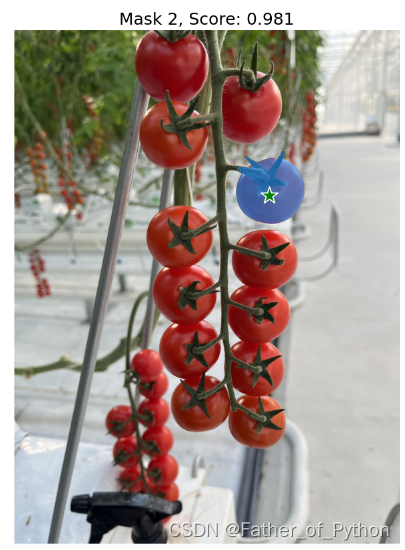
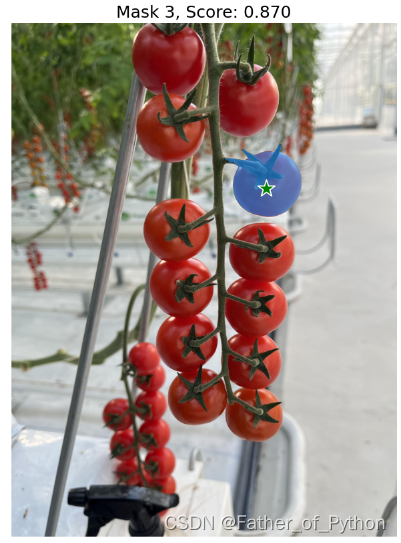
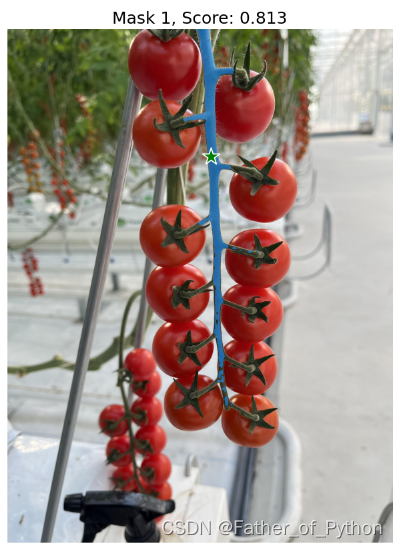
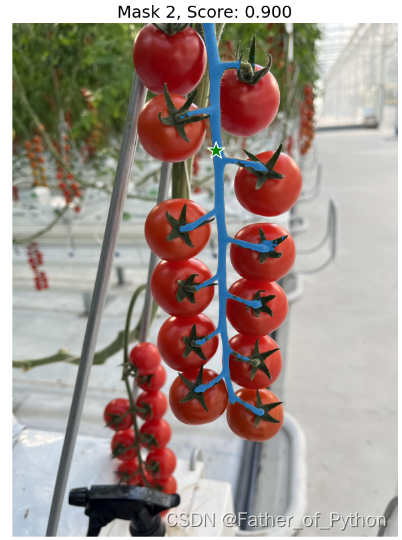
image = cv2.imread(r"F:\Dataset\Tomato_Appearance\Tomato_Xishi\images\xs_1.jpg")
image = cv2.cvtColor(image, cv2.COLOR_BGR2RGB)
predictor.set_image(image)
input_point = np.array([[1600, 1000]])
input_label = np.array([1])
plt.figure(figsize=(10,10))
plt.imshow(image)
show_points(input_point, input_label, plt.gca())
plt.axis('on')
plt.show()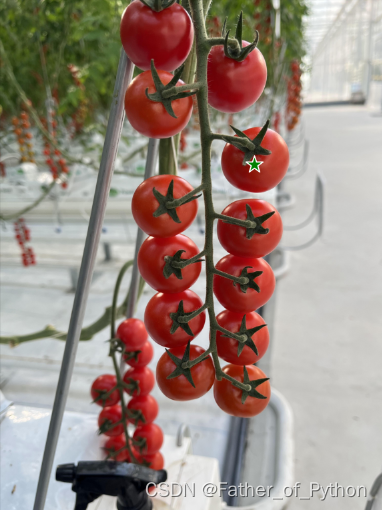
扣取图像(会同时提供多个扣取结果):
masks, scores, logits = predictor.predict(
    point_coords=input_point,
    point_labels=input_label,
    multimask_output=True,
)
# 遍历读取每个扣出的结果
for i, (mask, score) in enumerate(zip(masks, scores)):
    plt.figure(figsize=(10,10))
    plt.imshow(image)
    show_mask(mask, plt.gca())
    show_points(input_point, input_label, plt.gca())
    plt.title(f"Mask {i+1}, Score: {score:.3f}", fontsize=18)
    plt.axis('off')
    plt.show()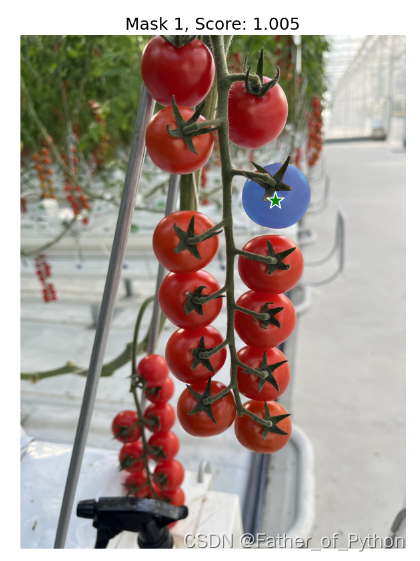
尝试扣取其他位置:

2.2 扣取图像中的所有物体
官方教程:
https://github.com/facebookresearch/segment-anything/blob/main/notebooks/automatic_mask_generator_example.ipynb
依赖库和函数导入:
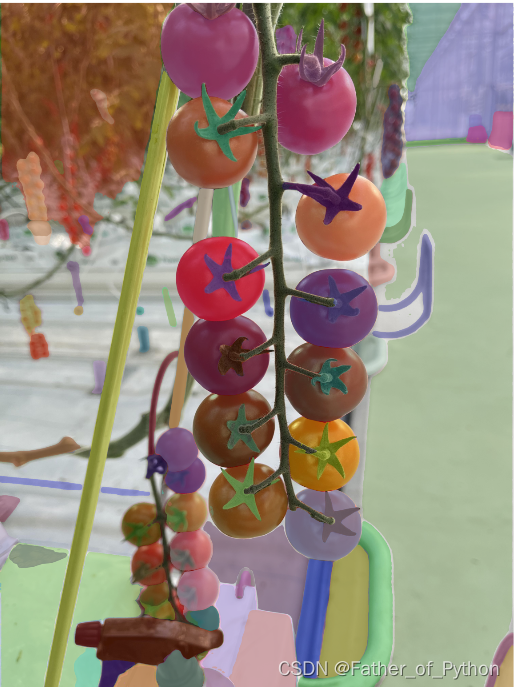
from segment_anything import sam_model_registry, SamAutomaticMaskGenerator, SamPredictor
import cv2
import matplotlib.pyplot as plt
import numpy as np
def show_anns(anns):
    if len(anns) == 0:
        return
    sorted_anns = sorted(anns, key=(lambda x: x['area']), reverse=True)
    ax = plt.gca()
    ax.set_autoscale_on(False)
    polygons = []
    color = []
    for ann in sorted_anns:
        m = ann['segmentation']
        img = np.ones((m.shape[0], m.shape[1], 3))
        color_mask = np.random.random((1, 3)).tolist()[0]
        for i in range(3):
            img[:,:,i] = color_mask[i]
        ax.imshow(np.dstack((img, m*0.35)))
读取图片:
image = cv2.imread(r"F:\Dataset\Tomato_Appearance\Tomato_Xishi\images\xs_1.jpg")
image = cv2.cvtColor(image, cv2.COLOR_BGR2RGB)
实例化模型:
sam_checkpoint = "F:\sam_vit_h_4b8939.pth"
model_type = "default"
device = "cuda"
sam = sam_model_registry[model_type](checkpoint=sam_checkpoint)
sam.to(device=device)
分割并展示(速度有点慢):
mask_generator = SamAutomaticMaskGenerator(sam)
masks = mask_generator.generate(image)
plt.figure(figsize=(20,20))
plt.imshow(image)
show_anns(masks)
plt.axis('off')
plt.show()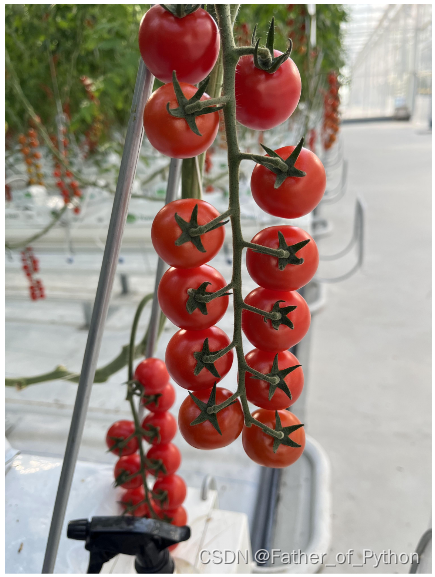
2.3 根据文字扣取物体
配置另外一个库:
https://github.com/IDEA-Research/Grounded-Segment-Anything
配置教程:
【图像分割】Grounded Segment Anything根据文字自动画框或分割环境配置和基本使用教程_Father_of_Python的博客-CSDN博客