文章目录
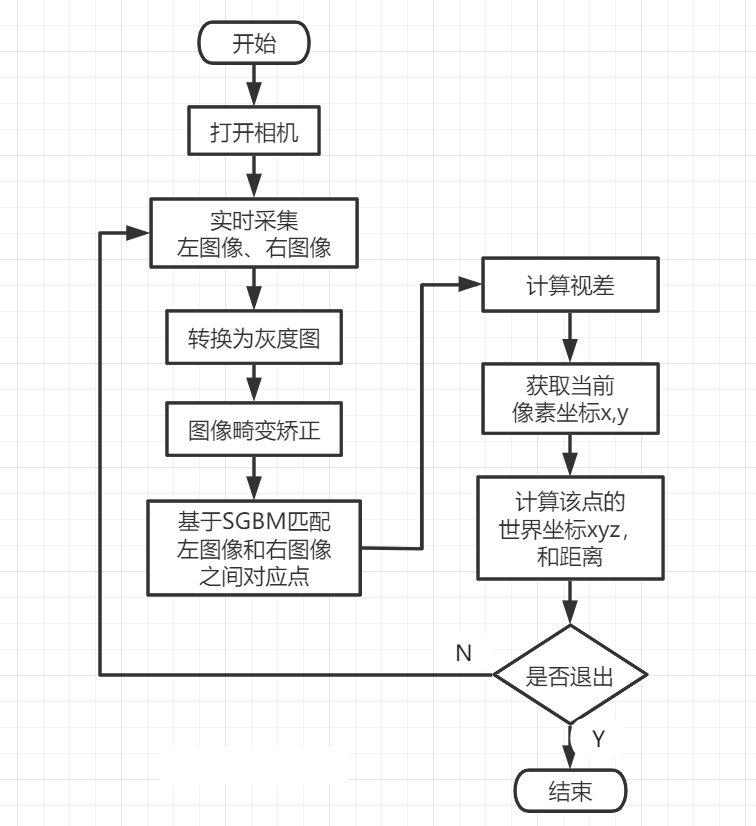
- 流程图
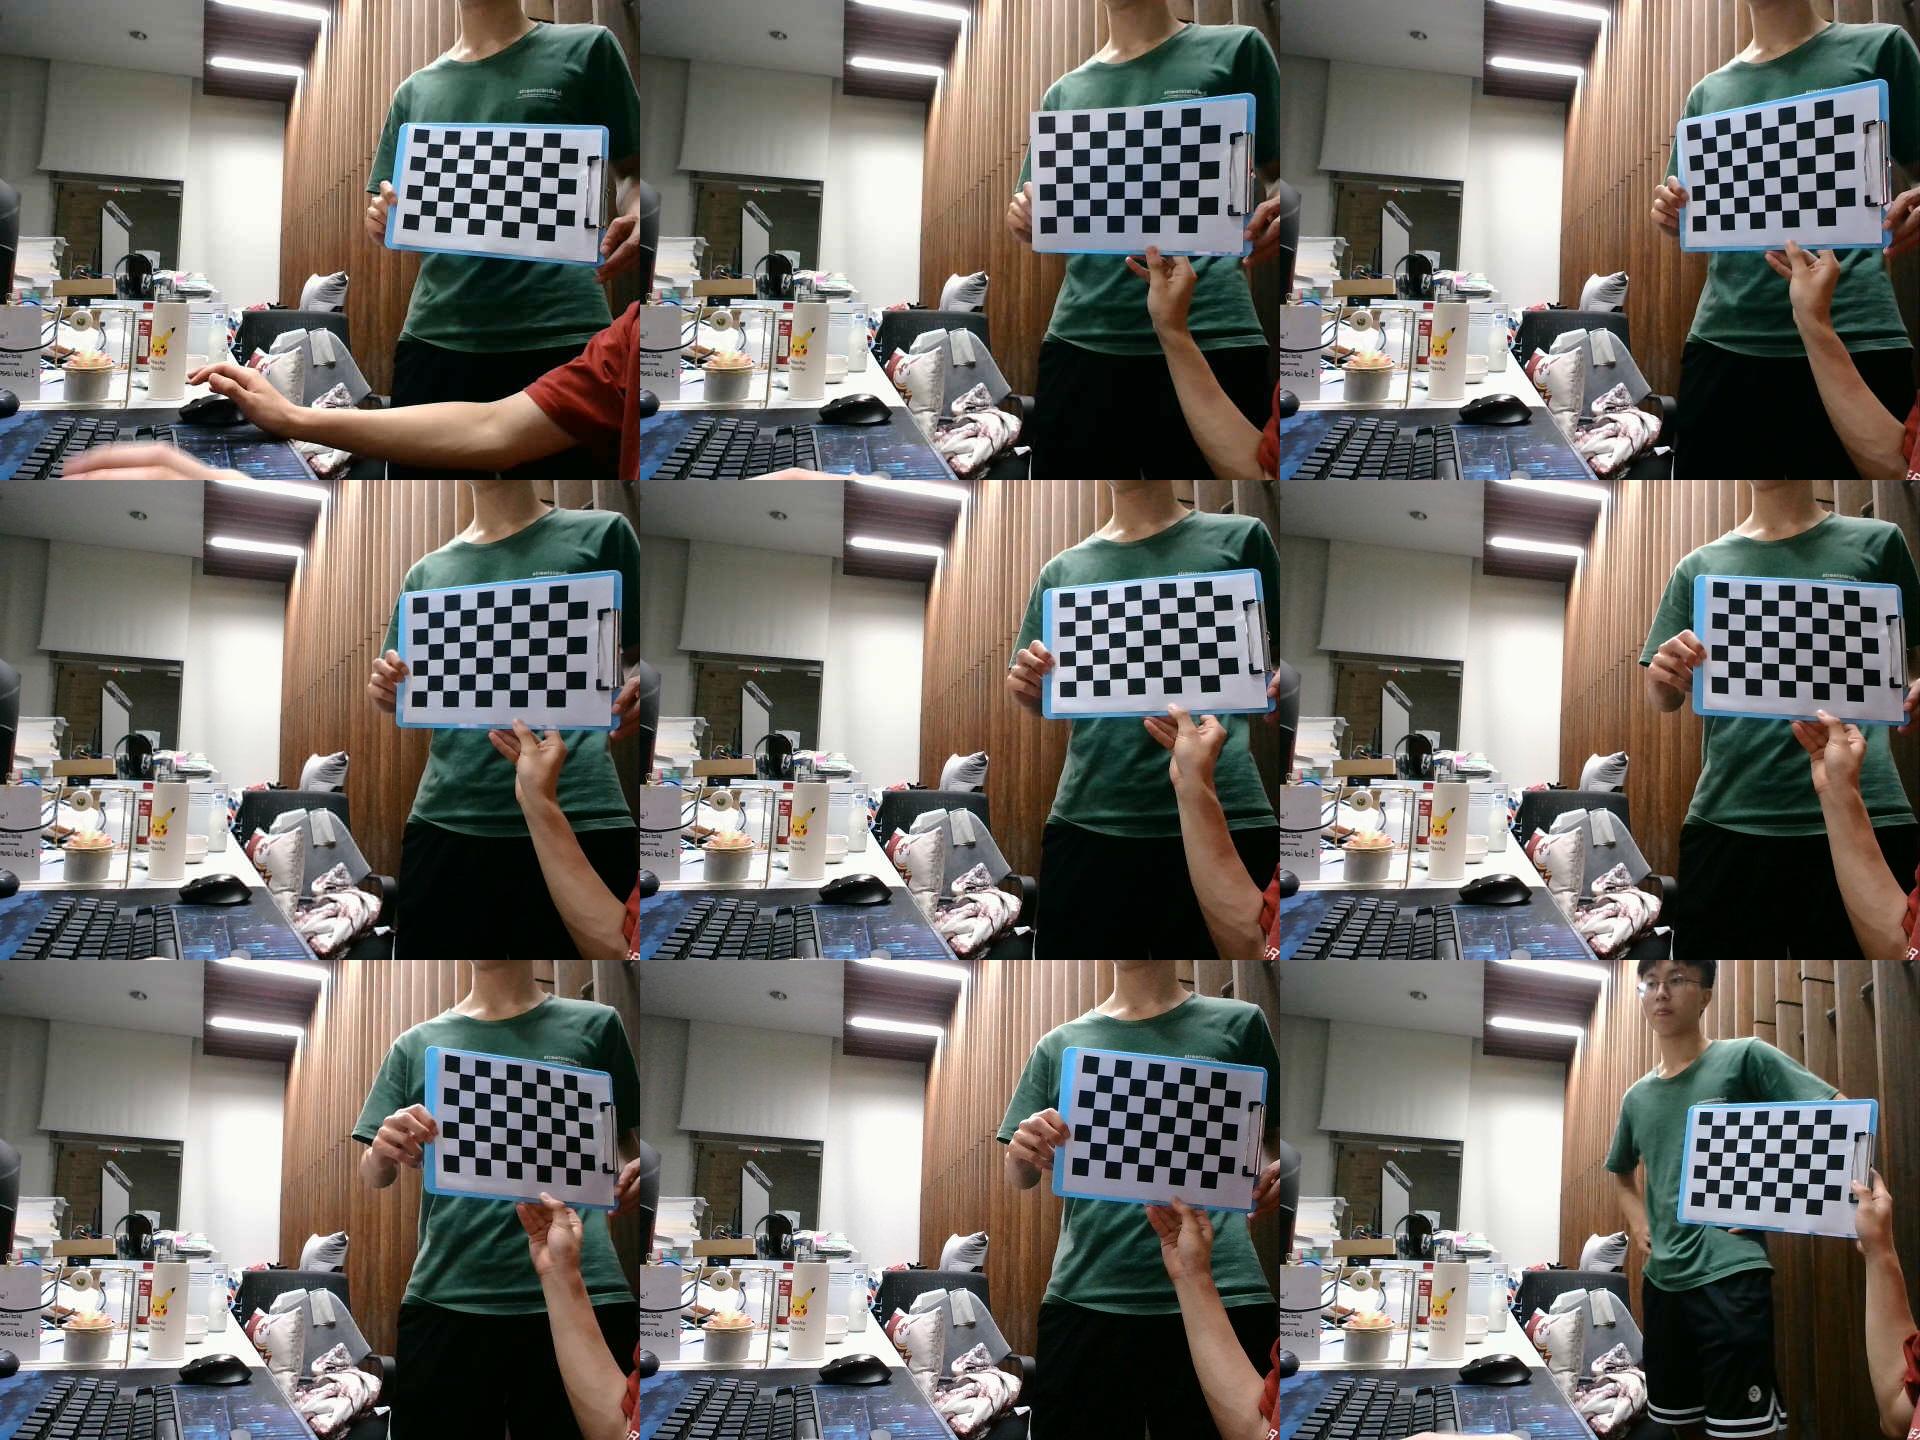
- 相机标定
- 立体匹配
- 效果
- 1.原图像
- 2.深度图
- 3.代码链接
流程图
相机标定
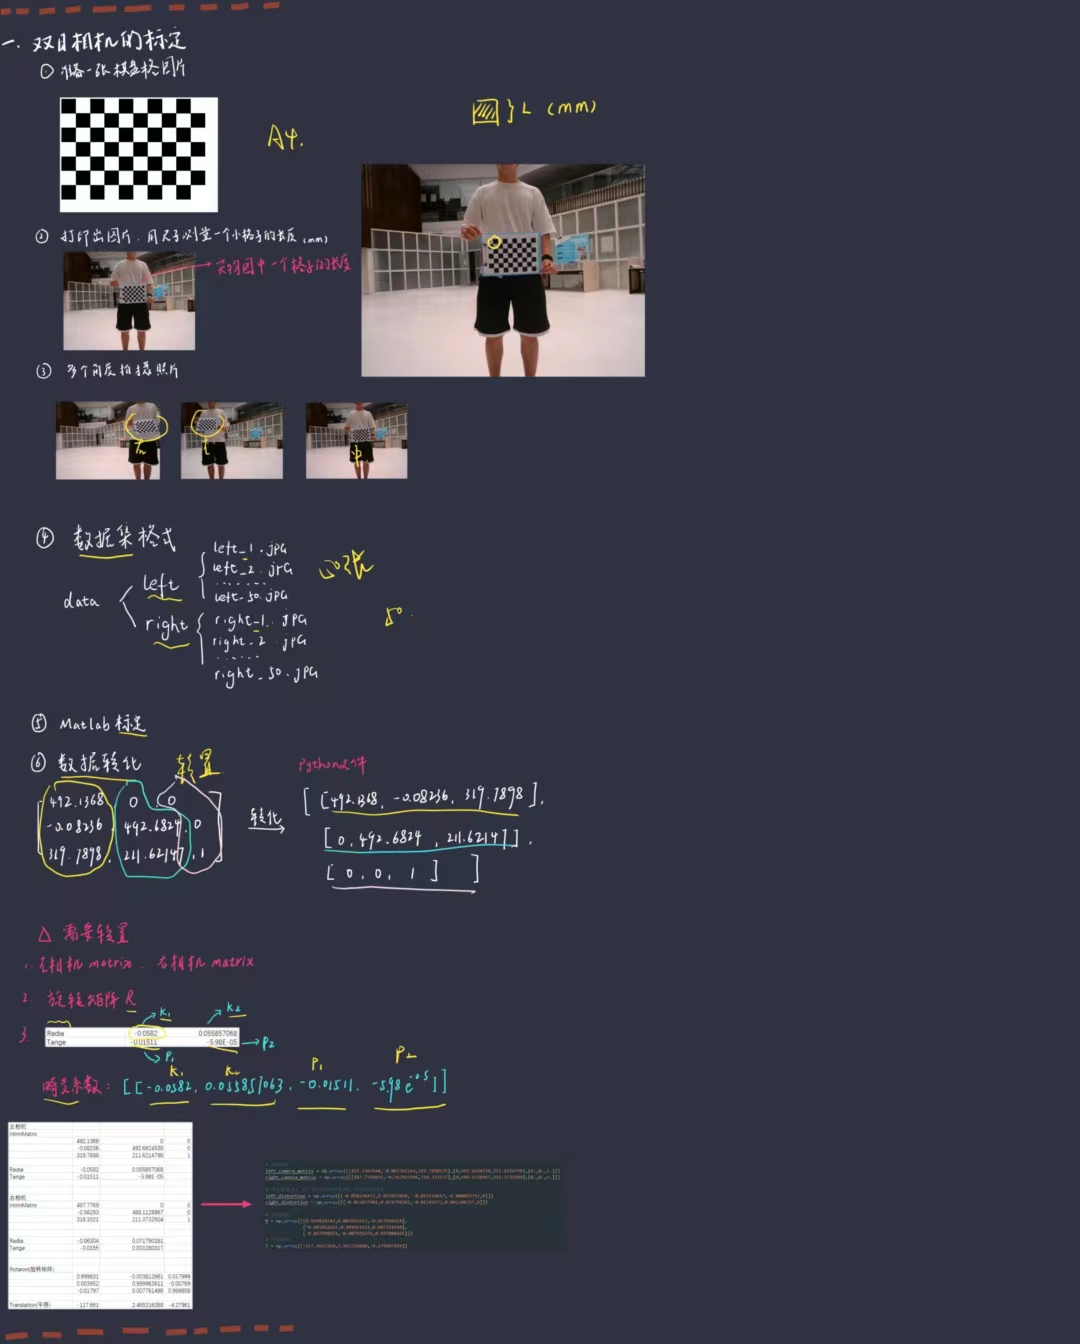
参考链接:【开源 |教程 | 双目测距】双目相机的标定_哔哩哔哩_bilibili
自制的标定数据集,必须用自己相机拍摄照片制作数据集
标定板下载:pattern.png (1830×1330) (opencv.org)
import cv2
import numpy as np
# -----------------------------------双目相机的基本参数---------------------------------------------------------
#   left_camera_matrix          左相机的内参矩阵
#   right_camera_matrix         右相机的内参矩阵
#
#   left_distortion             左相机的畸变系数    格式(K1,K2,P1,P2,0)
#   right_distortion            右相机的畸变系数
# -------------------------------------------------------------------------------------------------------------
# 左镜头的内参,如焦距
left_camera_matrix = np.array([[516.5066236,-1.444673028,320.2950423],[0,516.5816117,270.7881873],[0.,0.,1.]])
right_camera_matrix = np.array([[511.8428182,1.295112628,317.310253],[0,513.0748795,269.5885026],[0.,0.,1.]])
# 畸变系数,K1、K2、K3为径向畸变,P1、P2为切向畸变
left_distortion = np.array([[-0.046645194,0.077595167, 0.012476819,-0.000711358,0]])
right_distortion = np.array([[-0.061588946,0.122384376,0.011081232,-0.000750439,0]])
# 旋转矩阵
R = np.array([[0.999911333,-0.004351508,0.012585312],
              [0.004184066,0.999902792,0.013300386],
              [-0.012641965,-0.013246549,0.999832341]])
# 平移矩阵
T = np.array([-120.3559901,-0.188953775,-0.662073075])
size = (640, 480)
R1, R2, P1, P2, Q, validPixROI1, validPixROI2 = cv2.stereoRectify(left_camera_matrix, left_distortion,
                   right_camera_matrix, right_distortion, size, R,
                   T)
# 校正查找映射表,将原始图像和校正后的图像上的点一一对应起来
left_map1, left_map2 = cv2.initUndistortRectifyMap(left_camera_matrix, left_distortion, R1, P1, size, cv2.CV_16SC2)
right_map1, right_map2 = cv2.initUndistortRectifyMap(right_camera_matrix, right_distortion, R2, P2, size, cv2.CV_16SC2)
print(Q)
cv2.stereoRectify()函数
- 示例:R1, R2, P1, P2, Q, validPixROI1, validPixROI2 = cv2.stereoRectify(left_camera_matrix, left_distortion,right_camera_matrix, right_distortion, size, R, T)
- 作用:为每个摄像头计算立体校正的映射矩阵R1, R2, P1, P2
- 参数:
- left_camera_matrix:左相机内参
- left_distortion:左相机畸变系数
- right_camera_matrix:右相机内参
- right_distortion:右相机畸变系数
- size:单边相机的图片分辨率
- R:旋转矩阵
- T:平移矩阵
- 返回值:
- R1, R2:R1-输出矩阵,第一个摄像机的校正变换矩阵(旋转变换);R2-输出矩阵,第二个摄像机的校正变换矩阵(旋转变换)
- P1, P2:P1-输出矩阵,第一个摄像机在新坐标系下的投影矩阵;P2-输出矩阵,第二个摄像机在新坐标系下的投影矩阵
立体匹配
import numpy as np
import cv2
import random
import math
# 加载视频文件
capture = cv2.VideoCapture("./car.avi")
WIN_NAME = 'Deep disp'
cv2.namedWindow(WIN_NAME, cv2.WINDOW_AUTOSIZE)
# 读取视频
fps = 0.0
ret, frame = capture.read()
while ret:
    # 开始计时
    t1 = time.time()
    # 是否读取到了帧,读取到了则为True
    ret, frame = capture.read()
    # 切割为左右两张图片
    frame1 = frame[0:480, 0:640]
    frame2 = frame[0:480, 640:1280]
    # 将BGR格式转换成灰度图片,用于畸变矫正
    imgL = cv2.cvtColor(frame1, cv2.COLOR_BGR2GRAY)
    imgR = cv2.cvtColor(frame2, cv2.COLOR_BGR2GRAY)
    # 重映射,就是把一幅图像中某位置的像素放置到另一个图片指定位置的过程。
    # 依据MATLAB测量数据重建无畸变图片,输入图片要求为灰度图
    img1_rectified = cv2.remap(imgL, left_map1, left_map2, cv2.INTER_LINEAR)
    img2_rectified = cv2.remap(imgR, right_map1, right_map2, cv2.INTER_LINEAR)
    # 转换为opencv的BGR格式
    imageL = cv2.cvtColor(img1_rectified, cv2.COLOR_GRAY2BGR)
    imageR = cv2.cvtColor(img2_rectified, cv2.COLOR_GRAY2BGR)
    # ------------------------------------SGBM算法----------------------------------------------------------
    #   blockSize                   深度图成块,blocksize越低,其深度图就越零碎,0